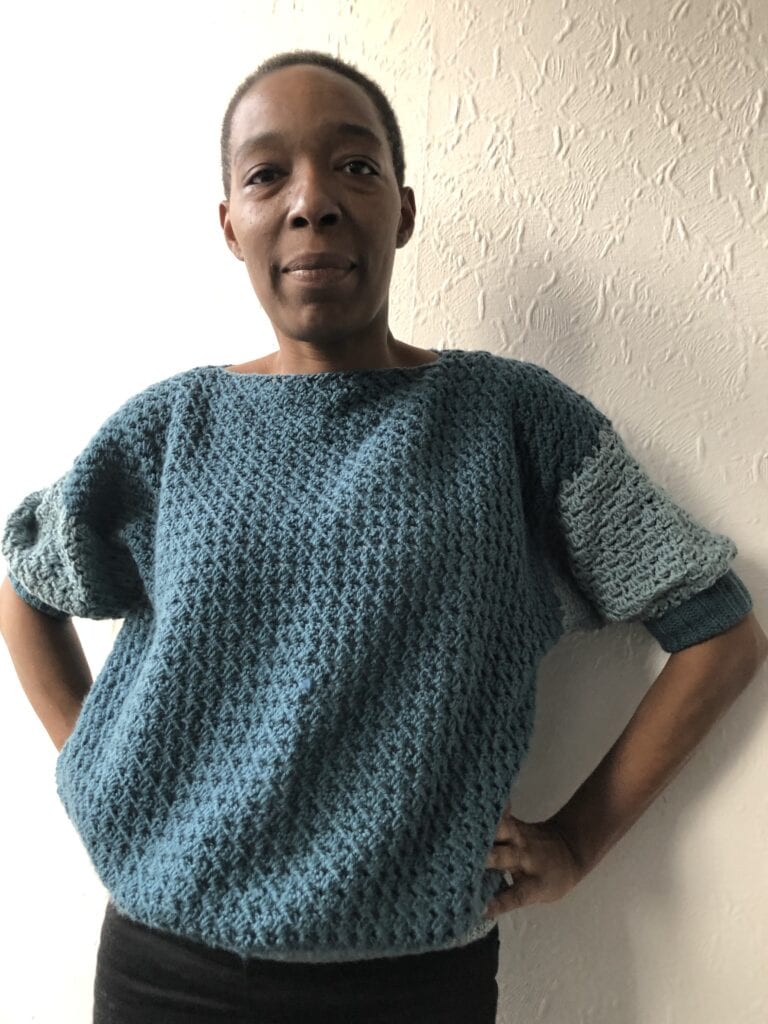
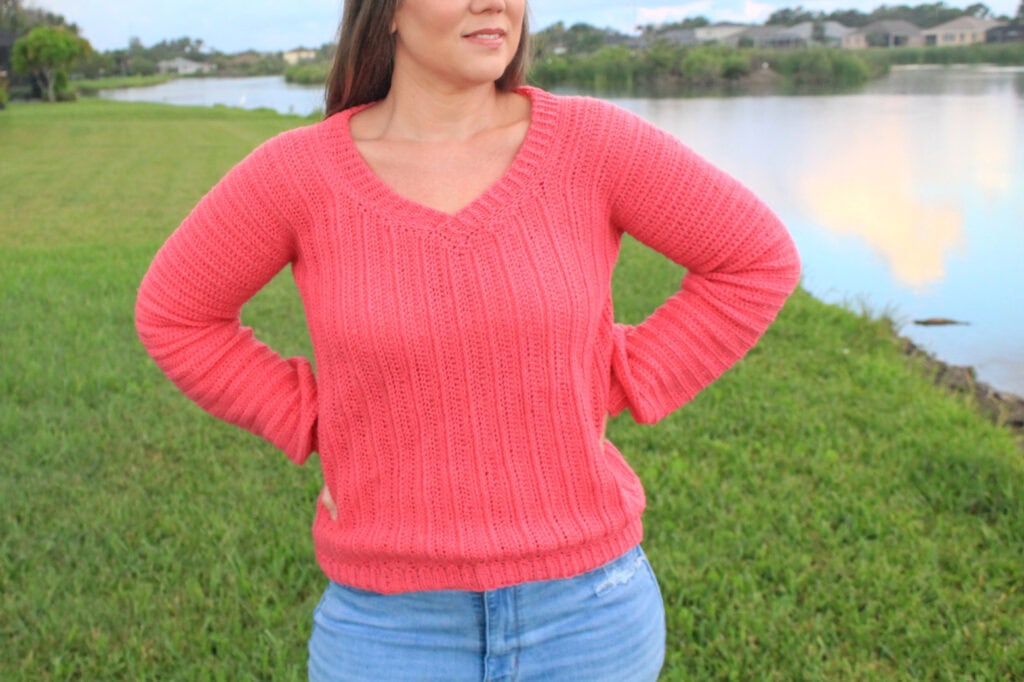
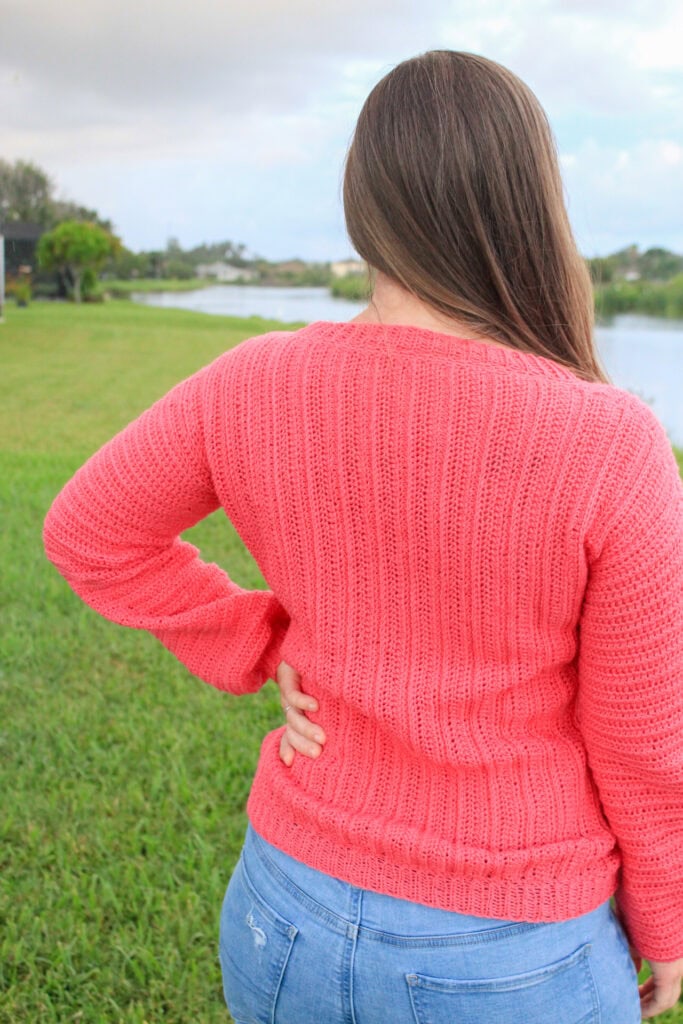
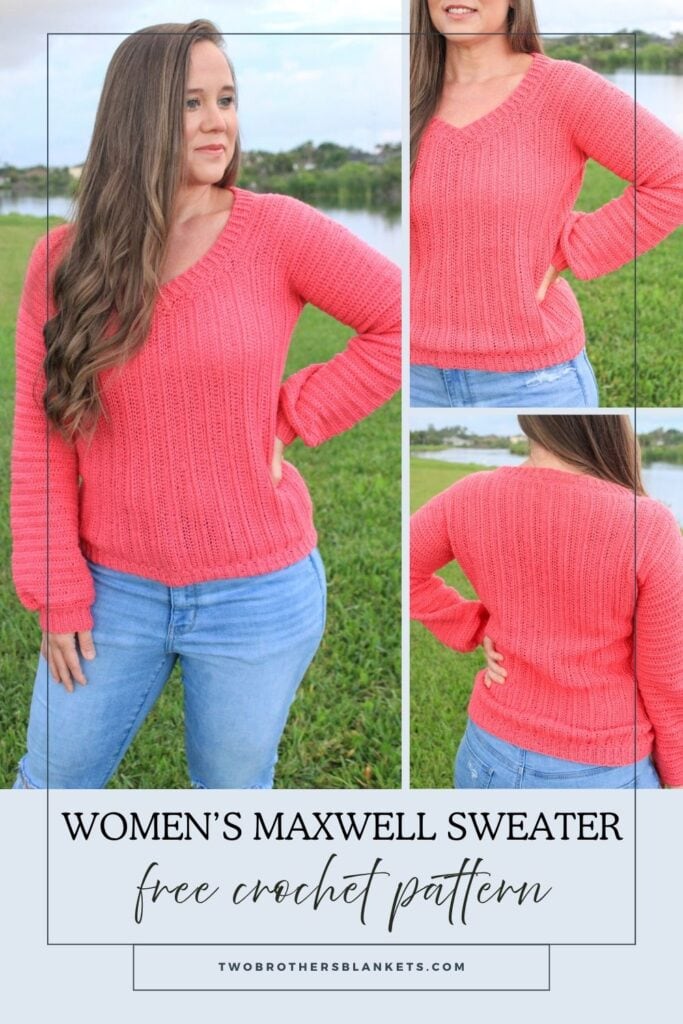
The Women’s Maxwell Sweater is a stylish V-neck crochet design that’s lightweight, comfortable, and ideal for crisp autumn weather.

Inspired by the Men’s Maxwell, Designed for Women
I first designed the Men’s Maxwell Sweater crochet pattern, which is also a lightweight V-neck style sweater. It is written for men’s sizes small to 5X. The style itself is unisex, so I knew right away that I wanted to create a women’s version.
The women’s Maxwell Sweater has a similar workup, but has a slightly deeper v neckline and a more feminine fit. The pattern is written for women’s sizes XS-5X, covering bust sizes of 28-62″.
The Yarn
This V-neck crochet sweater uses the lightweight fingering (#1) yarn, Stroll Fingering, from WeCrochet.
Stroll is made up of 75% fine super wash merino wool, and 25% nylon. It is so soft and perfect for lightweight garments. It can be machine washed and dried. There are over 40 beautiful and vibrant colors to choose from in this line. I used the colorway Candy Pink for the women’s sweater.
If you love crocheting as much as I do, or want to learn more, or just want to show off your work, please join our Crochet Garments community over on Facebook! I hope you’ll share your finished crochet project with us!

Sweater Workup
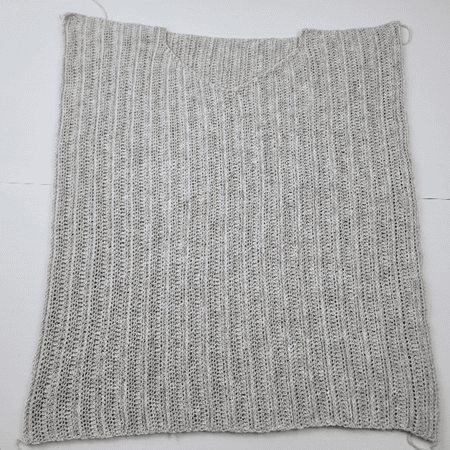
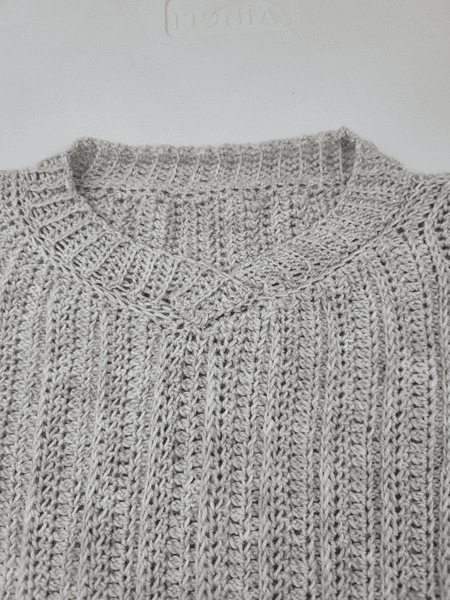
The Women’s Maxwell Sweater is worked in two panels with the stitches lined up vertically, so you will work one side across to the other. You will begin with the first shoulder, and then create the v-neckline using decrease and increase stitches. Then you will create the second shoulder.
The back panel is worked the same way, except you will be doing the same number of stitches all the way across.
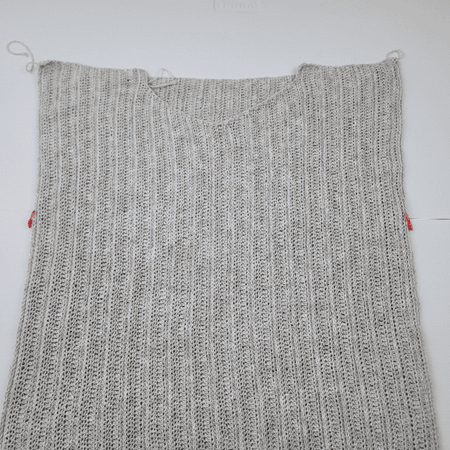
Once the two panels are completed you will sew them together and join yarn to the armholes to work the sleeves. The sleeves are worked in the round.
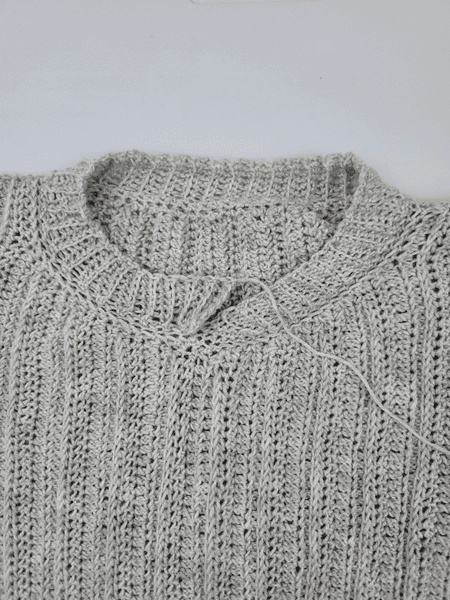
A ribbing trim is added around the bottom, sleeves, and neckline to finish the sweater.
Tips & Tricks
You can find a full pattern video tutorial on my YouTube channel. This video will walk you through the entire pattern and includes tips on customization, gauge, and more.
Women’s Maxwell Sweater Crochet Pattern
Ways to Access the Pattern
- Free on the blog as a blog subscriber: Blog Subscribers can access the full pattern for free here on the blog by logging in or signing up for a Grow Account.
- Upgrade to the ad-free, printable pdf pattern on Ravelry or Etsy. This pdf can be downloaded and/or printed for your convenience.
Women’s MAxwell Sweater
Get the PDF Pattern!
Upgrade to the ad-free, printable PDF download on Ravelry or Etsy!
Just want the free version? Scroll down below!
Women’s Maxwell Sweater Crochet Pattern
Copyright © 2026 Michelle Ferguson – Two Brothers Blankets
All rights reserved. No part of this pattern may be reproduced, sold, or tampered with, in any form or by any means, without permission from the publisher.
Items produced from these patterns may be sold, but the patterns themselves may not be sold, shared, or altered in any way.
Yarn:
Stroll Fingering (#1)
Colorway: Candy Pink
75% Fine Superwash Merino Wool, 25% Nylon
50g/231 yards
Hook:
G (4.0mm) crochet hook or hook to obtain gauge
Other Materials:
(2) stitch markers
Gauge:
19 hdc x 14 rows = 4” unblocked
See page 2 for swatch pattern.
Please note—when following washing instructions for this yarn, it will block out several inches bigger when washed but shrink back to unblocked measurements when dried in the dryer on low. It will need to be blocked to measurements each time.
Pattern Difficulty:
Intermediate/Advanced
Stitches Needed & Abbreviations:
st(s) – stitch(es)
ch(s) – chain(s)
sc – single crochet
dc – double crochet
blo – back loop only
*— repeat from
Lch — long chain – pull up a loop about the height of a dc
sl st – slip stitch
RS – right side
WS- wrong side
Sizing:
| Size | Bust Circumference | Finished Circumference | Finish Panel Width | Finished Length | Approximate Yardage |
| XS | 28-30” | 32.5” | 16.25” | 22.5” | 1584 |
| S | 32-34” | 37” | 18.5” | 23” | 1803 |
| M | 36-38” | 41.5” | 20.75” | 23.25 | 2022 |
| L | 40-42” | 44” | 22” | 23.5” | 2144 |
| XL | 44-46” | 48.5” | 24.25” | 23.75” | 2363 |
| 2X | 48-50” | 53” | 26” | 24” | 2583 |
| 3X | 52-54” | 56.5” | 28.25” | 24” | 2753 |
| 4X | 56-58” | 60” | 30” | 24.5” | 2924 |
| 5X | 60-62” | 64.5” | 32.25” | 24.5” | 3143 |
Special Stitches:
Extended half double crochet – yarn over, insert hook into stitch, yarn over, pull up a loop (3 loops on hook), yarn over, pull through one loop (3 loops on hook), yarn over, pull through all 3 loops. Video tutorial: https://youtu.be/VkIH0ZUzZMk
Extended half double crochet 2 together – yarn over, insert hook into stitch, yarn over, pull up a loop (3 loops on hook), yarn over, pull through one loop (3 loops on hook), yarn over, insert hook into next st, yarn over, pull up a loop (5 loops on hook), yarn over, pull through one loops (5 loops on hook), yarn over, pull through all 5 loops.
Half double crochet 2 together – yarn over, insert hook into stitch, pull up a loop (3 loops on the hook), yarn over, insert hook into next st, pull up a loop (5 loops on the hook), yarn over, pull through all loops.
Gauge Pattern:
Ch 20
Row 1: hdc in 2nd ch from hook and across. (19)
Row 2: ch 1, turn, 1 hdc in each st across. (19)
Row 3: ch 1, turn, 1 ehdc in 3rd loop of each st across. (19) Tip: work last st of row in both top loops.
Row 4: ch 1, turn, 1 ehdc in each st across. (19)
Row 5: ch 1, turn, 1 hdc in each st across. (19)
Rows 6-13: repeat rows 2-5.
Row 14: repeat row 2.
Fasten off. Square should be 4” x 4”.
Pattern Notes:
Pattern is in US terms.
Body of sweater is worked in two panels and seamed together. Sleeves and trim are then added.
Panels are worked the length of the sweater to give a vertical look to the garment. For the front panel you will be decreasing and increasing to create the v-neckline.
Garment has 2-3” of positive ease. Adjust circumference by working more/less rows for each panel. Adjust length by working your starting ch in a multiple of 2 + 1.
Starting chain does not count as first stitch unless stated otherwise within in the pattern.
Stitches are worked in both loops unless stated otherwise within the pattern.
All decreases in the front panel will be hdc2tog, and increases will be hdc, regardless of what the main stitch is for the row.
Pattern is written in smallest size, with additional sizes in parentheses as follows: XS (S, M, L, XL)(2X, 3X, 4X, 5X). Final stitch count will be in parentheses at the end of each round/row.
Front panel starts with all sizes and then splits into separate sizes for the v-neckline shaping.
I highly recommend watching the Video Tutorial: https://youtu.be/nX2Ale3F8_w
Access The Pattern
To access exclusive content, click the button to access the Grow.me app and sign in or create an account. You can create an account via your Google or Facebook accounts, or use an email and create a password.
Once you’ve created an account and signed in you will have access to all of the exclusive content on my blog. You’ll just need to sign in. If you forgot your password, simply click the “Forgot My Password” button to retrieve it. I cannot get access to your grow account to retrieve it for you.
Thank you so much for being a blog subscriber and I hope you enjoy the exclusive content!
Pattern:
Front Panel
You will start by creating the shoulder, then begin decreasing to create the v-neckline.
All sizes:
Ch 103 (105, 107, 107, 109)(111, 111, 113, 113)
Row 1: (WS) hdc in 2nd ch from hook and each ch across. 102 (104, 106, 106, 108)(110, 110, 112, 112)
Row 2: (RS) ch 1, turn, 1 hdc in each st across. 102 (104, 106, 106, 108)(110, 110, 112, 112)
Row 3: ch 1, turn, 1 ehdc in 3rd loop of each st across. 102 (104, 106, 106, 108)(110, 110, 112, 112) Tip: work last st of row in both top loops.
Row 4: ch 1, turn, 1 ehdc in each st across. 102 (104, 106, 106, 108)(110, 110, 112, 112)
Row 5: ch 1, turn, 1 hdc in each st across. 102 (104, 106, 106, 108)(110, 110, 112, 112)
Rows 6-13 (17, 17, 17, 21)(21, 25, 25, 29): repeat Rows 2-5.
Now go to the size you are crocheting and continue.
X-Small
You will now begin decreasing to create the v-neckline.
Row 14: repeat Row 2.
Row 15: repeat Row 3.
Row 16: ch 1, turn, 1 ehdc in each st across for 81 sts. (81) (do not work the rest of the sts)
Row 17: ch 1, turn, hdc2tog, 1 hdc in each st across. (80)
Row 18: ch 1, turn, 1 hdc in each st across to last 2 sts, hdc2tog. (79)
Row 19: ch 1, turn, hdc2tog, 1 ehdc in 3rd loop of each st across. (78)
Row 20: ch 1, turn, 1 ehdc in each st across to last 2 sts, hdc2tog. (77)
Rows 21-28: repeat Rows 17-20, decreasing by one st each row. (69)
Rows 29: repeat Row 17, decreasing by one st. (68)
Now you will begin increasing to create the other side of the v-neckline.
Row 30: ch 1, turn, 1 hdc in each st across to last st, 2 hdc in last st. (69)
Row 31: ch 1, turn, 2 hdc in first st, 1 ehdc in 3rd loop of each st across. (70)
Row 32: ch 1, turn, 1 ehdc in each st across to last st, 2 hdc in last st. (71)
Row 33: ch 1, turn, 2 hdc in first st, 1 hdc in each st across. (72)
Row 34: ch 1, turn, 1 hdc in each st across to last st, 2 hdc in last st. (73)
Rows 35-42: repeat Rows 31-34, increasing by one st each row. (81)
Now you will create the 21 sts dropped from the shoulder and work the 2nd shoulder Rows.
Row 43: ch 22, ehdc in 2nd ch from hook and each ch across, ehdc in 3rd loop of each st across. (102)
Row 44: ch 1, turn, 1 ehdc in each st across. (102)
Rows 45-46: ch 1, turn, 1 hdc in each st across. (102)
Row 47: ch 1, turn, 1 ehdc in 3rd loop of each st across. (102)
Row 48: ch 1, turn, 1 ehdc in each st across. (102)
Rows 49-56: repeat Rows 45-48.
Row 57: repeat row 45.
Fasten off. Move on to Back Panel.
Small
You will now begin decreasing to create the v-neckline.
Row 18: ch 1, turn, 1 hdc in each st across for 83 sts. (83) (do not work the rest of the sts)
Row 19: ch 1, turn, hdc2tog, 1 ehdc in 3rd loop across. (82)
Row 20: ch 1, turn, 1 ehdc in each st across to last 2 sts, hdc2tog. (81)
Row 21: ch 1, turn, hdc2tog, 1 hdc in each st across. (80)
Row 22: ch 1, turn, 1 hdc in each st across to last 2 sts, hdc2tog. (79)
Rows 23-30: repeat Rows 19-22, decreasing by one st each row. (71)
Rows 31-33: repeat Rows 19-21, decreasing by one st each row. (68)
Now you will begin increasing to create the other side of the v-neckline.
Row 34: ch 1, turn, 1 hdc in each st across to last st, 2 hdc in last st. (69)
Row 35: ch 1, turn, 2 hdc in first st, 1 ehdc in 3rd loop of each st across. (70)
Row 36: ch 1, turn, 1 ehdc in each st across to last st, 2 hdc in last st. (71)
Row 37: ch 1, turn, 2 hdc in first st, 1 hdc in each st across. (72)
Rows 38-45: repeat Rows 34-37, increasing by one stitch each row. (80)
Rows 46-48: repeat Rows 34-36, increasing by one stitch each row. (83)
Now you will create the 21 sts dropped from the shoulder and work the 2nd shoulder Rows.
Row 49: ch 22, hdc in 2nd ch from hook and each ch and st across. (104)
Row 50: ch 1, turn, 1 hdc in each st across. (104)
Row 51: ch 1, turn, 1 ehdc in 3rd loop of each st across. (104)
Row 52: ch 1, turn, 1 ehdc in each st across. (104)
Row 53: ch 1, turn, 1 hdc in each st across. (104)
Rows 54-65: repeat Rows 50-53. (104)
Fasten off. Move on to Back Panel.
Medium
You will now begin decreasing to create the v-neckline.
Row 18: repeat row 2.
Row 19: repeat row 3.
Row 20: ch 1, turn, 1 ehdc in each st across for 85 sts. (85) (do not work the rest of the sts)
Row 21: ch 1, turn, hdc2tog, 1 hdc in each st across.(84)
Row 22: ch 1, turn, 1 hdc in each st across to last 2 sts, hdc2tog. (83)
Row 23: ch 1, turn, hdc2tog, 1 ehdc in 3rd loop of each st across. (82)
Row 24: ch 1, turn, 1 ehdc in each st across to last 2 sts, hdc2tog. (8)
Rows 25-36: repeat Rows 21-24, decreasing by one st each row. (69)
Row 37: repeat Row 21, decreasing by one st. (68)
Now you will begin increasing to create the other side of the v-neckline.
Row 38: ch 1, turn, 1 hdc in each st across to last st, 2 hdc in last st. (69)
Row 39: ch 1, turn, 2 hdc in first st, 1 ehdc in 3rd loop of each st across. (70)
Row 40: ch 1, turn, 1 ehdc in each st across to last st, 2 hdc in last st. (71)
Row 41: ch 1, turn, 2 hdc in first st, 1 hdc in each st across. (72)
Rows 42-53: repeat Rows 38-41, increasing by one st each row. (84)
Row 54: repeat row 38, increasing by one st. (85)
Now you will create the 21 sts dropped from the shoulder and work the 2nd shoulder Rows.
Row 55: ch 22, ehdc in 2nd ch from hook and each ch across, ehdc in 3rd loop of each st across. (106)
Row 56: ch 1, turn, 1 ehdc in each st across. (106)
Row 57-58: ch 1, turn, 1 hdc in each st across. (106)
Rows 59: ch 1, turn, 1 ehdc in 3rd loop of each st across. (106)
60-71: repeat Rows 56-59.
Rows 72-73: repeat Rows 56-57.
Fasten off. Move on to Back Panel.
Large
You will now begin decreasing to create the v-neckline.
Row 18: repeat Row 2.
Row 19: repeat Row 3.
Row 20: ch 1, turn, 1 ehdc in each st across for 85 sts. (85) (do not work the rest of the sts)
Row 21: ch 1, turn, hdc2tog, 1 hdc in each st across.(84)
Row 22: ch 1, turn, 1 hdc in each st across to last 2 sts, hdc2tog. (83)
Row 23: ch 1, turn, hdc2tog, 1 ehdc in 3rd loop of each st across. (82)
Row 24: ch 1, turn, 1 ehdc in each st across to last 2 sts, hdc2tog. (81)
Row 25: ch 1, turn, hdc2tog, 1 hdc in each st across. (80)
Rows 26-37: repeat Rows 22-25, decreasing by one st each row. (68)
Row 38-39: repeat Rows 22-23, decreasing by one st. (66)
Now you will begin increasing to create the other side of the v-neckline.
Row 40: ch 1, turn, 1 ehdc in each st across to last st, 2 hdc in last st. (67)
Row 41: ch 1, turn, 2 hdc in first st, 1 hdc in each st across. (68)
Row 42: ch 1, turn, 1 hdc in each st across to last st, 2 hdc in last st. (69)
Row 43: ch 1, turn, 2 hdc in first st, 1 ehdc in 3rd loop of each st across. (70)
Rows 44-55: repeat Rows 40-43, increasing by one stitch each row. (82)
Row 56-58: repeat Rows 40-42, increasing by one stitch. (85)
Now you will create the 21 stitches dropped from the shoulder and work the 2nd shoulder Rows.
Row 59: ch 22, ehdc in 2nd ch from hook and each ch across, ehdc in 3rd loop of each st across. (106)
Row 60: ch 1, turn, 1 ehdc in each st across. (106)
Row 61-62: ch 1, turn, 1 hdc in each st across. (106)
Row 63: ch 1, turn, 1 ehdc in 3rd loop of each st across. (106)
Rows 64-75: repeat Rows 60-63.
Rows 76-77: repeat Rows 60-61.
Fasten off. Move on to back panel.
X-Large
You will now begin decreasing to create the v-neckline.
Row 22: ch 1, turn, 1 hdc in each st across for 87 sts. (87) (do not work the rest of the sts)
Row 23: ch 1, turn, hdc2tog, 1 ehdc in 3rd loop across. (86)
Row 24: ch 1, turn, 1 ehdc in each st across to last 2 sts, hdc2tog. (85)
Row 25: ch 1, turn, hdc2tog, 1 hdc in each st across. (84)
Row 26: ch 1, turn, 1 hdc in each st across to last 2 sts, hdc2tog. (83)
Rows 27-42: repeat Rows 23-26, decreasing by one st each row. (67)
Rows 43: repeat Rows 23, decreasing by one st each row. (66)
Now you will begin increasing to create the other side of the v-neckline.
Row 44: ch 1, turn, 1 ehdc in each st across to last st, 2 hdc in last st. (67)
Row 45: ch 1, turn, 2 hdc in first st, 1 hdc in each st across. (68)
Row 46: ch 1, turn, 1 hdc in each st across to last st, 2 hdc in last st. (69)
Row 47: ch 1, turn, 2 hdc in first st, 1 ehdc in 3rd loop of each st across. (70)
Rows 48-63: repeat Rows 44-47, increasing by one stitch each row. (86)
Rows 64: repeat Row 44, increasing by one stitch each row. (87)
Now you will create the 21 sts dropped from the shoulder and work the 2nd shoulder Rows.
Row 65: ch 22, hdc in 2nd ch from hook and each ch and st across. (108)
Row 66: ch 1, turn, 1 hdc in each st across. (108)
Row 67: ch 1, turn, 1 ehdc in 3rd loop of each st across. (108)
Row 68: ch 1, turn, 1 ehdc in each st across. (108)
Rows 69: ch 1, turn, 1 hdc in each st across. (108)
70-85: repeat Rows 66-69.
Fasten off. Move on to back panel.
2X
Row 22: repeat Row 2.
Row 23: repeat Row 3.
You will now begin decreasing to create the v-neckline.
Row 24: ch 1, turn, 1 ehdc in each st across for 89 sts. (do not work the rest of the sts)(89)
Row 25: ch 1, turn, hdc2tog, 1 hdc in each st across. (89)
Row 26: ch 1, turn, 1 hdc in each st across to last 2 sts, hdc2tog. (88)
Row 27: ch 1, turn, hdc2tog, 1 ehdc in 3rd loop across. (87)
Rows 28-47: repeat Rows 24-27, decreasing by one st each row. (66)
Now you will begin increasing to create the other side of the v-neckline.
Row 48: ch 1, turn, 1 ehdc in each st across to last st, 2 hdc in last st. (67)
Row 49: ch 1, turn, 2 hdc in first st, 1 hdc in each st across. (68)
Row 50: ch 1, turn, 1 hdc in each st across to last st, 2 hdc in last st. (69)
Row 51: ch 1, turn, 2 hdc in first st, 1 ehdc in 3rd loop of each st across. (70)
Rows 52-67: repeat Rows 48-51, increasing by one stitch each row. (86)
Rows 68-70: repeat Rows 48-50, increasing by one stitch each row. (89)
Now you will create the 21 sts dropped from the shoulder and work the 2nd shoulder Rows.
Row 71: ch 22, ehdc in 3rd loop of 2nd ch from hook and each ch and st across. (110)
Row 72: ch 1, turn, 1 ehdc in each st across. (110)
Row 73: ch 1, turn, 1 hdc in each st across. (110)
Row 74: ch 1, turn, 1 hdc in each st across. (110)
Rows 75: ch 1, turn, 1 ehdc in 3rd loop of each st across. (110)
Rows 76-91: repeat Rows 72- 75.
Rows 92-93: repeat Rows 72-73.
Fasten off. Move on to back panel.
3X
You will now begin decreasing to create the v-neckline.
Row 26: ch 1, turn, 1 hdc in each st across for 89 sts. (89) (do not work the rest of the sts)
Row 27: ch 1, turn, hdc2tog, 1 ehdc in 3rd loop of each st across. (88)
Row 28: ch 1, turn, 1 ehdc in each st across to last 2 sts, hdc2tog. (87)
Row 29: ch 1, turn, hdc2tog, 1 hdc in each st across. (86)
Row 30: ch 1, turn, 1 hdc in each st across to last 2 sts, hdc2tog. (85)
Rows 31-50: repeat Rows 27-30, decreasing by one st each row. (65)
Row 51: repeat Row 27 decreasing by one st each row. (64)
Now you will begin increasing to create the other side of the v-neckline.
Row 52: ch 1, turn, 1 ehdc in each st across to last st, 2 hdc in last st. (65)
Row 53: ch 1, turn, 2 hdc in first st, 1 hdc in each st across. (66)
Row 54: ch 1, turn, 1 hdc in each st across to last st, 2 hdc in last st. (67)
Row 55: ch 1, turn, 2 hdc in first st, 1 ehdc in 3rd loop of each st across. (68)
Rows 56-75: repeat Rows 52-55, increasing by one st each row. (88)
Row 76: repeat Row 52, increasing by one st. (89)
Now you will create the 21 sts dropped from the shoulder and work the 2nd shoulder Rows.
Row 77: ch 22, hdc in 2nd ch from hook and each ch and st across. (110)
Row 78: ch 1, turn, 1 hdc in each st across. (110)
Rows 79: ch 1, turn, 1 ehdc in 3rd loop of each st across. (110)
Row 80: ch 1, turn, 1 ehdc in each st across. (110)
Row 81: ch 1, turn, 1 hdc in each st across. (110)
Rows 82-101: repeat Rows 78-81.
Fasten off. Move on to Back Panel.
4X
Row 26: repeat Row 2.
Row 27: repeat Row 3.
You will now begin decreasing to create the v-neckline.
Row 28: ch 1, turn, 1 ehdc in each st across for 91 sts. (91) (do not work the rest of the sts)
Row 29: ch 1, turn, hdc2tog, 1 hdc in each st across. (90)
Row 30: ch 1, turn, 1 hdc in each st across to last 2 sts, hdc2tog. (89)
Row 31: ch 1, turn, hdc2tog, 1 ehdc in 3rd loop of each st across. (88)
Row 32: ch 1, turn, 1 ehdc in each st across to last 2 sts, hdc2tog. (87)
Rows 33-52: repeat Rows 29-32, decreasing by one st each row. (67)
Row 53: repeat Row 29 decreasing by one st each row. (66)
Now you will begin increasing to create the other side of the v-neckline.
Row 54: ch 1, turn, 1 hdc in each st across to last st, 2 hdc in last st. (67)
Row 55: ch 1, turn, 2 hdc in first st, 1 ehdc in 3rd loop of each st across. (68)
Row 56: ch 1, turn, 1 ehdc in each st across to last st, 2 hdc in last st. (69)
Row 57: ch 1, turn, 2 hdc in first st, 1 hdc in each st across. (70)
Rows 58-77: repeat Rows 54-57, increasing by one st each row. (90)
Row 78: repeat Row 54, increasing by one st. (91)
Now you will create the 21 sts dropped from the shoulder and work the 2nd shoulder Rows.
Row 79: ch 22, ehdc in 2nd ch from hook and each ch across, ehdc in 3rd loop of each st across. (112)
Row 80: ch 1, turn, 1 ehdc in each st across. (112)
Rows 81-82: ch 1, turn, 1 hdc in each st across. (112)
Row 83: ch 1, turn, 1 ehdc in 3rd loop of each st across. (112)
Row 84: ch 1, turn, 1 ehdc in each st across. (138)
Rows 85-104: repeat Rows 81-84.
Row 105: repeat Row 81.
Fasten off. Move on to Back Panel.
5X
You will now begin decreasing to create the v-neckline.
Row 30: ch 1, turn, 1 hdc in each st across for 91 sts. (91) (do not work the rest of the sts)
Row 31: ch 1, turn, hdc2tog, 1 ehdc in 3rd loop of each st across. (90)
Row 32: ch 1, turn, 1 ehdc in each st across to last 2 sts, hdc2tog. (89)
Row 33: ch 1, turn, hdc2tog, 1 hdc in each st across. (88)
Row 34: ch 1, turn, 1 hdc in each st across to last 2 sts, hdc2tog. (87)
Rows 35-54: repeat Rows 31-34, decreasing by one st each row. (67)
Rows 55-57: repeat Rows 31-33 decreasing by one st each row. (64)
Now you will begin increasing to create the other side of the v-neckline.
Row 58: ch 1, turn, 1 hdc in each st across to last st, 2 hdc in last st. (65)
Row 59: ch 1, turn, 2 hdc in first st, 1 ehdc in 3rd loop of each st across. (66)
Row 60: ch 1, turn, 1 ehdc in each st across to last st, 2 hdc in last st. (67)
Row 61: ch 1, turn, 2 hdc in first st, 1 hdc in each st across. (68)
Rows 62-81: repeat Rows 58-61, increasing by one st each row. (88)
Rows 82-84: repeat Rows 58-60, increasing by one st each row. (91)
Now you will create the 21 sts dropped from the shoulder and work the 2nd shoulder Rows.
Row 85: ch 22, hdc in 2nd ch from hook and each ch and st across. (112)
Row 86: ch 1, turn, 1 hdc in each st across. (112)
Row 87: ch 1, turn, 1 ehdc in 3rd loop of each st across. (112)
Row 88: ch 1, turn, 1 ehdc in each st across. (138)
Row 89: ch 1, turn, 1 hdc in each st across. (112)
Rows 90-113: repeat Rows 86-89.
Fasten off. Move on to Back Panel.
Back Panel
All Sizes:
Ch 103 (105, 107, 107, 109)(111, 111, 113, 113)
Row 1: hdc in 2nd ch from hook and each ch across. 102 (104, 106, 106, 108)(110, 110, 112, 112)
Row 2: (RS) ch 1, turn, 1 hdc in each st across. 102 (104, 106, 106, 108)(110, 110, 112, 112)
Row 3: ch 1, turn, 1 ehdc in 3rd loop of each st across. 102 (104, 106, 106, 108)(110, 110, 112, 112)
Row 4: ch 1, turn, 1 ehdc in each st across. 102 (104, 106, 106, 108)(110, 110, 112, 112)
Row 5: ch 1, turn, 1 hdc in each st across. 102 (104, 106, 106, 108)(110, 110, 112, 112)
Row 6- 57 (65, 73, 77, 85)(93, 101, 105, 113): repeat Rows 2-5.
Fasten off.
Block panels to measurements.
Sewing Panels Together
Take your Back Panel and lay it flat with WS facing you. Then, take your Front Panel and lay it on top of the Back Panel with RS facing you. Line up your edges and the top and bottom of the panels.
Now, mark your armholes by counting from the top of the panel down 28 (30, 34, 36, 38)(40, 42, 46, 48) sts (or at desired length) Mark that st with a st marker on each side. Tip: check fit to make sure arms fit through with enough room. If too small, take out a few stitches.
With a long string of yarn and your yarn needle, seam each side by sewing from the bottom up to the stitch before the stitch marked with a st marker. (I recommend using the mattress stitch.) Fasten off.
Now you will sew at the top for the shoulders.
Using another string of yarn and your yarn needle, seam 15 (17, 19, 19, 23)(23, 25, 27, 29) sts across the top. Fasten off. Repeat it on the 2nd shoulder.
Move on to Sleeves.
Sleeves
Work one sleeve for each armhole.
Join yarn to armhole, near the armpit area/where your st marker is, facing WS.
Round 1: ch 1, work 58 (62, 66, 72, 76)(80, 86, 90, 96) ehdc evenly around armhole, join to first st. 58 (62, 66, 72, 76)(80, 86, 90, 96)
Round 2: (RS) ch 1, turn, 1 ehdc in each st around, join with sl st to first st. 58 (62, 66, 72, 76)(80, 86, 90, 96)
Rounds 3-55 (57, 57, 59, 59)(61, 61, 63, 63): repeat Row 2. (or to desired length)
Round 56 (58, 58, 60, 55)(55, 53, 53, 49): ch 1, turn, *sc2tog; repeat from * around, join to first st. 29 (31, 33, 36, 38)(40, 43, 45, 48)
Tip: Check fit and work to desired sleeve length.
Do not fasten off. Move to Sleeve Trim.
Sleeve Trim
Tip: Work first and last stitch in both loops for a straight edge with no gaps.
Ch 11
Row 1: sc in 2nd ch from hook and across, sl st in next two sts (of sleeve). (10 sc)
Row 2: ch 1, turn, 1 blo sc in each st across. (10 sc)
Row 3: ch 1, turn, 1 blo sc in each st across, sl st in next two sts (of sleeve). (10 sc)
Row 4: ch 1, turn, 1 blo sc in each st across. (10 sc)
Repeat Rows 3-4 around entire sleeve. Join ends together by slip stitching in each st of both ends.
Fasten off. Move on to Bottom Trim.
Bottom Trim
Tip: Work first and last stitch in both loops for a straight edge with no gaps.
Join yarn to bottom of garment, at one of the side seams, facing RS.
Round 1: ch 1, work 1 sc along the edge of each row around bottom of garment, join with sl st to first st.114 (130, 146, 154, 170)(186, 202, 210, 226)
Now you will be working in Rows for the ribbing portion.
Ch 11
Row 1: sc in 2nd ch from hook and across, sl st in next two sts (at bottom of garment). (10 sc)
Row 2: ch 1, turn, 1 blo sc in each st across. (10 sc)
Row 3: ch 1, turn, 1 blo sc in each st across, sl st in next two sts (at bottom of garment). (10 sc)
Row 4: ch 1, turn, 1 blo sc in each st across. (10 sc)
Repeat Rows 3-4 around entire bottom of sweater. Join ends together by slip stitching in each st of both ends.
Fasten off. Move on to Neckline Trim
Neckline Trim
Tip: Work first and last stitch in both loops for a straight edge with no gaps.
Join yarn to last row of decreases on front panel, facing RS. (the point of the v) You will work in the round until stated otherwise.
Round 1: ch 1, work 1 sc along the edge of each row around entire neckline, join with sl st to first st. 96 (104, 112, 120, 124)(140, 144, 144, 152)
Round 2: ch 1, 1 blo sc in each st around, join with sl st to first st. 96 (104, 112, 120, 124)(140, 144, 144, 152)
Now you will create the ribbed trim.
Row 3: ch 1, 1 sc in next 7 sts. (7)
Row 4: ch 1, TURN, 1 blo sc in each st across, sl st in next 2 sts.(7)
Row 5: ch 1, turn, 1 blo sc in each st across.(7)
Repeat Rows 4-5 around entire neckline.
Once you’ve sl st in last 2 sc of neckline, repeat Round 5 for 5 more Rows.
Fasten off, leaving a long tail for sewing.
Sew end of ribbing to the front loops of first 7 sts.
Finishing
Fasten off.
Weave in ends.
Block finished garment to measurements.
Pin It for Later!
Free Blanket Pattern + More!
Sign up for our newsletter and receive a Dude Blanket crochet pattern pdf FREE straight to your inbox.