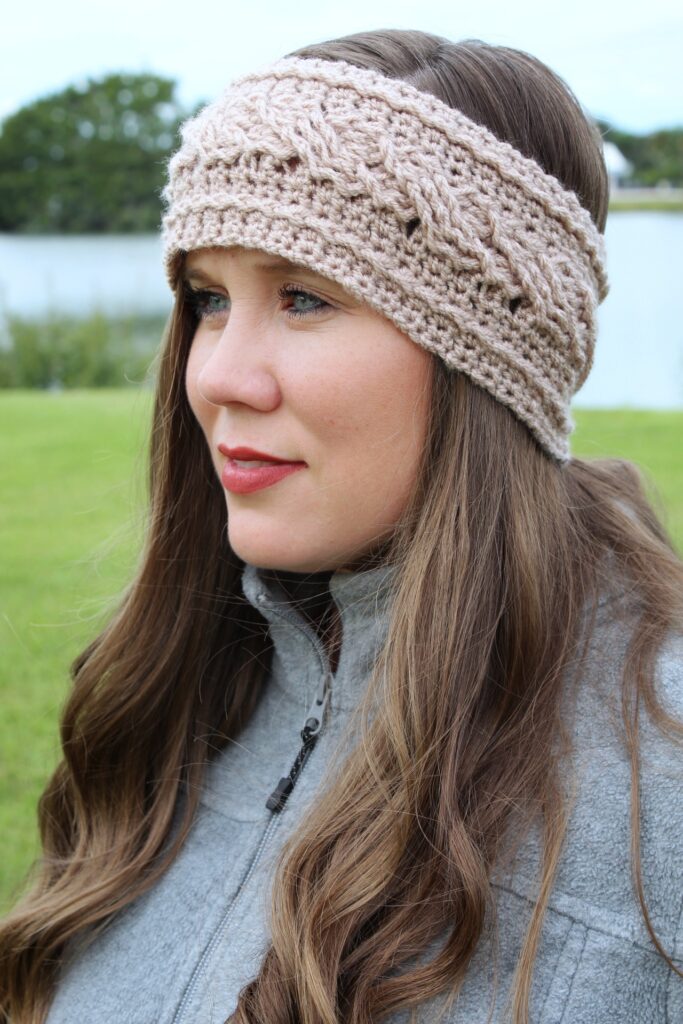
The Miriam Beanie is a quick project that is great for fall and winter weather! The crochet cables give it such an elegant look, and it can be customized to any size!

If you love crocheting as much as I do, or want to learn more, or just want to show off your work, please join our Crochet Garments community over on Facebook! I hope you’ll share your finished crochet project with us!
Mary Maxim Mellowspun Yarn
For this pattern I used Mary Maxim Mellowspun DK (#3) weight yarn. This yarn is 100% acrylic and so soft! It comes in a large variety of beautiful colorways. It is also machine washable, which is so nice!
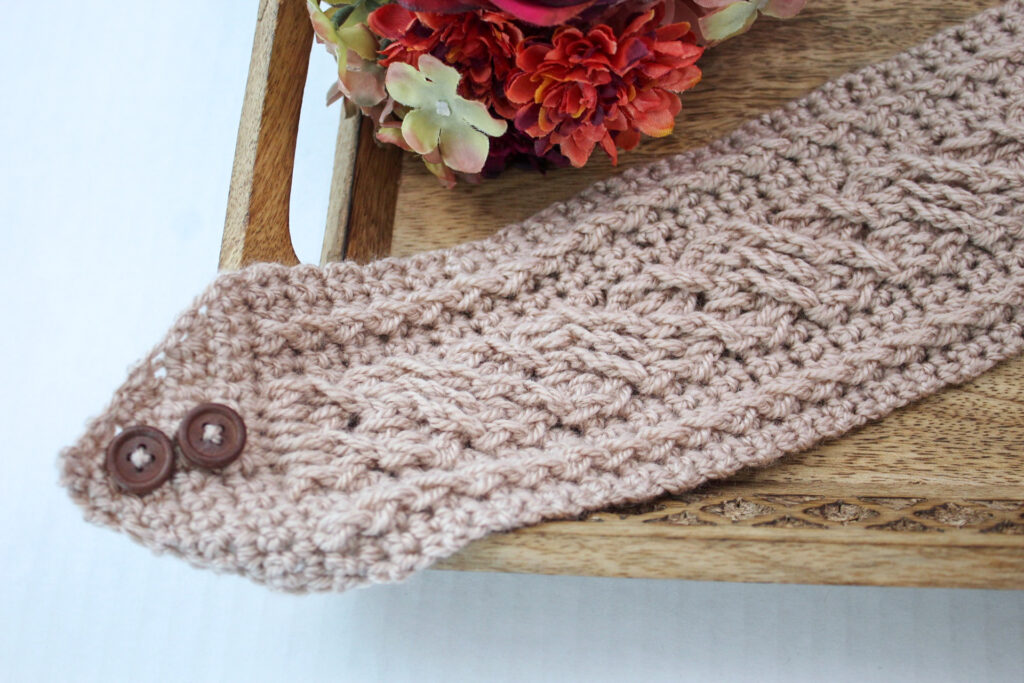
I used the colorway Sand for this earwarmer.
Earwarmer Details
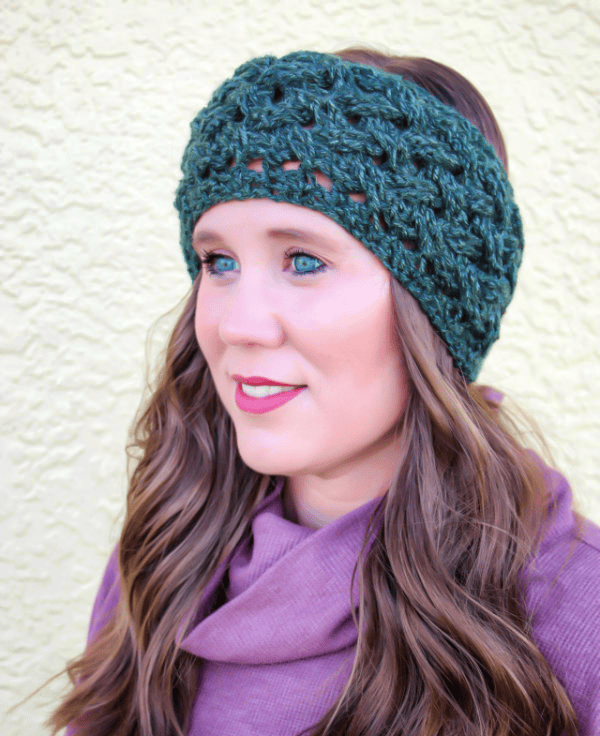
This crochet cabled earwarmer pattern uses front post stitches and single crochet throughout the project. It is worked flat in rows.
This pattern is rated intermediate in pattern difficulty.
You will need to know how to crochet the front post double crochet stitch and the front post triple crochet stitch for this project.
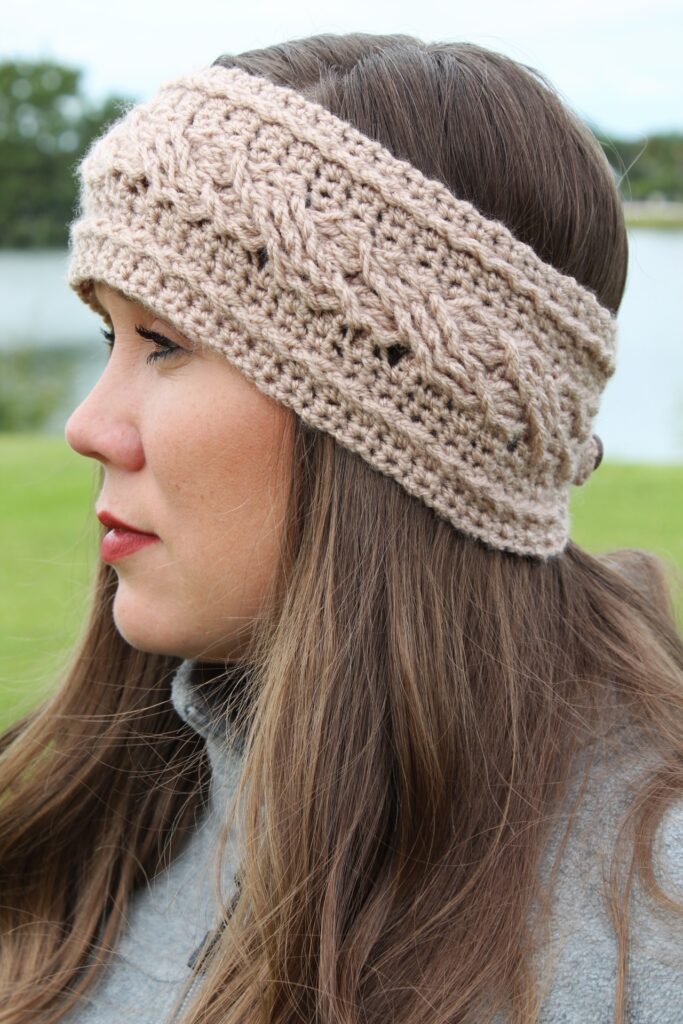
The Miriam Earwarmer crochet pattern is written in one size, but can be easily customized to fit any size.
The pattern includes instructions on how to customize the size. The original instructions make a 21.5″ long by 4″ wide earwarmer.
You’ll need 1-2 buttons. I used 1/2″ buttons for my sample and chose to add two so I can adjust as needed.
Ways to Access the Pattern
- Free on the blog as a blog subscriber: Blog Subscribers can access the full pattern for free here on the blog by logging in or signing up for a Grow Account.
- Upgrade to the ad-free, printable pdf pattern on Ravelry or Etsy. This pdf can be downloaded and/or printed for your convenience.
Miriam Earwarmer
Get the PDF Pattern!
Upgrade to the ad-free, printable PDF download on Ravelry or Etsy!
Just want the free version? Scroll down below!
Love this crochet pattern? Check out my ever growing list of Free Crochet Patterns!
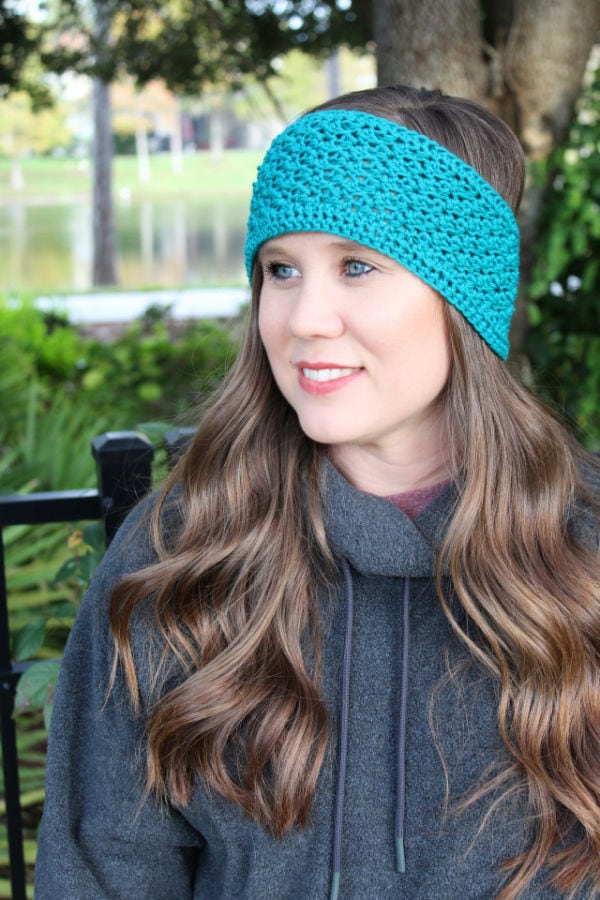
More Ear Warmer Patterns
Love this pattern? You may also like some of my other crochet ear warmer patterns.

Miriam Earwarmer Crochet Pattern
Copyright © 2026 Michelle Ferguson – Two Brothers Blankets
All rights reserved. No part of this pattern may be reproduced, sold, or tampered with, in any form or by any means, without permission from the publisher.
Items produced from these patterns may be sold, but the patterns themselves may not be sold, shared, or altered in any way.
Yarn:
113-130 yards
100% Acrylic
100g/284yds
Hook:
H/8 (5.0mm) crochet hook or hook to obtain gauge
Other Materials:
1-2 (.5”) Buttons
Gauge:
9 sc x 9 rows = 2”
Pattern Difficulty:
Intermediate
Stitches Needed & Abbreviations:
st(s) – stitch(es)
ch(s) – chain(s)
sc – single crochet
sc2tog – single crochet 2 together
FPdc – front post double crochet
FPtc – front post triple crochet
RS – right side
* – repeat from
Sizing:
21.5” x 4”
Increase or decrease repeat, ending on any repeat of row 10, to make earwarmer longer or shorter. Rows 1-9 and Rows 85-93 are approximately 2” each.
Pattern Notes:
Pattern is in US terms.
Starting chain does not count as first stitch, unless stated otherwise within the pattern.
FPdc – front post double crochet – yarn over, insert hook behind entire stitch, yarn over, pull up a loop (3 loops on hook), yarn over, pull through 2 loops, yarn over pull through last 2 loops
FPtc – front post triple crochet – yarn over twice, insert hook behind entire stitch, yarn over, pull up a loop (5 loops on hook), yarn over pull through 2 loops (3 loops on hook), yarn over pull through 2 loops (2 loops on hook), yarn over pull through last 2 loops.
Post stitches should be worked around stitches two rows below.
Access The Pattern
To access exclusive content, click the button to access the Grow.me app and sign in or create an account. You can create an account via your Google or Facebook accounts, or use an email and create a password.
Once you’ve created an account and signed in you will have access to all of the exclusive content on my blog. You’ll just need to sign in. If you forgot your password, simply click the “Forgot My Password” button to retrieve it. I cannot get access to your grow account to retrieve it for you.
Thank you so much for being a blog subscriber and I hope you enjoy the exclusive content!
Pin It for Later