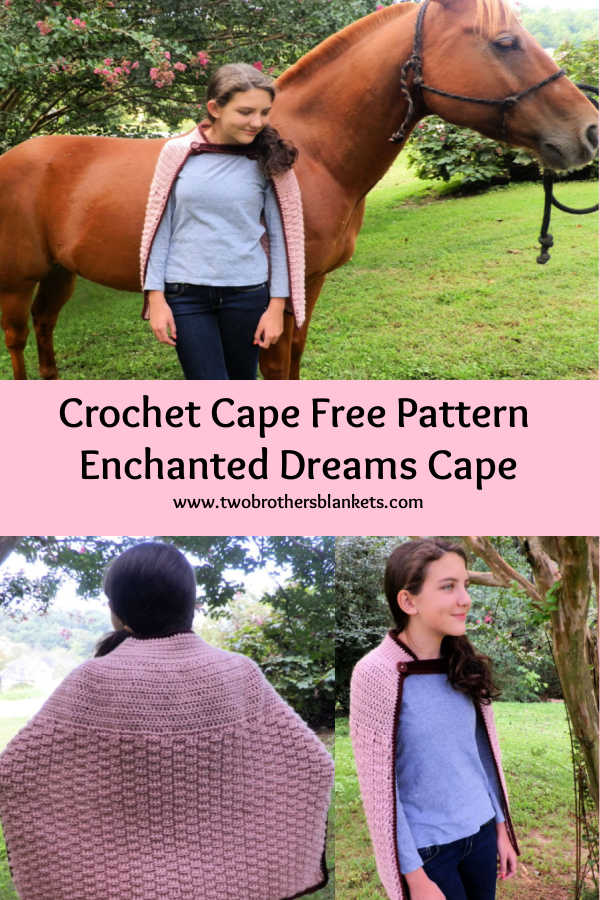
Crochet Cape Free Pattern- Enchanted Dreams
This post- Crochet Cape Pattern Free Pattern- Enchanted Dreams– contains affiliate links, which means if you make a purchase from the links below, I will get a small percentage of the sales at no additional cost to you. Thank you for your continued support!
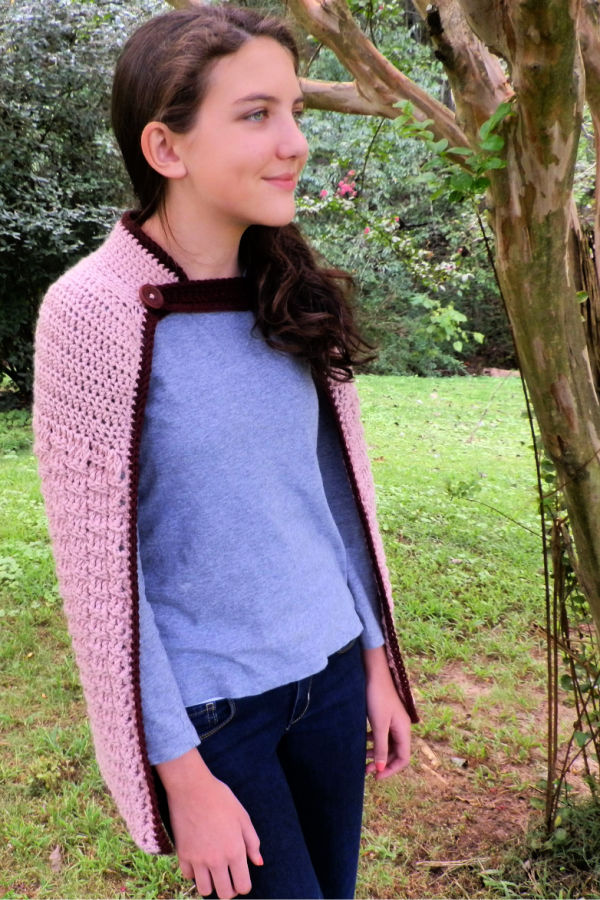
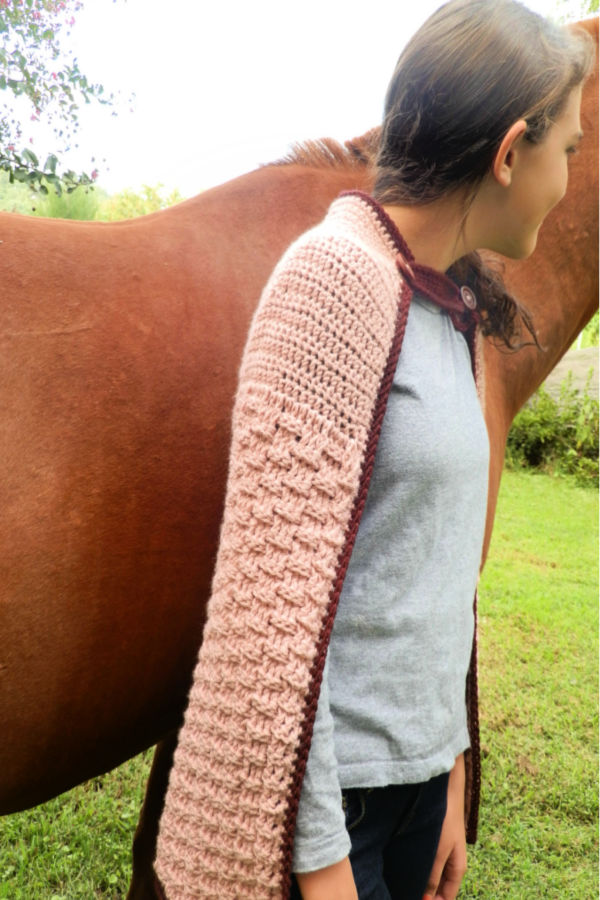
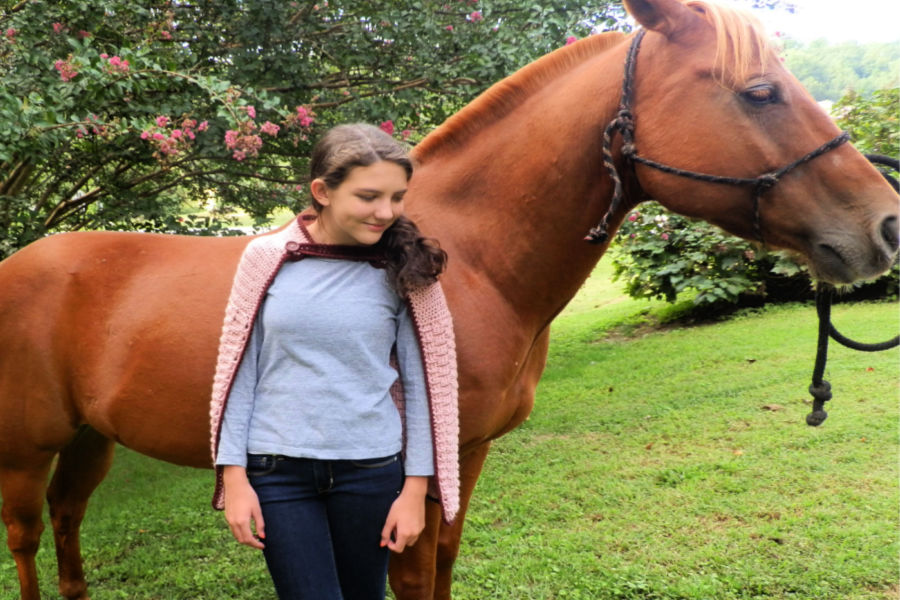
The Enchanted Dreams Cape is a simple, beautifully textured cape that will keep you warm, and work great for photo shoots, a special occasion, or to wear as part of a costume!
Pattern Inspiration
For this crochet cape pattern I was invited to be a part of the Battle of the Stitches. It is a designing competition where you are given a specific stitch to use and then you have to design something. You are then judged on your design and a winner is chosen.
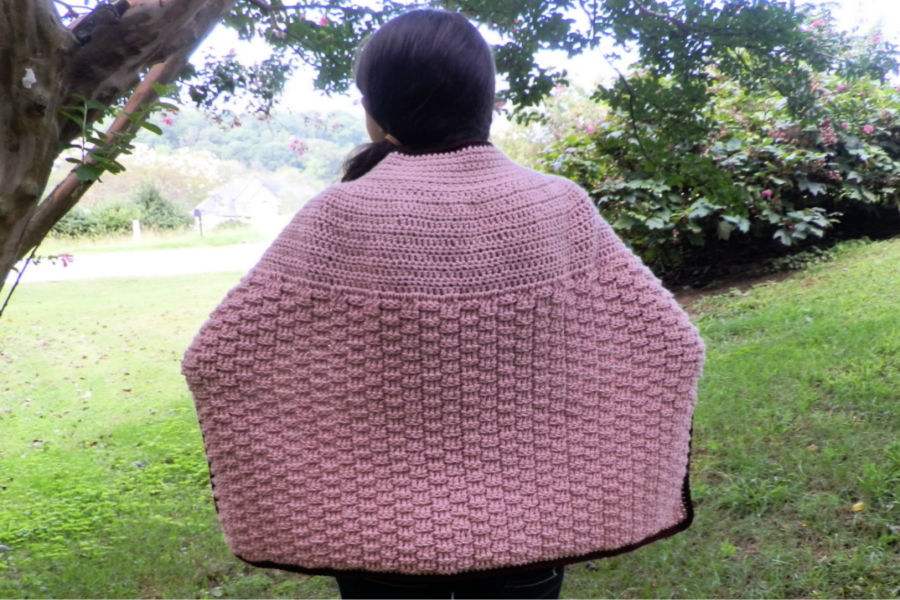
For this round, we were given the tri-square stitch. It is similar to the basket weave stitch, but smaller in size.
I came up with this beautiful crochet cape for my design!
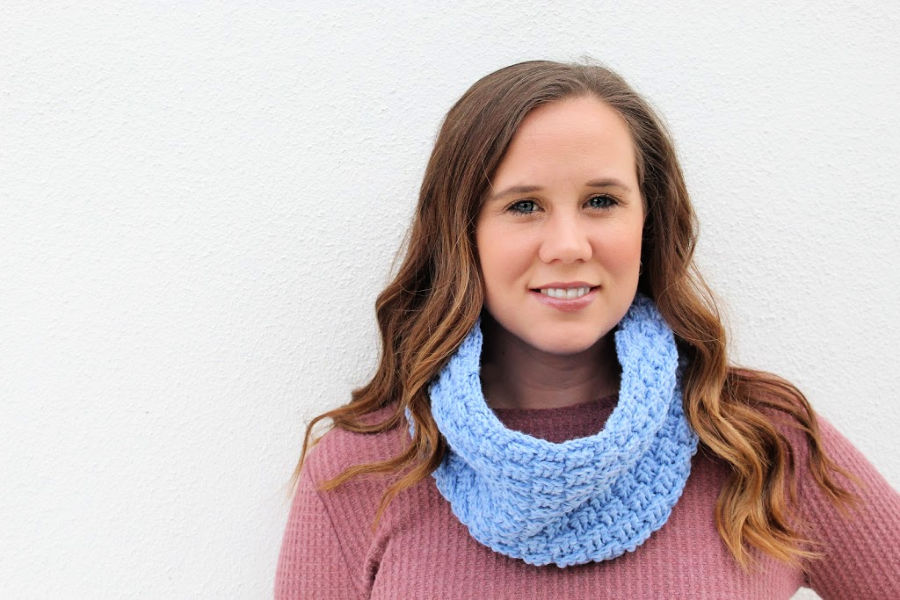
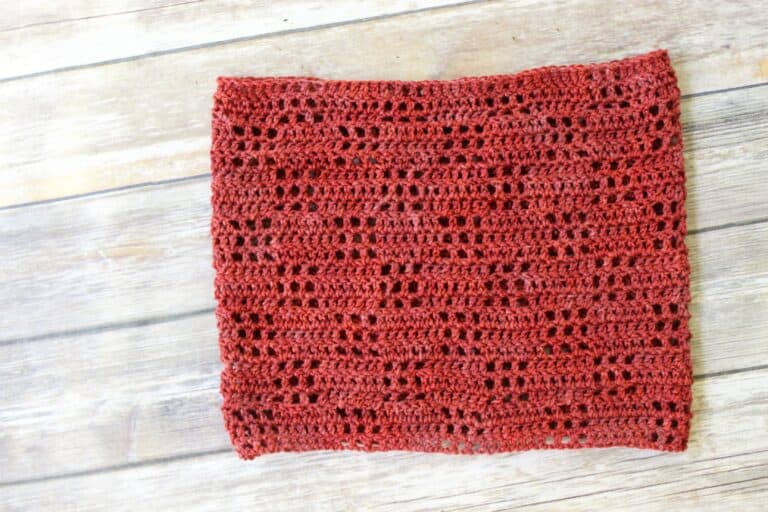
Be sure to check out the matching cowl- the Enchanted Dreams Cowl!
Pattern Details
This vintage style crochet cape pattern calls for worsted weight (#4) yarn. I used Hobby Lobby’s I Love This Yarn for my sample.
Another great yarn option would be Lion Brand Yarn Pound of Love. Both are really nice, soft and sturdy worsted weight yarns.
This crochet cape pattern comes in 8 sizes total- 4 in adult sizes and 4 in children’s sizes.
The pattern is rated Intermediate in pattern difficulty.
Enchanted Dreams Cape Adult Sizes
You can purchase the printable pdf version on Ravelry and Etsy!
Like this crochet cape pattern? Check out more Free Crochet Patterns!
Materials
Worsted weight yarn in a main color and contrasting color
I/9 (5.5mm) hook or hook to obtain gauge
Scissors, measuring tape
Two 1” buttons
Darning needle for weaving in ends.
Difficulty
Intermediate
Gauge
14 hdc and 10 rows = 4” square
Sizing
X-Small (28-30” bust) – 710 yards
Small (32-34” bust)- 800 yards
Medium (36-38” bust)- 950 yards
Large (40-42” bust)- 1100 yards
Pattern Notes
Pattern is worked from the top down with trim, collar, and buckle added at the end. Starting chain does not count as first stitch unless otherwise stated within the pattern. Pattern is instructions for x-small with instructions for the other sizes in parentheses as so, XS (S, M, L), with the total stitch count for all at the end of the row inside parentheses. If there are not parentheses do the same for every size.
Stitches Needed
ch- chain
hdc- half double crochet
**- repeat instructions in asterisks as many times as instructed
dc- double crochet
sc- single crochet
FPdc- front post double crochet
BPdc- back post double crochet
MC- main color
CC- contrasting color
Body
Chain 55.
Row 1: in 2nd ch from hook, hdc in the back bump of each stitch across. (54)
Row 2: Ch 1, turn, 2 hdc in 1st stitch, 1 hdc in next 2, 2 hdc in next, 1 hdc in next 2, repeat across. (72)
Row 3: Ch 1, turn, 2 hdc in 1st stitch, 1 hdc in next 2, 2 hdc in next, 1 hdc in next 2, repeat across. (96) Stop here for X-small. Move to row 7.
Row 4: Ch 1, turn, 2 hdc in 1st stitch, 1 hdc in next 3, 2 hdc in next, 1 hdc in next 3, repeat across. (120) Stop here for Small. Move to row 7.
Row 5: Ch 1, turn, 2 hdc in 1st stitch, 1 hdc in next 4, 2 hdc in next, 1 hdc in next 4, repeat across. (144) Stop here for Medium. Move to row 7.
Row 6: Ch 1, turn, 2 hdc in 1st stitch, 1 hdc in next 5, 2 hdc in next, 1 hdc in next 5, repeat across. (168)
Row 7: Ch 1, turn, hdc in each stitch across. (96, 120, 144, 168) Repeat Row 7 “10 (15, 15, 20)” more times.
Row 8: Ch 3 (counts as 1st stitch), turn, dc in next 95 (119, 143, 167). (96, 120, 144, 168)
Row 9: Ch 3 (counts as 1st stitch), turn, FPdc in next 2, BPdc in next 3, FPdc in next 3, BPdc in next 3, repeat across. (96, 120, 144, 168)
Row 10: Ch 3 (counts as 1st stitch), turn, BPdc in next 2, FPdc in next 3, FPdc in next 3, BPdc in next 3, repeat across. (96, 120, 144, 168)
Repeat rows 9 & 10 until garment reaches 22” or until desired length. Row 11: Ch 1, turn, sc evenly around entire garment, working 2 sc in each corner stitch. Fasten off.
Collar
Join MC to top corner of garment, with right side facing you. Row 1: Ch 1, sc in 1st stitch and in next 53 stitches. (54) Row 2: Ch 1, turn, sc in each stitch across. (54) Rows 3-10: repeat row 2.
Trim
Join CC to last stitch of collar. Round 1: Ch 1, turn, sc in each stitch around entire garment, working 2 sc in each corner stitch, join to 1st stitch. Repeat 2 more times. Finish off. Weave in all ends. Block if necessary.
Buckle
With CC, chain 21. Row 1: Dc in 3rd ch from hook and in each ch across, ch 5, turn row around and sl st to bottom of 1st ch stitch.
Row 2: Ch 1, sc in each stitch across, ch 5, sl st to top of 1st dc stitch.
Row 3: Ch 1, sc in each stitch across, work 5 sc in ch 5 space, sc in each bottom stitch across, work 5 sc in ch 5 space, join to 1st stitch. Finish off. Weave in ends.
Sew on buttons about 2” down from very top of garment on each side edge. Attach buckle with buttons.
Enchanted Dreams Cape Children’s Sizes
You can purchase the printable pdf version on Ravelry!
2/4 – 15”x 18” – 247 yards
5/6 – 21”x20.5” – 355 yards
7/8 – 24”x22.5” – 415 yards
10/12- 24”x26.5” – 637 yard
Cape
Ch 37
Row 1: hdc in 2nd chain from hook and each st across. (36)
Row 2: ch 1, turn, 2 hdc in 1st st, 1 hdc in next 2, 2 hdc in next, 1 hdc in next 2, repeat across. (48)
Stop here for size 2/4. Move on to Row 6.
Row 3: Ch 1, turn, 2 hdc in 1st, 1 hdc in next 3, 2 hdc in next, 1 hdc in next 3, repeat across. (60)
Stop here for size 5/6. Move on to Row 6.
Row 4: Ch 1, turn, 2 hdc in 1st, 1 hdc in next 4, 2 hdc in next, 1 hdc in next 4, repeat across. (72)
Stop here for size 7/8. Move on to Row 6.
Row 5: Ch 1, turn, 2 hdc in 1st, 1 hdc in next 5, 2 hdc in next, 1 hdc in next 5, repeat across. (84)
Row 6: Ch 1, turn, hdc in each st across. (48, 60, 72, 84)
Repeat row 6 (9, 9, 14, 14) times.
Row 7: Ch 3 (counts as 1st st), turn, dc in next (47, 59, 71, 83). (48, 60, 72, 84)
Row 8: Ch 3 (counts as 1st st), turn, FPdc in next 2, BPdc in next 3, FPdc in next 3, BPdc in next 3, repeat across. (48, 60, 72, 84)
Row 9: Ch 3 (counts as 1st st), turn, BPdc in next 2, FPdc in next 3, BPdc in next 3, FPdc in next 3, repeat across. (48, 60, 72, 84)
Repeat rows 8 and 9 until entire garment reaches approximately (16”, 18”, 20”, 22”) or until desired length.
Row 10: Ch 1, turn, sc evenly around entire garment, working 2 sc in each corner. Fasten off. Weave in ends.
Collar
Join MC to top corner of garment with RS facing you.
Row 1: Ch 1, sc in same st and in next 35. (36)
Row 2: Ch 1, turn, sc in each st across. (36)
Repeat row 2 (6, 6, 8, 8) more times.
Finish off. Weave in ends.
Trim
Join CC to last stitch of collar.
Round 1: Ch 1, turn, sc in each stitch around entire garment, working 2 sc in each corner stitch, join to 1st stitch. Repeat round one 2 more times. Finish off. Weave in all ends. Block if necessary.
Buckle
With CC, chain 16. Row 1: Dc in 3rd ch from hook and in each ch across, ch 5, turn row around and sl st to bottom of 1st ch stitch.
Row 2: Working in bottom of starting chain, ch 1, sc in each stitch across, ch 5, sl st to top of 1st dc stitch.
Row 3: Ch 1, sc in each stitch across, work 5 sc in ch 5 space, sc in each bottom stitch across, work 5 sc in ch 5 space, join to 1st stitch. Finish off. Weave in ends.
Sew on buttons about 2” down from very top of garment on each side edge of the collar. Attach buckle with buttons.
Pin It!

Michelle has been crocheting since 2011 and has been designing crochet patterns since 2014! She specializes in modern garments and accessories for your handmade wardrobe. Michelle has been featured in Happily Hooked Magazine, thehooknooklife.com, wecrochet.com, ourmakerlife.com, and several other websites. She is committed to providing the highest quality crochet information and patterns that instill a true feeling of pride, enjoyment, and accomplishment when completing a project.

Lovely pattern! Also, I have to say, I highly approve of the horse in the picture 🙂 I’ve been trying to get my barn friends to learn to crochet with me but I haven’t been having any luck. Thank you again for a great pattern!