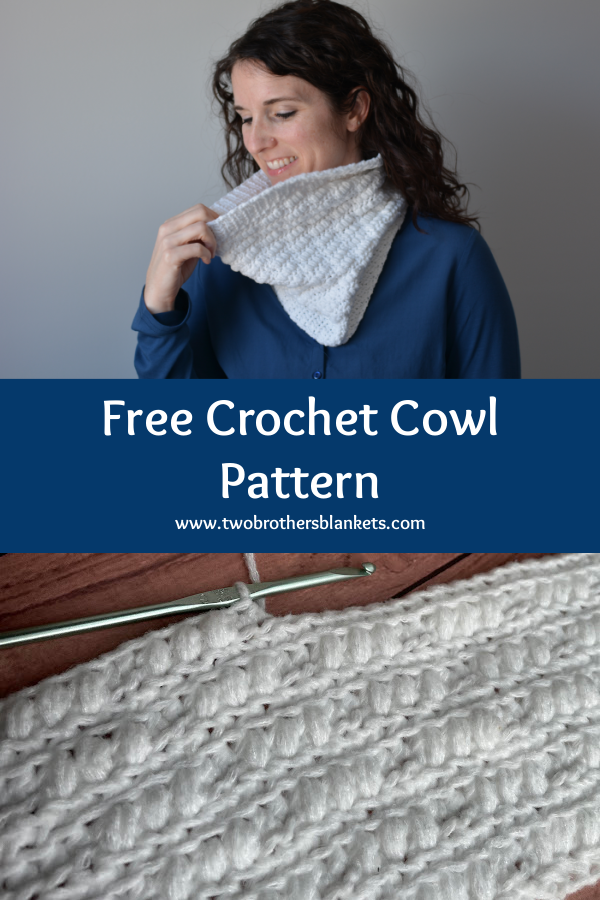
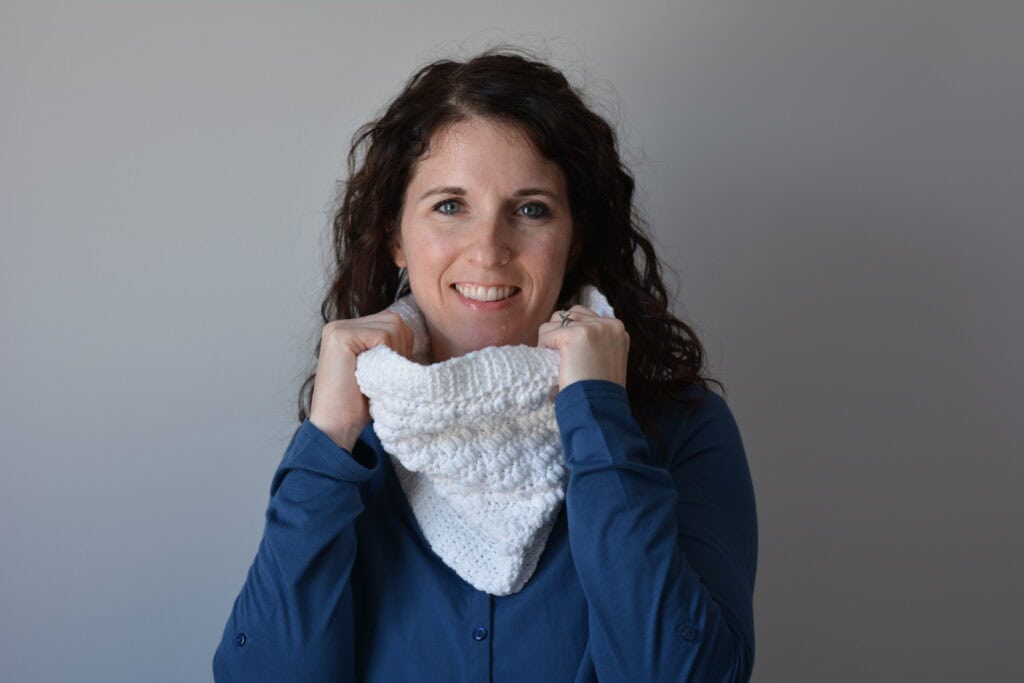
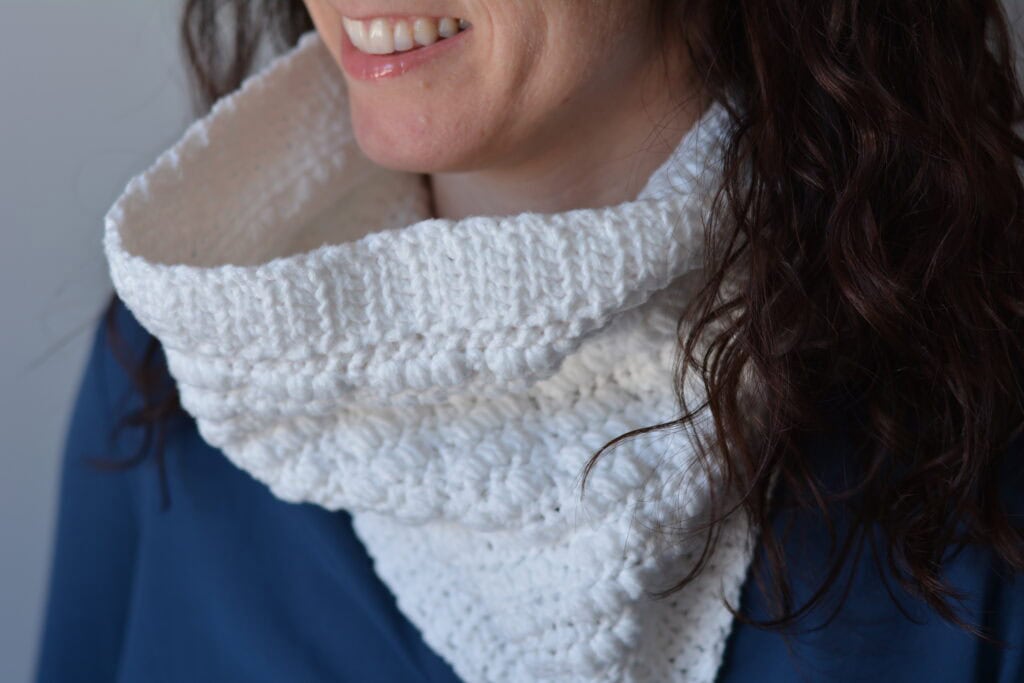
The St. Peregrine Cowl is a textured cozy cowl, perfect for the cooler months.
I am so happy to have Jamie from Remington Lane Crochet sharing this beautiful crochet pattern today!
About the Designer
Jamie, of Remington Lane Crochet, is a busy mom of 4! She started her journey learning to crochet stockings and prayer shawls, and is now designing crochet patterns! Her designs make wonderful handmade gifts for friends and family!
Follow Jamie:
Blog: https://remingtonlane.com
Etsy: https://www.etsy.com/shop/RemingtonLaneCrochet
Raverly: https://www.ravelry.com/designers/jamie-morris
Facebook: https://www.facebook.com/remingtonlanecrochet
Instagram: https://www.instagram.com/remingtonlanecrochet

If you love crocheting as much as I do, or want to learn more, or just want to show off your work, please join our Crochet Garments community over on Facebook! I hope you’ll share your finished crochet project with us!
St. Peregrine Cowl Crochet Pattern
Items needed:
#4 Medium Worsted Weight / Aran (Lion Brand Feels Like Butta in White used in sample)
Yardage:
350 yards (5.6 oz)
4.00mm (G6) crochet hook
Yarn needle
Scissors
Abbreviations:
sl st – slip stitch
ch – chain
hdc – half double crochet
Fhdc – foundation half double crochet
FLO – front loop only
BLO – back loop only
puff – puff stitch
st – stitch
rep – repeat
RS – right side
* * – repeat instructions between asterisks as directed
Special Stitch
Puff Stitch – *yarn over, insert your hook, yarn over and pull up a loop*, repeat from * to * two more times (7 loops will be on your hook), yarn over and pull through all of the loops.
Notes:
US Terms
Skill Level – Easy / Advanced Beginner
Ch 2 counts as a stitch
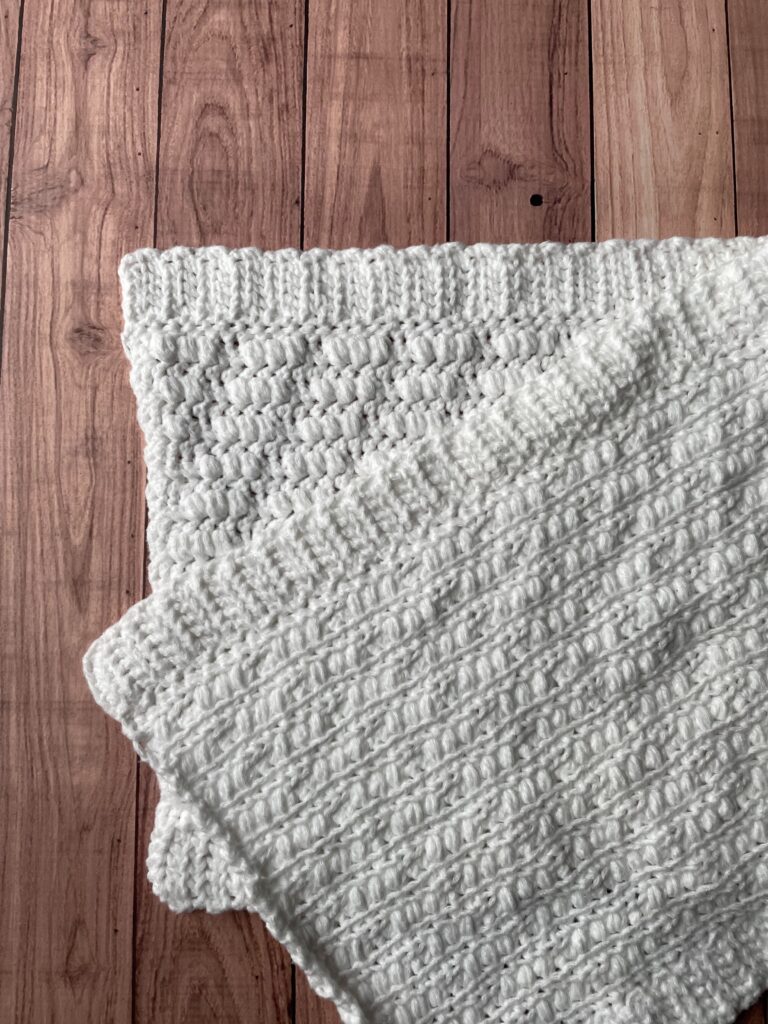
Cowl is worked in rows
Trim is added to both long edges before sewing the cowl together
For the puff stitch rows, you may end a row mid-repeat when you get to where there are 2 stitches left
Gauge:
Gauge is not important, but for reference it is: half double crochet 15.5 st x 13.5 rows = 4” square
Finished Measurements
Finished dimensions: 12.5” wide x 10.25” high (31.8cm x 26.0cm)
Cowl Pattern Instructions:
Row 1: Fhdc 90
Or, Chain 91
Row 1: hdc in 3rd ch from hook, hdc to end of the row. Turn. (90)
Row 2: Ch 2, BLO hdc in next st, * 3 puff, 2 BLO hdc *, rep from * to * until 2 st remain. BLO hdc, hdc in turning chain from previous row. Turn (90)
Row 3: Ch 2, FLO hdc in next st, FLO hdc to end of the row, hdc in turning chain from previous row. Turn. (90)
Row 4: Ch 2, BLO hdc in next st, 2 puff, 2 BLO hdc, * 3 puff, 2 BLO hdc *, rep from * to * until 2 st remain. BLO hdc, hdc in turning chain from previous row. Turn (90)
Row 5: Repeat row 3
Row 6: Ch 2, BLO hdc in next st, puff, 2 BLO hdc, * 3 puff, 2 BLO hdc *, rep from * to * until 2 st remain. BLO hdc, hdc in turning chain from previous row. Turn (90)
Row 7: Repeat row 3
Row 8: Ch 2, BLO hdc in next st, 2 BLO hdc, * 3 puff, 2 BLO hdc *, rep from * to * until 2 st remain. BLO hdc, hdc in turning chain from previous row. Turn (90)
Row 9: Repeat row 3
Row 10: Ch 2, BLO hdc in next st, BLO hdc, * 3 puff, 2 BLO hdc *, rep from * to * until 2 st remain. BLO hdc, hdc in turning chain from previous row. Turn (90)
Row 11: Repeat row 3
Row 12-25: Repeat rows 2-11.
Do not fasten off.
Add the Trim
Turn the cowl 90 degrees so that you will add the trim along the long edge.
Chain 7
Row 1: hdc into the 3rd ch from the hook, hdc to the end of the ch, sl st to join it to the cowl, sl st in next st of the cowl. Turn. (6)
Row 2: FLO hdc in each st to end of the row. Turn (6)
Row 3: Ch 2, 6 FLO hdc, sl st to join to the cowl, sl st in next st. Turn.
Repeat rows 2-3 until you reach the end of the cowl.
Break yarn and fasten off.
Turn cowl to the other long side and join the yarn to the corner.
Repeat the trim along this edge.
Fasten off and weave in ends.
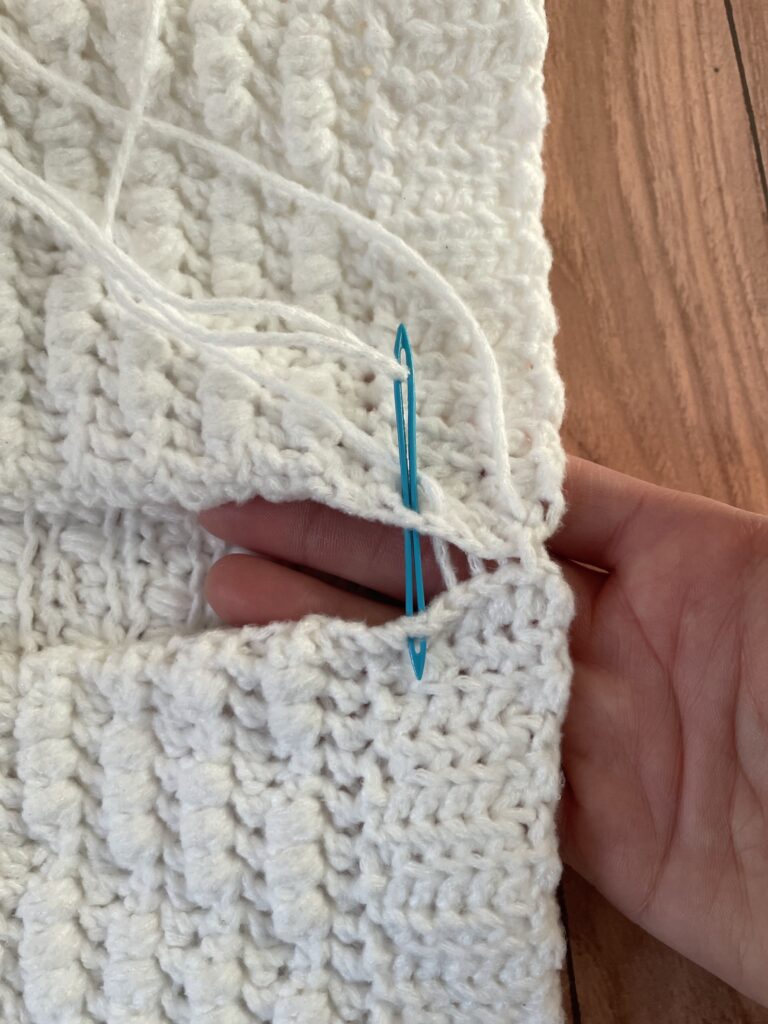
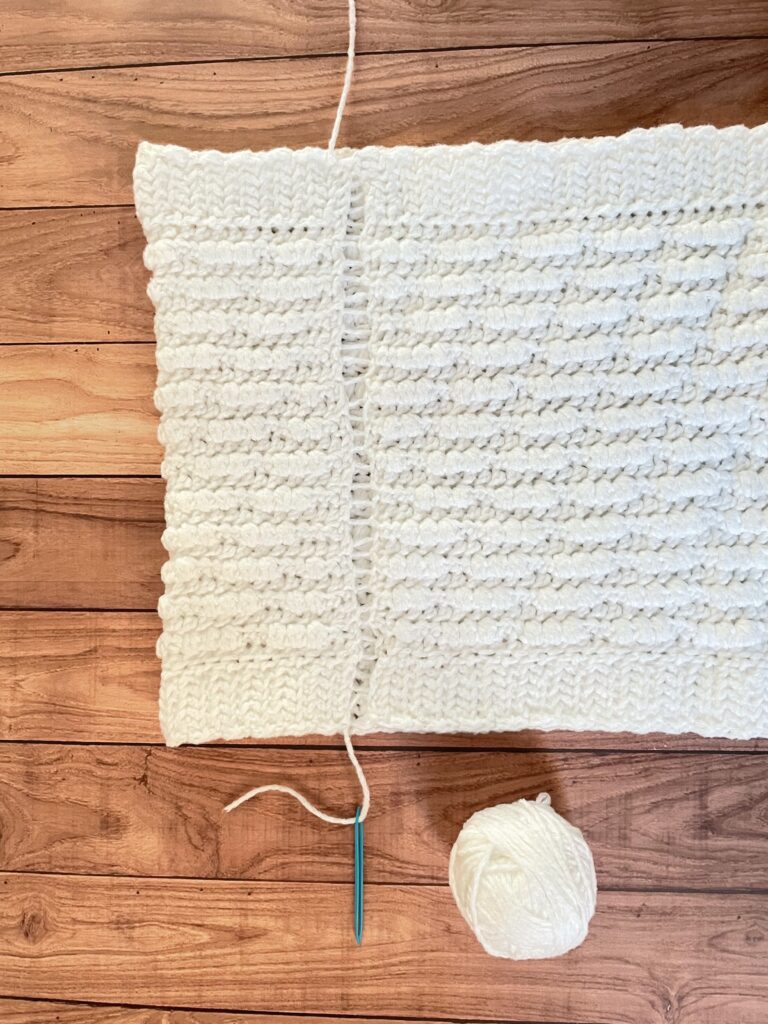
Sew the Ends Together
Option 1: Cut a long piece of yarn approximately 36” (91.4 cm). Thread the yarn into one corner of the short end, leaving a 6” tail. Using your yarn needle whip stitch or mattress stitch through both edges, from one end to the other. Pull the end so that the seam is tight. Weave in ends.
Option 2: Join yarn to one corner along the short end. With RS together sl st through both edges and continue along the edge all the way down. Fasten off and weave in ends.
We would love to see your work! Tag me and Jamie @remingtonlanecrochet & @Twobrothersblankets on Instagram of your St. Peregrine Cowls!
If you enjoyed this pattern, check out my ever growing list of Free Crochet Patterns!
Pin it!