
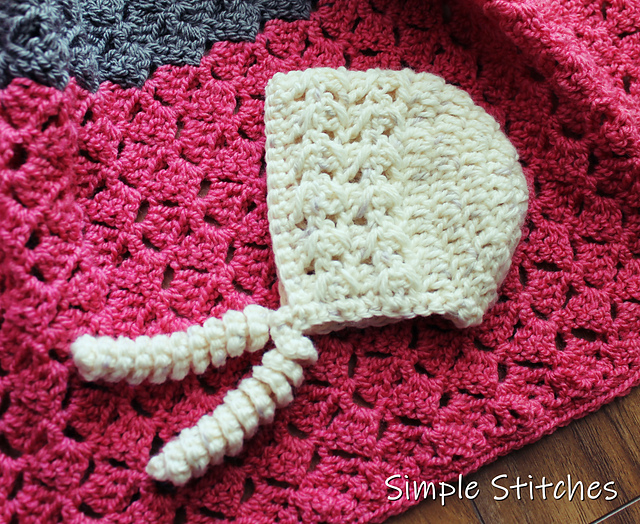
Looking for a sweet and simple project for a new arrival? The Little Textures Newborn Beanie is an easy crochet pattern designed specifically for the tiniest members of your family, with lovely texture and a cozy fit.

What You’ll Love About this Crochet Newborn Beanie
- Beginner-friendly crochet pattern with basic stitches
- Cozy textured stitch adds warmth and beauty
- Quick make, great for a last-minute baby gift
- Written instructions and a video tutorial for how to crochet this adorable newborn hat
- Perfect for charity donations, baby showers, or your own little one
This pattern combines both simplicity and texture, making it a perfect project for beginners and seasoned crocheters alike.
The beanie features a beautiful textured stitch that not only adds visual interest but also provides extra warmth and coziness for newborns.
Whether you’re crafting for a baby shower, charity, or your own little one, the Little Textures Newborn Beanie is a delightful addition to any handmade wardrobe. Read on for step-by-step instructions and tips to create this charming crochet baby hat that’s sure to be a cherished keepsake.
Crochet Newborn Beanie Pattern Details
Skill Level: Easy
Finished Size: Newborn (12-14” head circumference)
Hook Size: I/9 (5.5mm)
Yardage: 40 – 50 yards worsted (#4) weight yarn
The Yarn
I used Knit Picks Mighty Stitch yarn and Knit Picks Brava Worsted for the hats pictured above.
The Mighty Stitch yarn is amazingly soft! Seriously perfect for sensitive baby skin! It also has a slight shine to it!
The Brava Worsted is not quite as soft, but still nice to the touch. Both of these yarns come in a rather large variety of colors.

Any soft worsted (#4) weight yarn will work for this hat pattern. Just be sure to check gauge!
The crochet newborn hat is worked from the top down in simple crochet stitches. The pattern is rated easy in pattern difficulty.


Frequently Asked QUestions
Can I use a different weight of yarn for this crochet newborn beanie?
As long as you’re able to meet gauge, you can use a different yarn weight. You may need to adjust your hook size—going up for thinner yarns and down for thicker ones. Keep in mind that changing the yarn weight will also affect the thickness, stretch, and overall feel of the finished beanie.
Is this crochet newborn hat pattern good for beginners?
Yes! This newborn beanie begins with rounds of basic double crochet and simple increases, making it very approachable for beginners. Some crocheters find rounds 7–9 (the pattern stitch section) a bit trickier, so if you’d like extra guidance, you can follow along with the video tutorial, here.
Is this crochet infant hat pattern available in other sizes?
Yes! The Little Textures Beanie is also available in sizes from 3–6 months through adult, free on the blog. It’s a fun way to create matching pieces for siblings or even a coordinated look for family photos.
If you’re looking for a smaller size, the Teeny Little Preemie Beanie is a great option for babies weighing 2–6 pounds.
Do you have any matching baby patterns with this stitch combination?
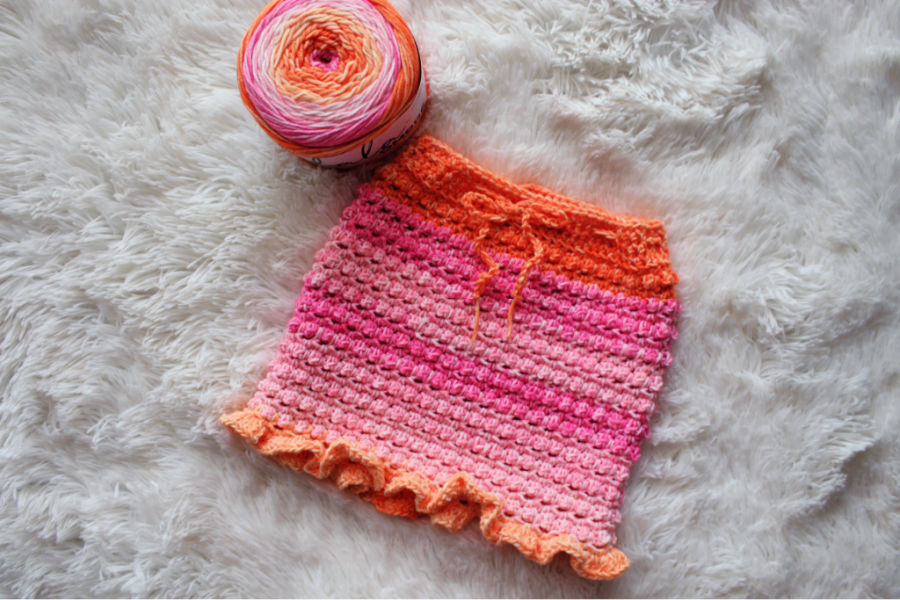
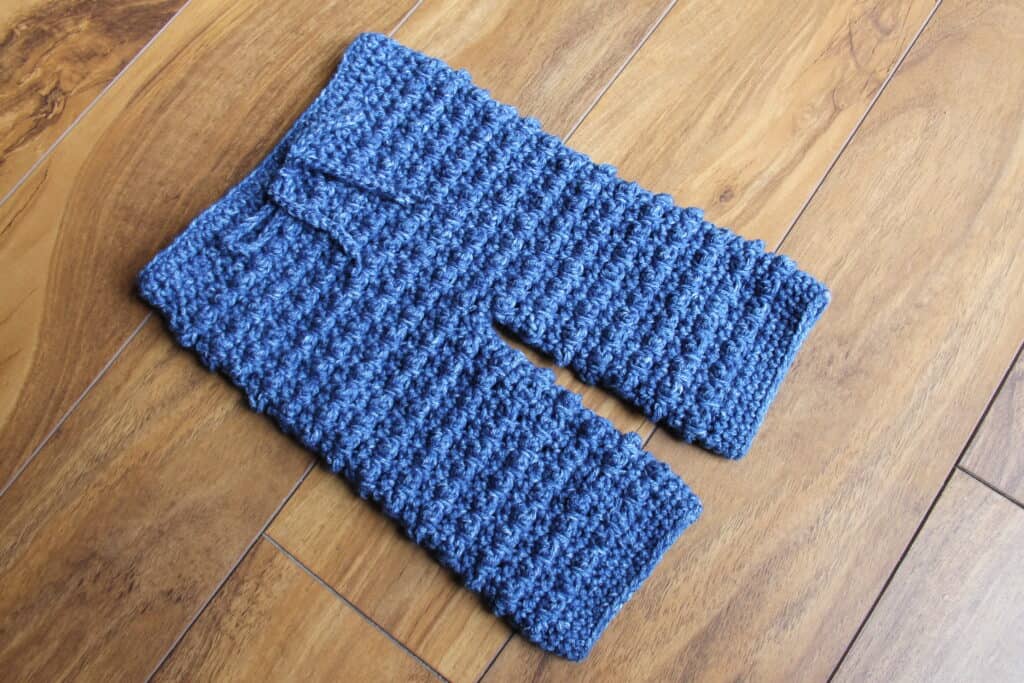
Yes! This stitch pattern is also featured in a ruffled skirt, a sweater, and a pair of baby pants. Mix and match them to create a sweet coordinated outfit—perfect for baby showers or gifting.
Do you have any Little Textures patterns for older kids or adults?
Yes! If you love this stitch pattern, you can also use it to make a hooded cowl (adult size), as well as an ear warmer and boot cuffs set available in sizes from toddler to adult.
If you love crocheting as much as I do, or want to learn more, or just want to show off your work, please join our Crochet Garments community over on Facebook! I hope you’ll share your finished crochet project with us!
Like this pattern? Check out my growing list of Free Crochet Patterns!
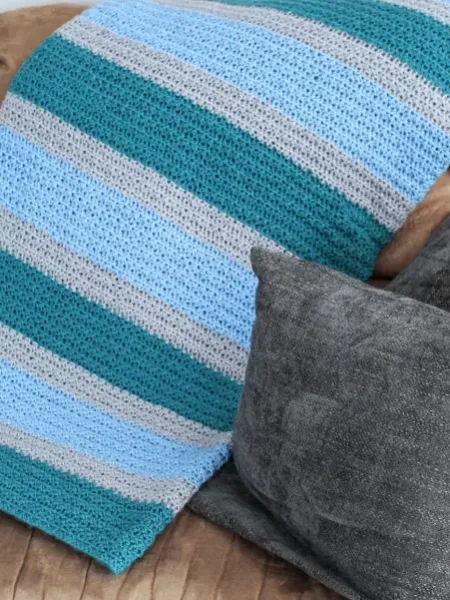
More Baby Crochet Patterns
Love this pattern? You may also like some of these other adorable crochet patterns for babies!
Ways to Access the Pattern
- Free on the blog as a blog subscriber: Blog Subscribers can access the full pattern for free here on the blog by logging in or signing up for a Grow Account.
- Upgrade to the ad-free, printable pdf pattern on Ravelry or Etsy. This pdf can be downloaded and/or printed for your convenience.
Upgrade to the Ad-free PDF
Little Textures newborn Beanie
Get the PDF Pattern!
Upgrade to the ad-free, printable PDF download on Ravelry or Etsy!
Just want the free version? Scroll down below!
You can purchase the printable pdf version of this pattern on Ravelry and Etsy!
Little Textures Newborn Beanie Crochet Pattern
Copyright © 2026 Michelle Ferguson – Two Brothers Blankets
All rights reserved. No part of this pattern may be reproduced, sold, or tampered with, in any form or by any means, without permission from the publisher.
Items produced from these patterns may be sold, but the patterns themselves may not be sold, shared, or altered in any way.
Yarn:
30-50 yards
100% Premium Acrylic
100g/218yards
Hook:
I/9 (5.5mm) crochet hook or hook to obtain gauge
Other Materials:
Gauge:
Round 4 = 4” diameter
Pattern Difficulty:
Easy
Stitches Needed & Abbreviations:
mc- magic circle
sc- single crochet
hdc- half double crochet
dc- double crochet
ch-chain
*- repeat from
Sizing:
Newborn: 12-14” head circumference
Pattern Notes:
Pattern is in US terms.
Starting chain does not count as a stitch in the dc rounds but DOES count as a stitch in the textured rounds.
Join to 1st st with a slip stitch, unless stated otherwise within the pattern.
You can get very creative with the color way of this hat by changing colors at different points of the hat.
Pattern is worked in a multiple of 10.
Pattern for larger sizes: https://www.twobrothersblankets.com/crochet-beanie-free-pattern-little-textures-beanie/
Full pattern tutorial: https://youtu.be/S-dcnMa-I0Q
Access The Pattern
To access exclusive content, click the button to access the Grow.me app and sign in or create an account. You can create an account via your Google or Facebook accounts, or use an email and create a password.
Once you’ve created an account and signed in you will have access to all of the exclusive content on my blog. You’ll just need to sign in. If you forgot your password, simply click the “Forgot My Password” button to retrieve it. I cannot get access to your grow account to retrieve it for you.
Thank you so much for being a blog subscriber and I hope you enjoy the exclusive content!
Pattern:
Pattern is a copyright of Two Brothers Blankets. Please do not alter, copy, share, or sell in any way. You may, however, sell your finished products from this pattern.
Pin it for later:

Free Blanket Pattern + More!
Sign up for our newsletter and receive a Dude Blanket crochet pattern pdf FREE straight to your inbox.


Very nice pattern, I like it very much!
Thanks for sharing it with us!
Thank you for adding the tutorial it help me to see the overs and unders very well ! The patter when finished is darling
Thanks again
I am unable to find the tutorial. Not sure how to do row 8. Could I get some help please..
The video should just pop up after a few seconds, but you can also watch it on my YouTube channel: https://www.youtube.com/watch?v=py5zBUrSgOY
Having a hard time with round 8. I`m right handed. Help!!!!
The video tutorial will show you how to do it. The steps are exactly the same for right handed crocheters.
I’m sorry I cannot figure out what you mean on row nine, single crochet and chain one each stitch?
In round 8 your working a stitch and then a chain 1 space, so in round 9 you will work an sc in the stitch and then another sc around the chain 1 space. You’ll do that all the way around.
Any quick tips on converting the pattern to a 3 weight yarn?
As long as you can meet gauge, you should be fine. Since it’s a thinner yarn, you’ll likely have to go up a hook size or two to meet gauge.