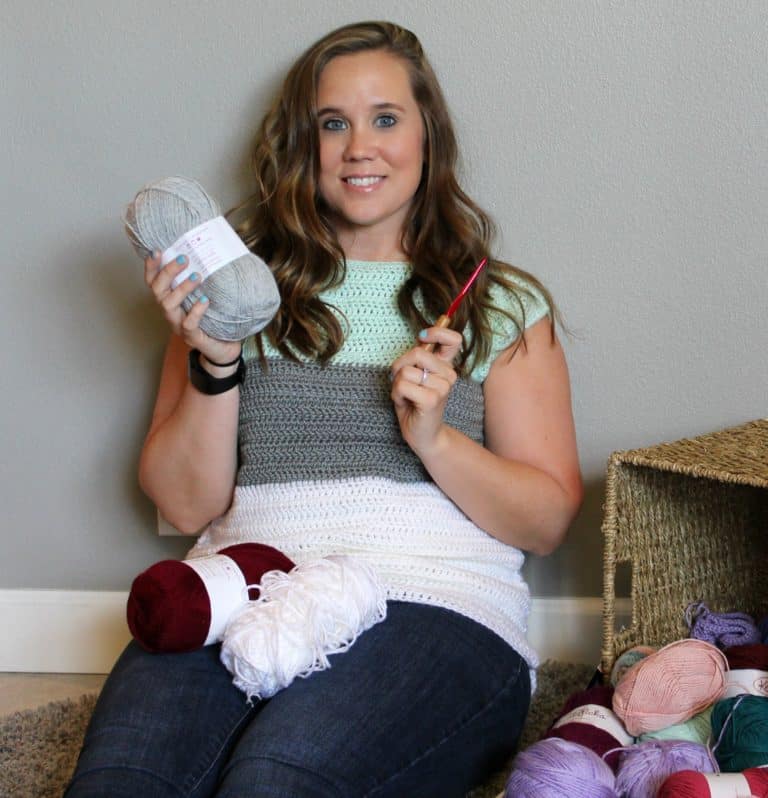
I am so excited to have one of my favorite crochet designers and friend, Amber of Bliss This, as a guest on the blog today!
About the Designer
Amber’s very first published pattern was a crocheted skirt! She’s been writing patterns for 3 years and focuses on designs that make all women feel fantastic.
Her Bliss This design specialties are earrings and skirts, but bags/purses are quickly becoming part of her repertoire.
Amber is also one of the co-founders of the Crochetmous Crew which aims to inspire, encourage, and feature crocheters, designers, and business owners.
When she isn’t designing crochet patterns, she can be found hanging out in the Pacific Northwest with her family (husband—AKA the Guapinator, 2 kids, and Yorkie mix pup). They enjoy watching Netflix, eating good food, hanging out at the lake, and kayaking. Amber claims crochet as her true passion but also loves teaching international university students English and academic skills “on the side.”
Places you can follow Amber and shop her patterns:
Bliss This Blog: https://amberblissthis.com/
Bliss This Ravelry Shop: https://www.ravelry.com/designers/amber-bliss-calderon
Bliss This Etsy Shop: https://www.etsy.com/shop/BlissThis
Bliss This Instagram: https://www.instagram.com/amberblissthis/
Bliss This Facebook: https://www.facebook.com/BlissThisbyAmber
Bliss This Pinterest: https://www.pinterest.com/ambercalderon/

If you love crocheting as much as I do, or want to learn more, or just want to show off your work, please join our Crochet Garments community over on Facebook! I hope you’ll share your finished crochet project with us!
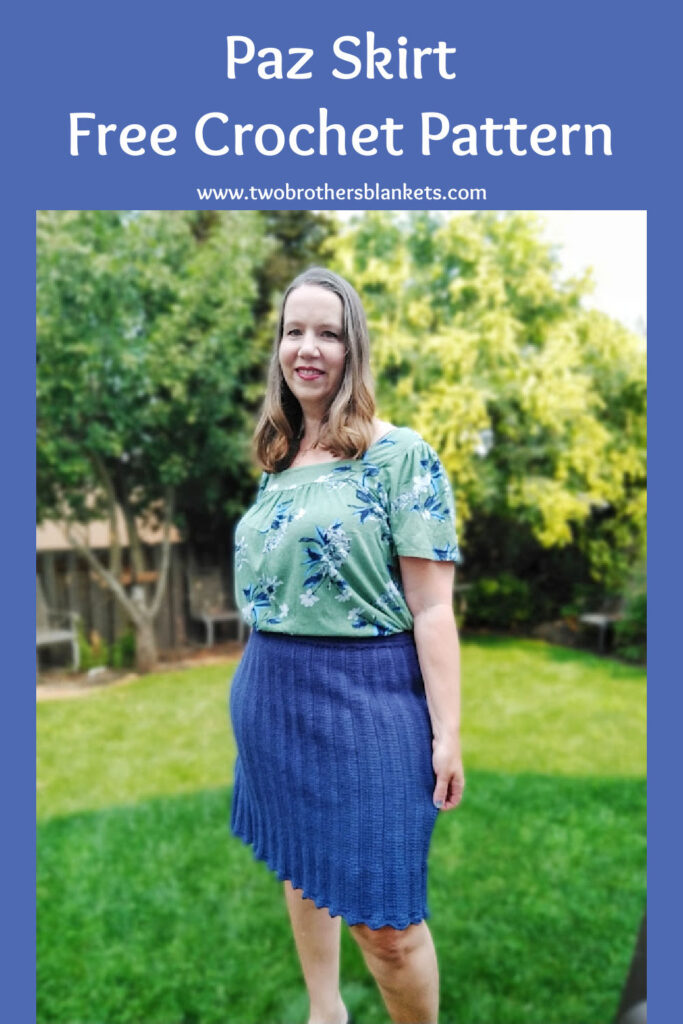
Why Crochet Skirts?
Amber writes:
I’ve always been partial to skirts, so it seemed only natural to start designing them. For one thing, they are a lot easier to make than a sweater (well, unless you are designing them and have to do the math for all the sizes!). But they are easier to make, I promise!
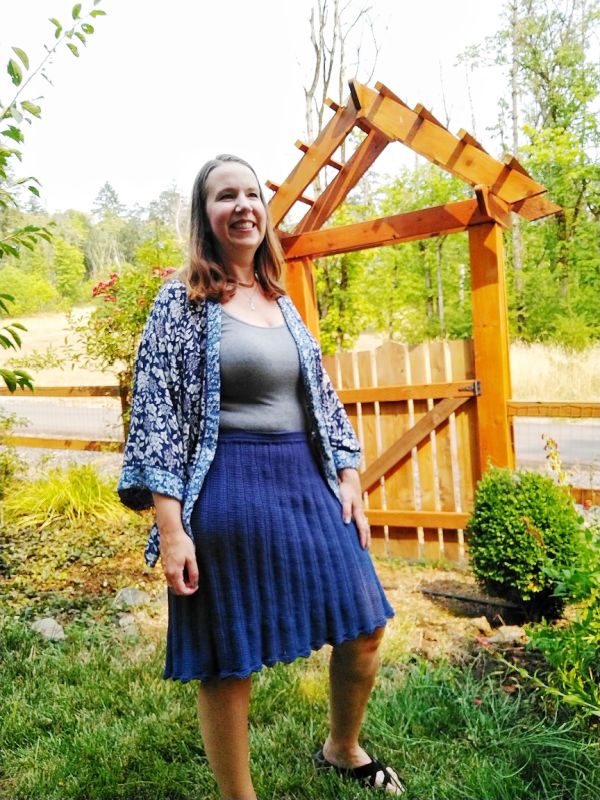
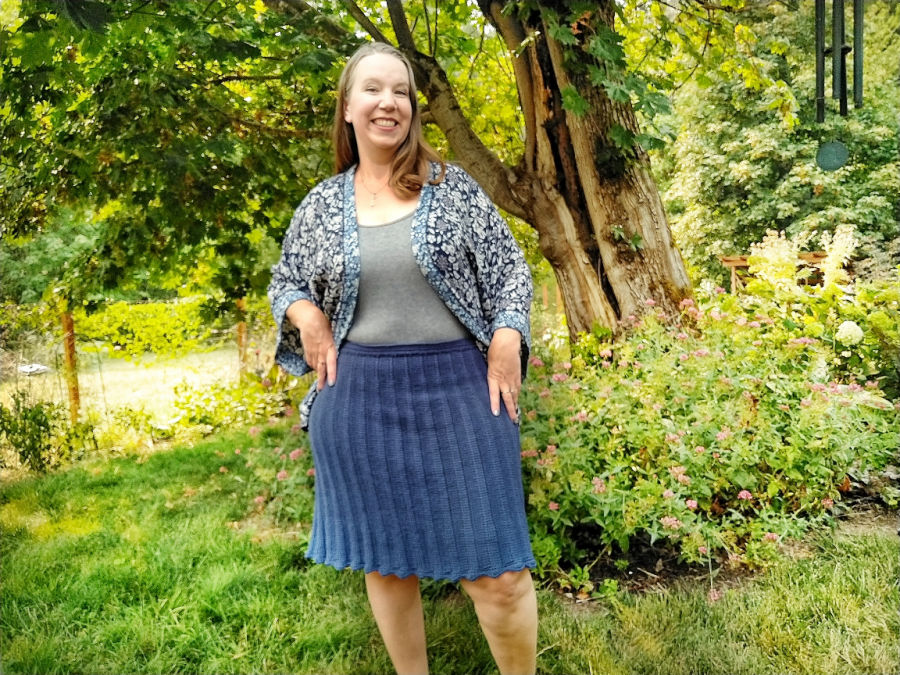
For another thing, they really do look great on all kinds of body types! I always make my skirt patterns customizable in the women’s sizes so that you can fit it perfectly to your body size and type! Trust me, I’m not a skinny-mini. I wear an extra-large and feel comfortable and stunning in my crocheted skirts. Finally, skirts are so fun, and they can be worn all year long. Why not join the ranks of people who LOVE making and wearing crocheted skirts!
Crochet Skirts for Women? Really?
They aren’t just for kids, I’m telling you! Skirts are flattering and fun for women. Yes, all women of all sizes. I’ve put together an article that tells you all about the ways my daughter and I wear our crocheted skirts year-round. The article details what to wear under your crocheted skirts to feel modest, comfortable, and fashionable!
Link to How to Wear Crocheted Skirts blog post: https://amberblissthis.com/how-to-wear-crocheted-skirts/
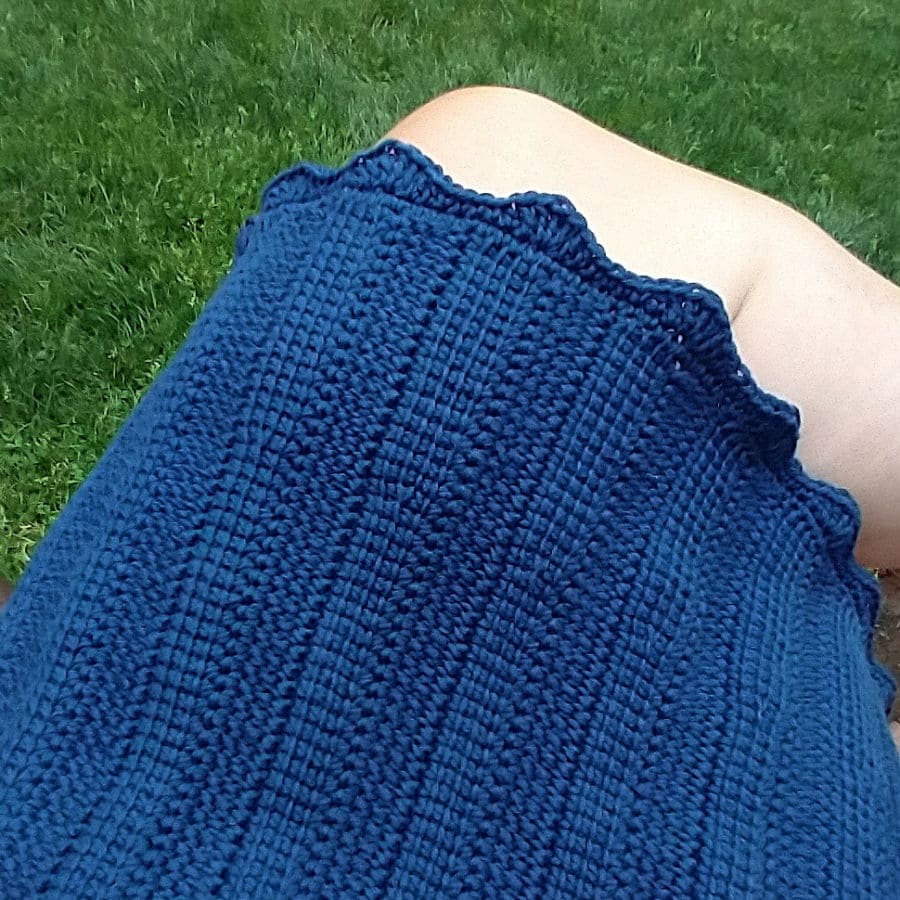
Stitch Description
The Paz Skirt is made with linked stitches. These are basically short rows of Tunisian crochet. Don’t stop reading there!! Keep reading the description; I promise it’s worth it. Tunisian crochet is one of those YOU LOVE IT or YOU HATE IT kinds of things. Let’s just say, I don’t love it. (GULP! Don’t come after me, Tunisian lovers, I LOVE LOOKING AT IT, I just don’t love doing it.) I DO, however, love linked stitches. It’s the look of Tunisian without needing a special hook.
The rows are simple to create, and once you get used to making linked stitches, you get into a total rhythm. It’s pretty addictive. In fact, this is my 3rd linked stitches pattern. I KNOW! It is a fun one! I hope you’ll give it a try. You can learn more about linked stitches by checking out this tutorial on my blog. https://amberblissthis.com/new-crochet-stitch-photo-tutorial-linked-stitches/.
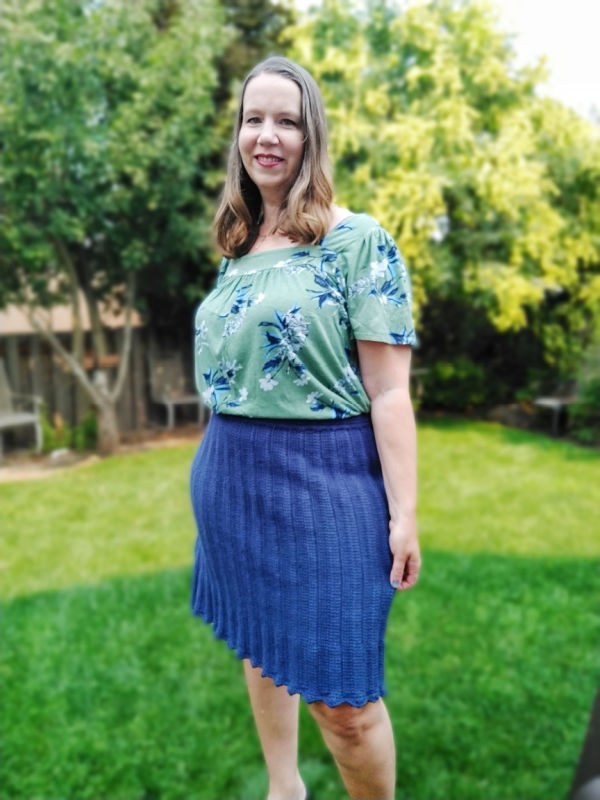
Paz Skirt Crochet Pattern
Materials
Bernat Softee Cotton or any DK (3) yarn
5.5 mm, I hook or hook required to meet GAUGE
Tapestry Needle
Scissors
Safety pin
Thread
Thread needle
Stitch markers (optional)
¾” elastic
Abbreviation & Stitch Key
3L = 3rd loop
BL(s) = back loop
ch = chain stitch
dc = double crochet
dec = decrease
FL(s) = front loop
hdc = half double crochet
hdcslst = half double crochet slip stitch
Ldc = linked double crochet
lp(s) = loop(s)
RS = right side
sc = single crochet
slst = slip stitch
st(s) = stitch(es)
tr = treble crochet
WS = wrong side
yo = yarn over
Gauge
17sts, 5 rows = 4”
Row 1: Step 1: Ch 21.
Step 2: Insert hook into 2nd ch from hook, pull up lp, [insert hook into next ch, pull up lp] 3 times—5 lps on hook, [yo, pull through 2 lps] 4 times. [1 linked st created]
Step 3: Insert hook into second vertical bar, pull up lp, [insert hook into next vertical bar, pull up lp] 2 times, insert hook into next ch, pull up lp—5 lps on hook, [yo, pull through 2 lps] 4 times. [1 linked st created]
Step 4: Repeat Step 3 15 times. [Row 1 completed with 17 sts]
Row 2: Step 1: Ch 4, turn.
Step 2: Insert hook into second ch from hook, pull up lp, [insert hook into next ch, pull up lp] 2 times, insert hook into next st, pull up lp—5 lps on hook, [yo, pull through 2 lps] 4 times. [1 linked st created]
Step 3: Insert hook into second vertical bar, pull up lp, [insert hook into next vertical bar, pull up lp] 2 times, insert hook into next st, pull up lp—5 lps on hook, [yo, pull through 2 lps] 4 times. [1 linked st created]
Step 4: Repeat Step 3 15 times. [Row 2 completed with 17 sts]
Rows 3-5: Repeat Row 2 3 times.
Special Stitches
Hdcslst = yo, insert hook into st, yo, pull through st and both lps on hook. Note: this stitch can also be referred to as a yarn over slip stitch.
Ldc = insert hook into horizontal bar in middle of previous st, pull up lp, insert hook into next st, pull up lp, [yo, pull through 2 lps] twice.
Note–to create the first Ldc in a row, do the following: ch 3, insert hook into second ch, pull up lp, insert hook into next st, pull up loop (you have 3 loops on hook), (yo, pull through 2 lps) twice.
Linked Sts = See photo tutorial for complete explanation. (Link to blog post with complete photo tutorial: https://amberblissthis.com/new-crochet-stitch-photo-tutorial-linked-stitches/.)
Pattern Notes
All directions are written in American Crochet Terms.
Body of skirt is created sideways in rows using linked sts, the waistband is created after and then folded down and sewn in place, creating a casing to insert your elastic in, an optional edging is then added to the bottom.
Pattern allows for customization to absolutely any size.
To fit to body, continue the 2-row repeats until the top of skirt, when laid flat, is at least 1-2” larger (1-2” positive ease) than the largest circumference (either hips or waist).
Directions in brackets [ ] are to be completed the number of times written in the pattern.
Directions in parentheses ( ) are to be worked into the same stitch.
Directions between asterisks * and ** are to be repeated around until round is completed.
St counts and st explanations are in bold brackets [ ] at the end of steps and rows throughout the pattern.
3L is located below and in front of the front and back loops of the hdcslst when working Row 4 of the waistband.
Stitch markers can be used to mark decrease sts for ease.
In skirt body, when inserting hook in 2 vertical bars, a dec is created. (See the photo tutorial.)+
Size Chart
| Size (indicates length of skirt) | Length—total length including waistband and edging | Hips(or Widest Part of Body | Approximate Yardage |
| Petite | 18” | Make to fit. Add 1-2” positive ease around hips or widest part. | 36.5 yds per 2 row rep |
| Regular | 20” | 39 yds per 2 row rep | |
| Tall | 22” | 41.5 yds per 2 row rep | |
| XTall | 24” | 44 yds per 2 row rep |
How to Estimate Yardage
2 row repeat is equal to approximately 1.4″ (across the top of the skirt, with a bit of stretch). Measure widest part around body to figure out how many repeats are needed. For example, my widest part around is 48″. 48 divided by 1.4 equals 34.28. So, rounding up, I will need to do 35 2-row repeats to be able to fit around and easily pull up my skirt (70 rows total). Don’t worry if your waist is much smaller; the elastic waistband will pull it in to fit.
The math:
35 multiplied by the estimated yardage of 41.5 yards for the tall size. I will need approximately 1452.5 yards for my skirt. (Note that this is a rough estimate and not my exact yardage.)
The formula:
Inches around widest part = number of 2 row repeats needed
1.4
(# of 2 row repeats needed) X (# of yards per 2 row repeat—See chart) = Yardage estimate
Women’s Sizes Petite (Regular, Tall, Extra Tall)
Skirt
Written for smallest size with other sizes in parentheses. If only one st count is given, it applies to all sizes.
Row 1:
Step 1: Ch 77 (85, 94, 102).
Step 2: Insert hook into 2nd ch from hook, pull up lp, [insert hook into next ch, pull up lp] 3 times—5 lps on hook, [yo, pull through 2 lps] 4 times. [1st linked st created]
Step 3: Insert hook into 2nd vertical bar, pull up lp, [insert hook into next vertical bar, pull up lp] 2 times, insert hook into next ch, pull up lp—5 lps on hook, [yo, pull through 2 lps] 4 times. [1 4-bar linked st created]
Step 4: Repeat Step 3 71 (79, 88, 96) times.
[Row 1 completed with 73 (81, 90, 98) 4-bar linked sts]
Row 2:
Step 1: Ch 5, turn.
Step 2: Insert hook into 2nd ch from hook, pull up lp, [insert hook into next ch, pull up lp] 3 times, insert hook into next st, pull up lp—6 lps on hook, [yo, pull through 2 lps] 5 times. [1 5-bar linked st created]
Step 3: Insert hook into 2nd vertical bar, pull up lp, [insert hook into next vertical bar, pull up lp] 3 times, insert hook into next st, pull up lp—6 loops on hook, [yo, pull through 2 lps] 5 times. [1 5-bar linked st created]
Step 4: Repeat Step 3 12 (12, 14, 14) times.
Step 5: Insert hook into 2nd vertical bar, pull up lp, insert hook into next 2 vertical bars, pull up lp, insert hook into next vertical bar, pull up lp, insert hook into next st, pull up lp—5 lps on hook, [yo, pull through 2 lps] 4 times. [1 4-bar linked st created]
Step 6: Insert hook into 2nd vertical bar, pull up lp, (insert hook into next vertical bar, pull up lp) 2 times, insert hook into next st, pull up lp—5 lps on hook, [yo, pull through 2 lps] 4 times. [1 4-bar linked st created]
Step 7: Repeat Step 6 35 (41, 48, 56) times.
Step 8: Insert hook into 2nd vertical bar, pull up lp, insert hook into next 2 vertical bars, pull up lp, insert hook into next st, pull up lp—4 lps on hook, [yo, pull through 2 lps] 3 times. [1 3-bar linked st created]
Step 9: Insert hook into 2nd vertical bar, pull up lp, insert hook into next vertical bar, pull up lp, insert hook into next st, pull up lp—4 loops on hook, [yo, pull through 2 lps] 3 times. [1 3-bar linked st created]
Step 10: Repeat Step 9 10 (12, 12, 12) times.
Step 11: Insert hook into 2nd and 3rd vertical bars, pull up lp, insert hook into next st, pull up lp—3 loops on hook, [yo, pull through 2 lps] 2 times. [1 2-bar linked st created]
Step 12: Insert hook into 2nd vertical bar, pull up lp, insert hook into next st, pull up lp—3 loops on hook, [yo, pull through 2 lps] 2 times. [1 2-bar linked st created]
Step 13: Repeat Step 12 8 times.
[Row 2 completed with 14(14, 16, 16) 5-bar linked sts, 37 (43, 50, 58) 4-bar linked sts, 12 (14, 14, 14) 3-bar linked sts, & 10 2-bar linked sts]
Note: Steps 5, 8, and 11 above create the dec.
Row 3:
Step 1: Ch 4, turn.
Step 2: Insert hook into 2nd ch from hook, pull up lp, [insert hook into next ch, pull up lp] 2 times, insert hook into next st, pull up lp—5 lps on hook, [yo, pull through 2 lps] 4 times. [1st 4-bar linked st created]
Step 3: Insert hook into 2nd vertical bar, pull up lp, [insert hook into next vertical bar, pull up lp] 2 times, insert hook into next st, pull up lp—5 loops on hook, [yo, pull through 2 lps] 4 times. [1 4-bar linked st created]
Step 4: Repeat Step 3 71 (79, 88, 96) times.
[Row 3 completed with 73 (81, 90, 98) 4-bar linked sts]
Rows 4-X: Repeat Rows 2 and 3 until you have 1-2” positive ease to go over hips (or widest part), ending after a Row 2 repeat and an even number of rows.
Do not continue until you check fit. Make sure that when seamed, the top of the skirt will easily pull on over hips, rear and up to waist. Do not be concerned if it is extremely loose around waist; the elastic will pull this in to fit at waist. If needed, add or remove rows in multiples of 2, always ending after a Row 2 repeat.
Waistband
Row 1 (RS): Ch 3, rotate to work along top edge of rows. Pull up lp in 2nd ch from hook, pull up lp between next vertical bars, complete dc, work Ldc across between each vertical bar—placing 6 Ldc per 2 rows.
Row 2 (WS): Ch 3, turn, Ldc in each st across.
Row 3 (RS): Ch 1, turn, hdcslst in each st across.
Row 4 (WS): Ch 3, turn, Ldc in 3L of each st across.
Row 5 (RS): Ch 3, Ldc in each st across.
Fasten off, leaving a long tail for seaming the waistband.
Seaming Waistband
Thread tapestry needle with long yarn tail. Fold waistband over, WS together. The FLs and BLs of the hdcslsts from Row 3 should be at the top and on RS. Stitch Row 5 to the body of the skirt to create a casing to insert elastic into.
Seaming Skirt
Thread tapestry needle with new length of yarn. Place the two sides of the skirt together and whip stitch the sides of skirt together from top of waistband to bottom of skirt, leaving the casing of the waistband open on WS of skirt to insert elastic.
Bottom Edging
Round 1: Join in bottom edge next to seam on side you choose as RS. Sc between each vertical bar across, placing 9 scs per 2 rows, slst in first sc to join.
Round 2: Ch 1, sc in same st and next, hdc, dc, (dc, tr, dc) in next, dc, hdc, sc in 2, *sc in 2, hdc, dc, (dc, tr, dc) in next, dc, hdc, sc in 2** repeat from * to ** around, slst in first sc to join.
Fasten off. Weave in ends.
Adding Elastic
Measure waist, cut 3/4” elastic to overlap by approximately ½”. Place a safety pin on one end of elastic and use it to work the elastic into the casing, being careful not to snag safety pin on sts. St the ends of the elastic together, either with a sewing machine or by hand with thread and needle. St casing closed or leave open as desired.
Now that You’re Hooked on Skirts
Skirts are a hidden treasure of the crochet world! They are so easy to make and fun to wear. Now that you’ve got a taste for how absolutely awesome crocheted skirts are, check out some of my other crochet skirt patterns! I have plenty to choose from. They all have instructions for toddler through adult sizes. This blog post gives you the inside scoop on my other crocheted skirts!
Do you love the Paz Skirt and want to make one for the favorite little miss in your life? Grab the PDF pattern to the Paz Skirt for kids in Ravelry.
Love this pattern? Check out my ever growing list of Free Crochet Patterns!
Be sure to check out my interview with Amber on the Garments and Gauge crochet podcast!
Pin It!