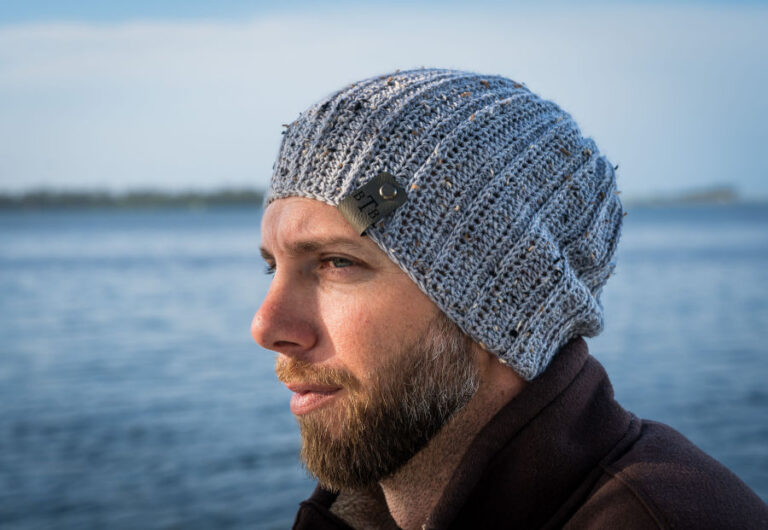
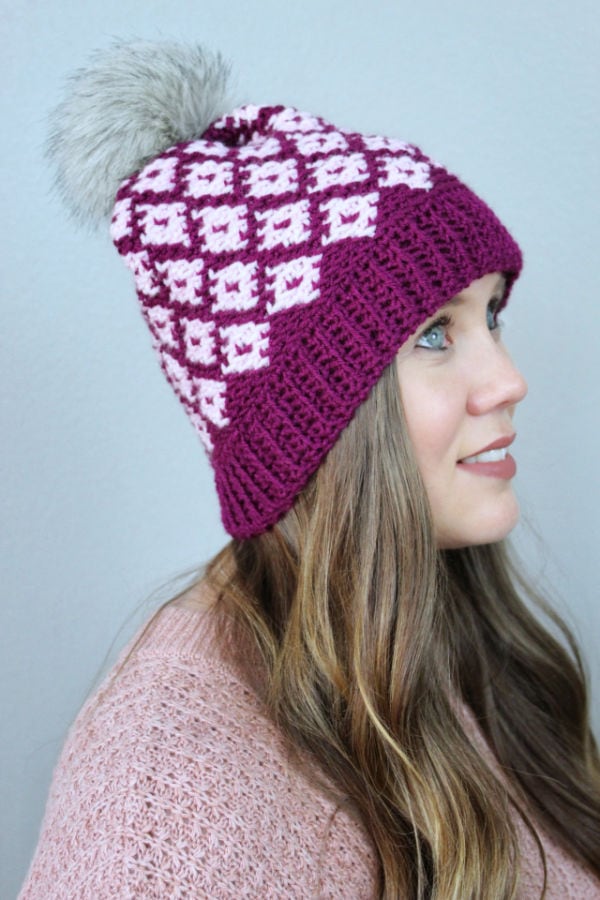
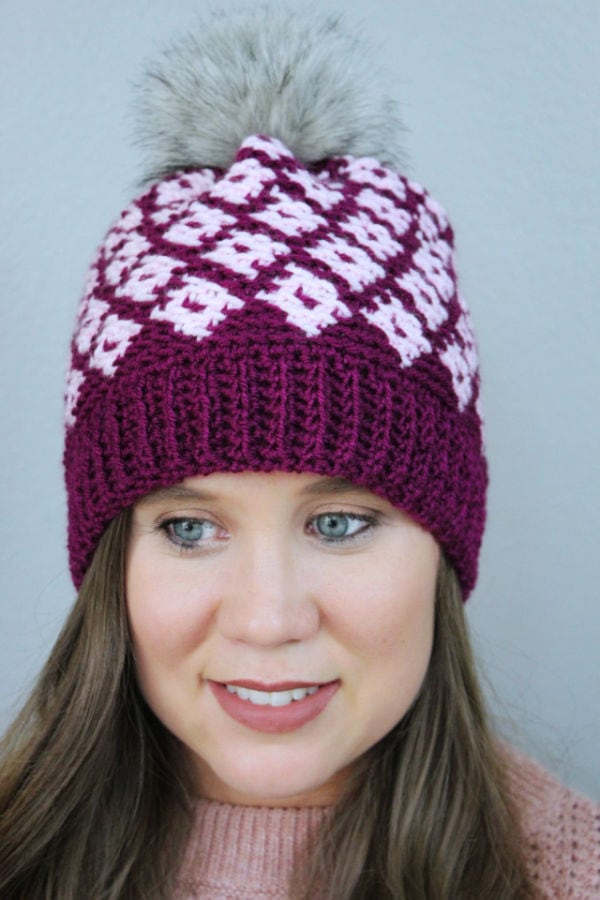
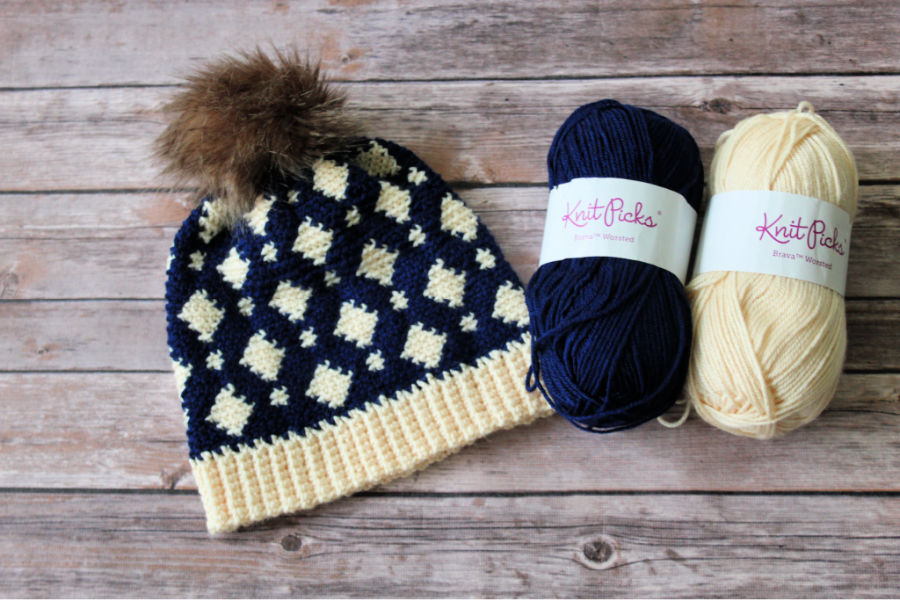
The Illusion Hat is another design using fair isle crochet technique. I call this the Illusion Hat because sometimes you see the contrasting color diamonds and sometimes you see the main color diamonds created in between!
Pattern Inspiration
I love using the fair isle crochet technique to make hats and beanies and other designs! My son wanted a fair isle crochet hat like some of my other designs, so I created this new one. Then of course I had to make one for myself!!
I love how simple this design is with the alternating diamonds and how the main color creates a diamond shape too, around the contrasting color. It’s a great hat for using lots of your favorite color combinations.
Which pops out at your first? The contrasting color or the small, skinny diamonds in the main color?

If you love crocheting as much as I do, or want to learn more, or just want to show off your work, please join our Crochet Garments community over on Facebook! I hope you’ll share your finished crochet project with us!
Pattern Details
The Yarn
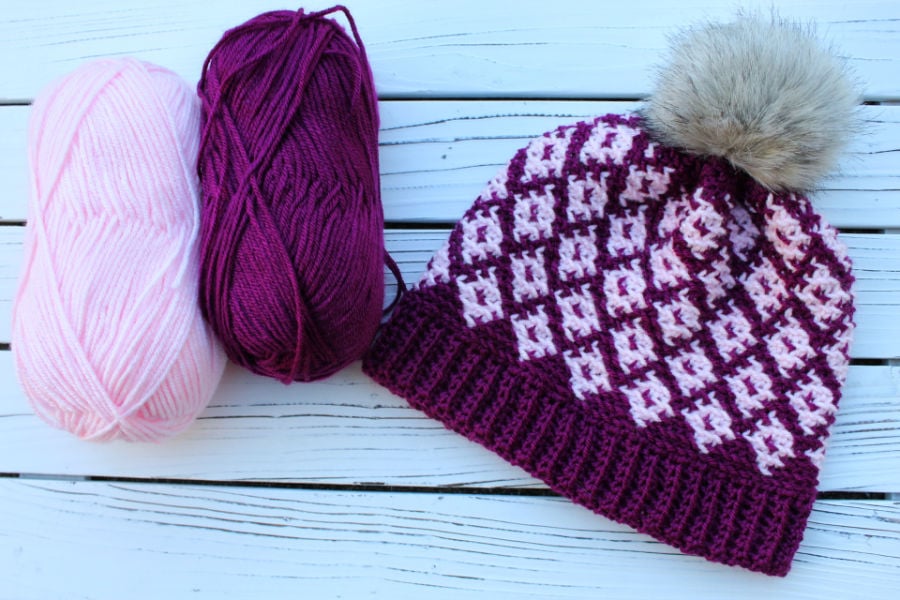
The Illusion Hat is made using at least 2 colors of worsted weight (#4) yarn. I used WeCrochet Brava Worsted in the colorways Fairy Tale and Blush.
Brava Worsted is one of my go-to yarns! It is 100% acrylic and SO soft! It comes in a huge variety of colors and is very affordable!
This crochet beanie is worked from the bottom up, starting with the brim. You will then work along the side of the brim to create the body of the hat.
The colors are categorized into main color and contrasting color.
This pattern is rated Easy in pattern difficulty. You will just use single crochet and single crochet 2 together throughout the entire hat. The Fair Isle Crochet technique is quite simple to learn.
The pattern comes with written instructions, a link to a video tutorial, photo tutorials, and a chart to follow. So even if you’ve never tried this technique before, the pattern will help you learn it!
The Illusion Hat crochet pattern comes in 6 sizes ranging from infant to adult. You will need between 50 and 150 yards of yarn, depending on what size you make.
How to Fair Isle Crochet
More Fair Isle Crochet Hat Patterns
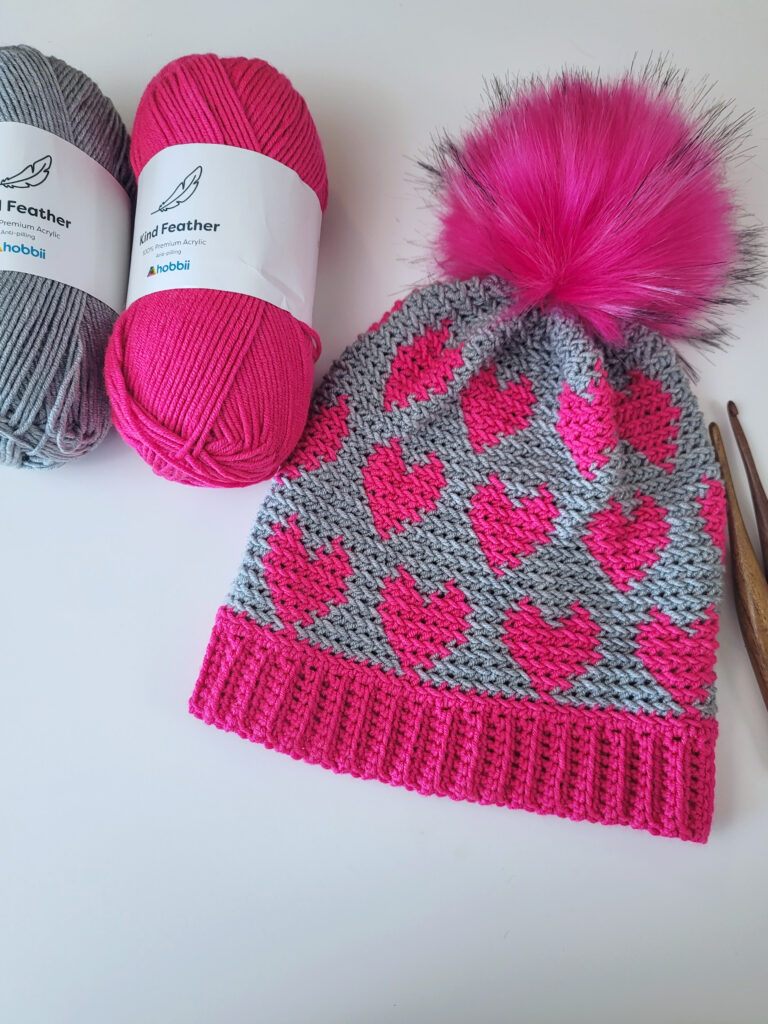
Love this pattern? You may also like some of these other colorful and cozy hat patterns that use the fair isle technique.

Ways to Access the Pattern
- Free on the blog as a blog subscriber: Blog Subscribers can access the full pattern for free here on the blog by logging in or signing up for a Grow Account.
- Upgrade to the ad-free, printable pdf pattern on Ravelry or Etsy. This pdf can be downloaded and/or printed for your convenience.
Illusion Hat
Get the PDF Pattern!
Upgrade to the ad-free, printable PDF download on Ravelry or Etsy!
Just want the free version? Scroll down below!
Want to try before you buy? Check out my ever growing list of Free Crochet Patterns!
Illusion Hat
Copyright © 2026 Michelle Ferguson – Two Brothers Blankets
All rights reserved. No part of this pattern may be reproduced, sold, or tampered with, in any form or by any means, without permission from the publisher.
Items produced from these patterns may be sold, but the patterns themselves may not be sold, shared, or altered in any way.
Yarn:
100% Premium Acrylic
100g/218yards
Hook:
I (5.5mm) crochet hook
Other Materials:
Pom (optional)
Gauge:
16 sc x 16 rows = 4”
Pattern Difficulty:
Easy
Stitches Needed & Abbreviations
st(s) – stitch(es)
ch(s) – chain(s)
sl st – slip stitch
sc – single crochet
blo – back loop only
sc2tog – single crochet 2 together
MC – main color
CC – contrasting color
** – repeat from
Sizing:
- 0-6m (15-16” head circumference)
- 6-12m (16-18”)
- Toddler (18-20”)
- Child (20-21”)
- Teen (21-22”)
- Adult (22-23”)
Pattern Notes:
Hat is worked from the bottom up.
Starting ch 1 does not count as 1st st. Hat is made in fair isle crochet style.
Unused yarn is floated behind the stitches until it is used again.
If more than 7 stitches are used before a color change, catch your float halfway through.
Watch your tension throughout the workup. Do not pull your floats too tight behind the stitches.
Entire pattern is worked in blo sc, unless stated otherwise within the pattern.
Join your rounds in both loops.
Number of stitches worked in either Main Color or Contrasting Color is indicated as MC() or CC()
throughout pattern.
Pattern is written in 0-6m sizes with additional sizes in parentheses as follows: 0-6m (6-12m, Toddler, Child, Teen, Adult).
Crochet graph is provided below if you prefer to follow that. Photo tutorial for color changes is also provided.
You may want to go down a hook size to work brim as it is very stretchy, and the hat is not.
Access The Pattern
To access exclusive content, click the button to access the Grow.me app and sign in or create an account. You can create an account via your Google or Facebook accounts, or use an email and create a password.
Once you’ve created an account and signed in you will have access to all of the exclusive content on my blog. You’ll just need to sign in. If you forgot your password, simply click the “Forgot My Password” button to retrieve it. I cannot get access to your grow account to retrieve it for you.
Thank you so much for being a blog subscriber and I hope you enjoy the exclusive content!
Illusion Hat Crochet Pattern:
Brim
*Go down one hook size from what you met gauge with.
With MC: Ch 9
Row 1: sc in 2nd ch from hook and in each ch across. (8)
Row 2: Ch 1, turn, in blo, sc in each st across. (8)
Rows 3-60 (66, 72, 78, 84, 90): Repeat row 2.
Sew both ends of the brim together by slip stitching through both stitches across each end. Turn brim to the other side and continue to Body of Hat.
Body of Hat
Go back to the hook size you met gauge with.
Round 1: (With MC) Ch 1, (in both loops) work 60 (66, 72, 78, 84, 90) sc evenly around side of brim. Join to 1st st. (60, 66, 72, 78, 84, 90)
Round 2: (in blo here and throughout) Ch 1, *MC(5), CC(1)*, repeat from * around to last 6 sts, MC(6), join to 1st st. (60, 66, 72, 78, 84, 90)
Round 3: Ch 1, MC (4), CC(3), *MC(3), CC(3)*, repeat from * to last 5 sts, MC(5), join to 1st st. (60, 66, 72, 78, 84, 90)
Round 4: Ch 1, MC(3), *CC(2), MC(1), CC(2), MC(1)*, repeat from * around to last 4 stitches, MC(4), join to 1st st. (60, 66, 72, 78, 84, 90)
Round 5: Ch 1, MC(4), CC(3), *MC (3), CC(3)*, repeat from * to last 5 sts, MC(5), join to 1st st. (60, 66, 72, 78, 84, 90)
Round 6: Ch 1, *MC(2), CC(1)*, repeat from * to last 3 sts, MC(3), join to 1st st. (60, 66, 72, 78, 84, 90)
Round 7: Ch 1, MC(1), CC(3), *MC(3), CC(3)*, repeat from * around to last 2 sts, MC(2), join to 1st st. (60, 66, 72, 78, 84, 90)
Round 8: Ch 1, *CC(2), MC(1)*, repeat from * around, join to 1st st. (60, 66, 72, 78, 84, 90)
Round 9: Ch 1, MC(1), CC(3), *MC(3), CC(3)*, repeat from * around to last 2 sts, MC(2), join to 1st st. (60, 66, 72, 78, 84, 90)
Round 10: Ch 1, MC (2), CC(1), *MC(2), CC(1)*, repeat from * to last 3 sts, MC(3), join to 1st st. (60, 66, 72, 78, 84, 90)
Stop here for infant sizes. Move on to decreases.
Toddler and Child Size:
Repeat rounds 3-9 one more time.
Round 18: Ch 1, MC(2), CC(1), *MC(5), CC(1), repeat from * around to last 3 sts, MC(3), join to 1st st. (72, 78)
Do not fasten off. Move on to decreases.
Teen and Adult Size:
Repeat rounds 3-10 one more time.
Repeat rounds 3-5 one more time.
Round 22: Ch 1, MC(2), CC(1), *MC(5), CC(1), repeat from * around to last 3 sts, MC(3), join to 1st st. (84, 90)
Do not fasten off. Move on to decreases.
Decreases
Fasten off CC and use only MC for the rest of the hat.
Round 20: Ch 1, 1 sc in each st around, join to 1st st. (60, 66, 72, 78, 84, 90)
Round 21: Ch 1, sc2tog, repeat from * around, join to 1st st. (30, 33, 36, 39, 42, 45)
Round 22: Ch 1, 1 sc in each st around, join to 1st st. (30, 33, 36, 39, 42, 45) Round 23: Ch 1, sc2tog,
repeat from * around, (for odd numbered sizes, sc in last), join to 1st st. (15, 17, 18, 20, 21, 23)
Fasten off leaving a long tail to sew the top closed.
With a tapestry needle, weave the tail in and out of the stitches and pull tight to close. Weave in ends.
Add pom pom if desired.
Fair Isle Crochet Chart for the Illusion Hat
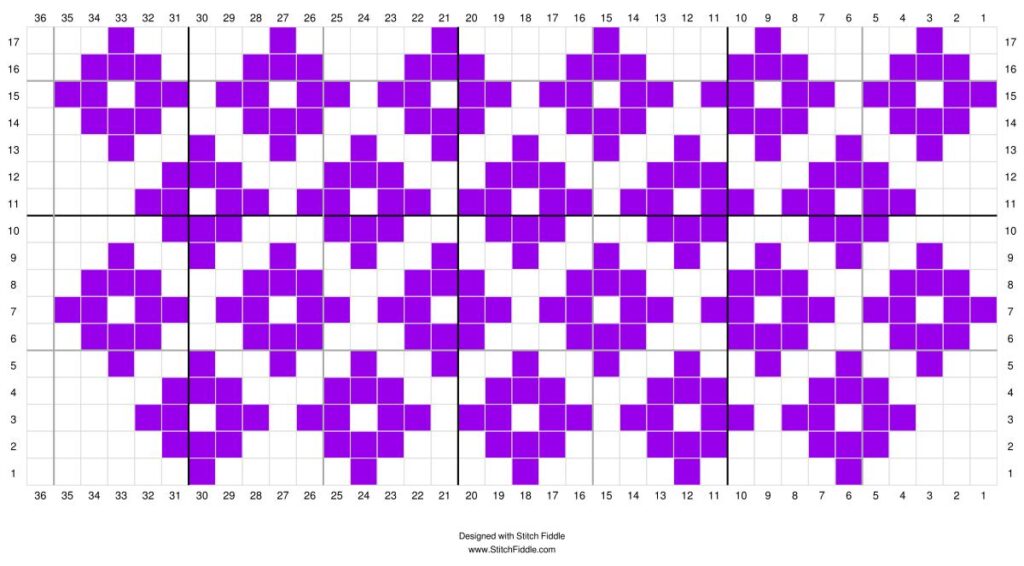
Photo Tutorial for Color Changes and Floats
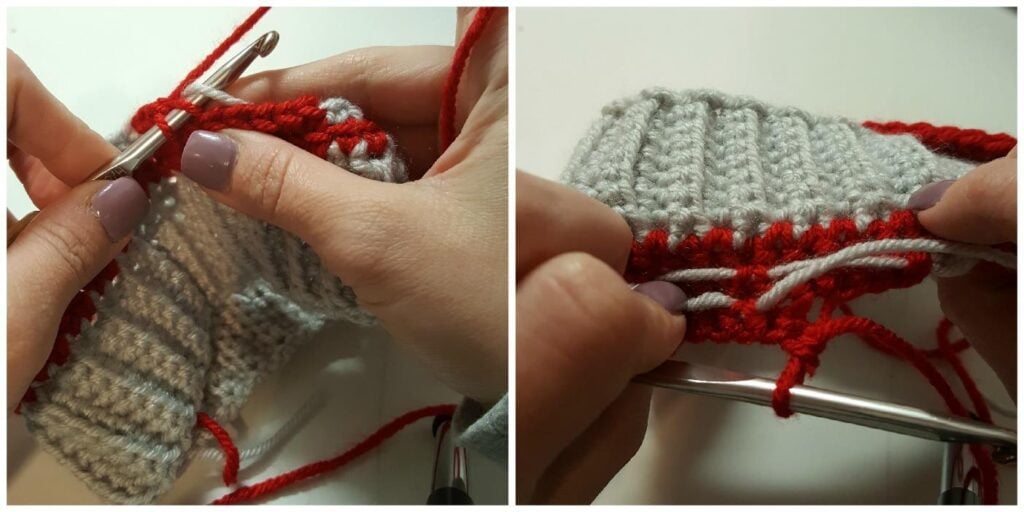
To change colors, instead of finishing out the last stitch before you go to the next color, pull the next color through the 2 loops for the last step of your stitch. This will finish out your last stitch and start you off with the new color for your next stitch.
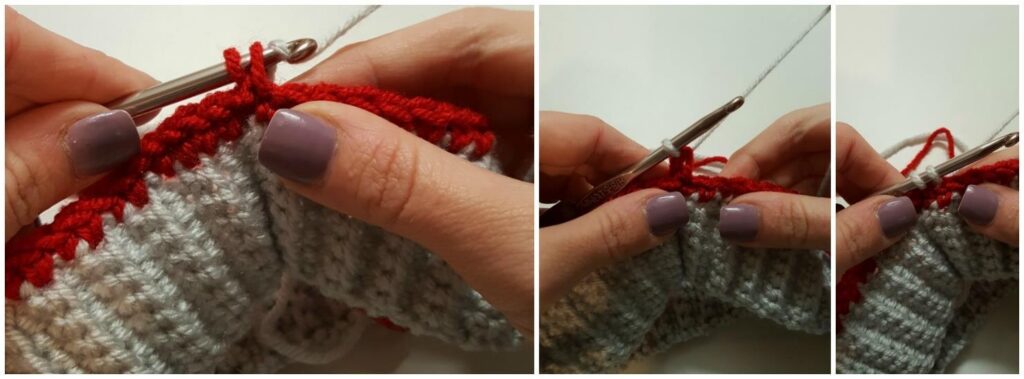
To catch your float when working 7 stitches or more in the same color, simply grab your non-working yarn when working a middle stitch and then drop it again until your next color change.
Pin It!
Free Blanket Pattern + More!
Sign up for our newsletter and receive a Dude Blanket crochet pattern pdf FREE straight to your inbox.