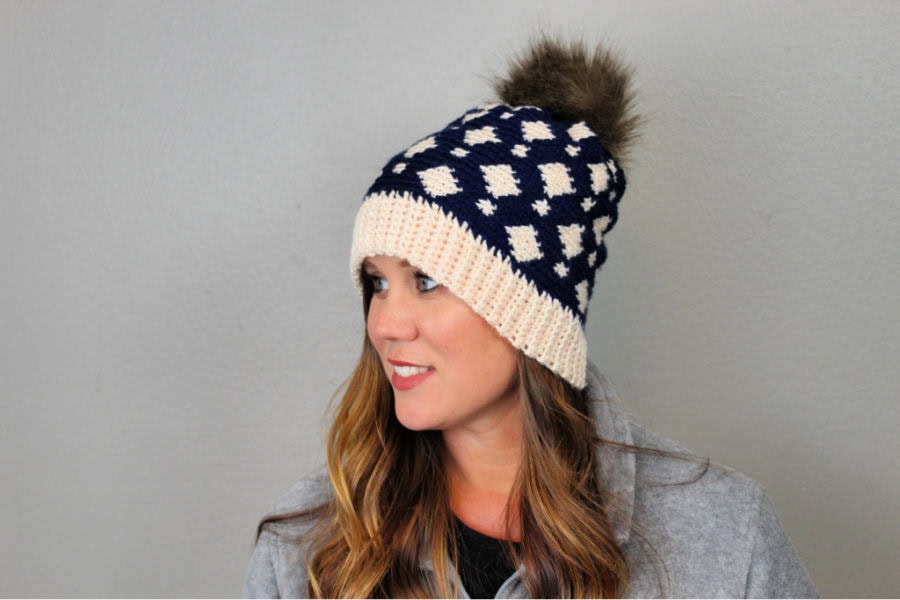
I was designing this fair isle crochet hat when the horrible wildfires swept through Gatlinburg and the Smoky Mountains in November 2016.
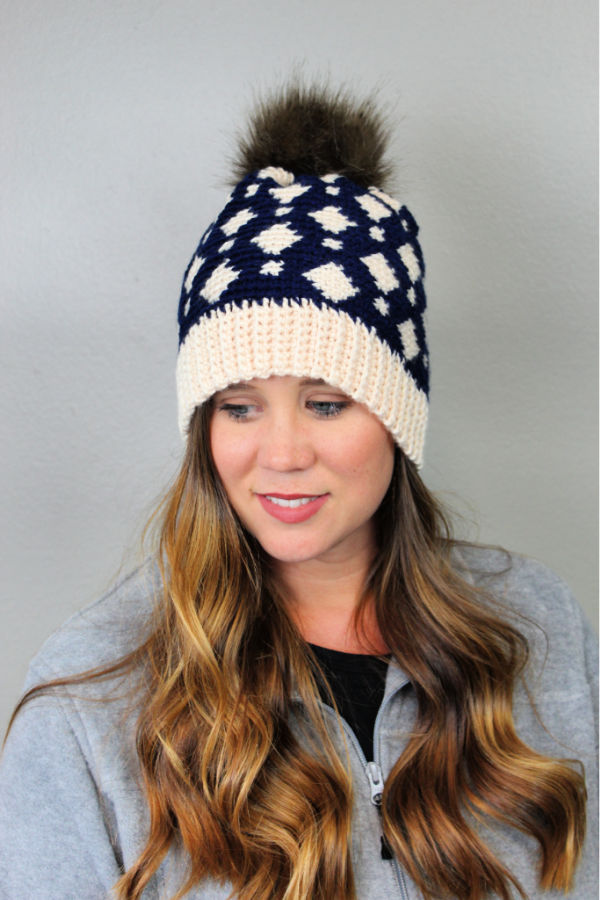
After seeing all the devastation, I decided to keep the tradition of naming my designs after cities and name this hat the Gatlinburg Hat.
The first week of the pattern release, all profits were donated to the wildfire relief. We were able to send over $200! The crochet community came together in a great way!
Inspiration
This crochet beanie was my first Fair Isle Crochet project. I loved the idea of making a picture with my crochet, but I didn’t love the idea of working over my yarn, like in Tapestry crochet.
So I did some research and discovered Fair Isle crochet. I loved it! I wanted to start off simple, so I created the diamonds design and went from there.
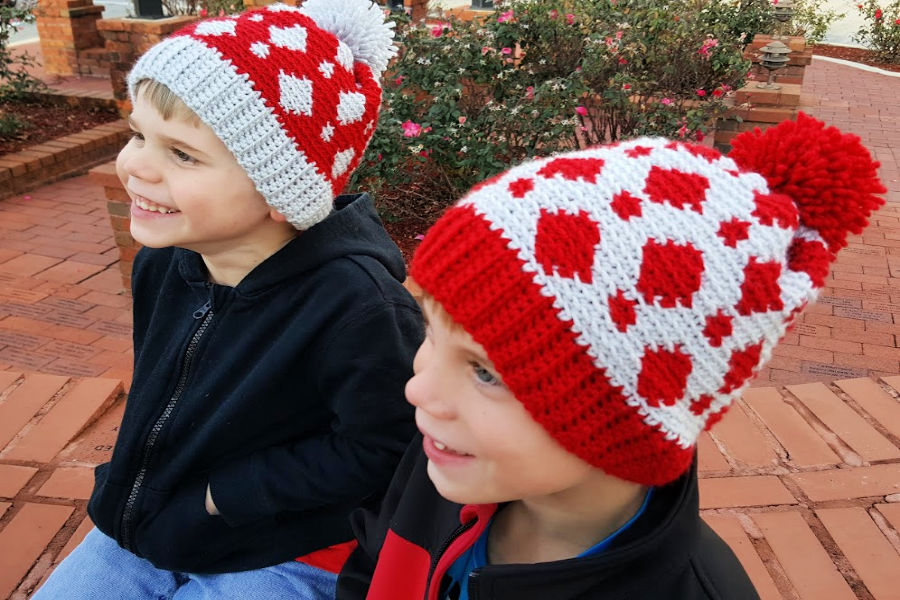
This hat worked really well for winter hats for my boys and they loved them! They were comfy and warm and could be made in any of their favorite colors!

If you love crocheting as much as I do, or want to learn more, or just want to show off your work, please join our Crochet Garments community over on Facebook! I hope you’ll share your finished crochet project with us!
Pattern Details
The Gatlinburg Hat is made using fair isle crochet techniques. It is very much like tapestry crochet.
With fair isle crochet you float your yarn along the back instead of working around it in your stitches. This ensures that the yarn doesn’t show up in your stitches, and helps you have more control of the tension as well.
This technique is a great way to create different pictures within your crochet! I like to use Stitch Fiddle to create my charts and then use the charts to create the look I want!
This pattern is a great beginner pattern for those who have never done fair isle or tapestry crochet.
The pattern includes written instructions, links to video tutorials, picture tutorials and a graph!
You only need to know the basic single crochet stitch and how to work in the back loop only. The rest is taught to you within the pattern! If you prefer to learn by watching, check out my Fair Isle Crochet Tutorial on YouTube.
Also, I am always available for pattern support. Just send me an email!
The hat is made from the bottom up, with the ribbed brim created first. Check out my tutorial on How to Create a Ribbed Trim if you need some help with this part.
Supplies
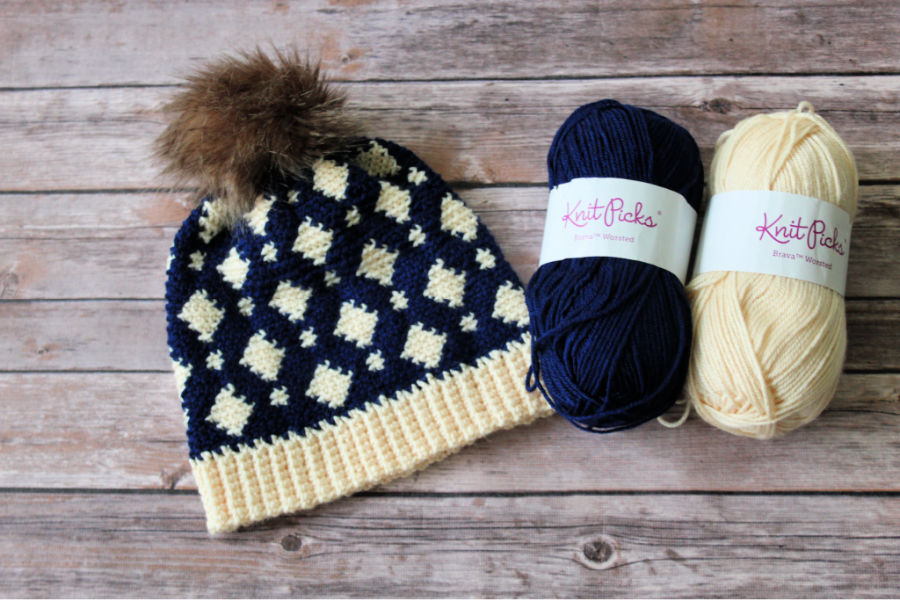
You will need approximately 175-200 yards of worsted (#4) weight yarn in two of your favorite colors.
A favorite worsted (#4) weight yarn of mine is Brava Worsted from WeCrochet! It is 100% premium acrylic yarn that comes in a huge variety of colors and is very affordable! I love using Brava Worsted for hats, sweaters, blankets, and many other projects!
You will need an I/9 (5.5mm) crochet hook, or hook to obtain gauge. Gauge is especially important in crocheting wearables, so be sure to check!
You will also need scissors, measuring tape, and a yarn needle for weaving in your ends.
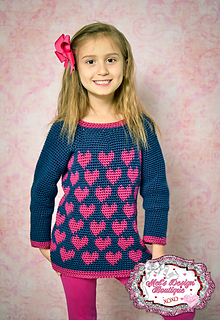
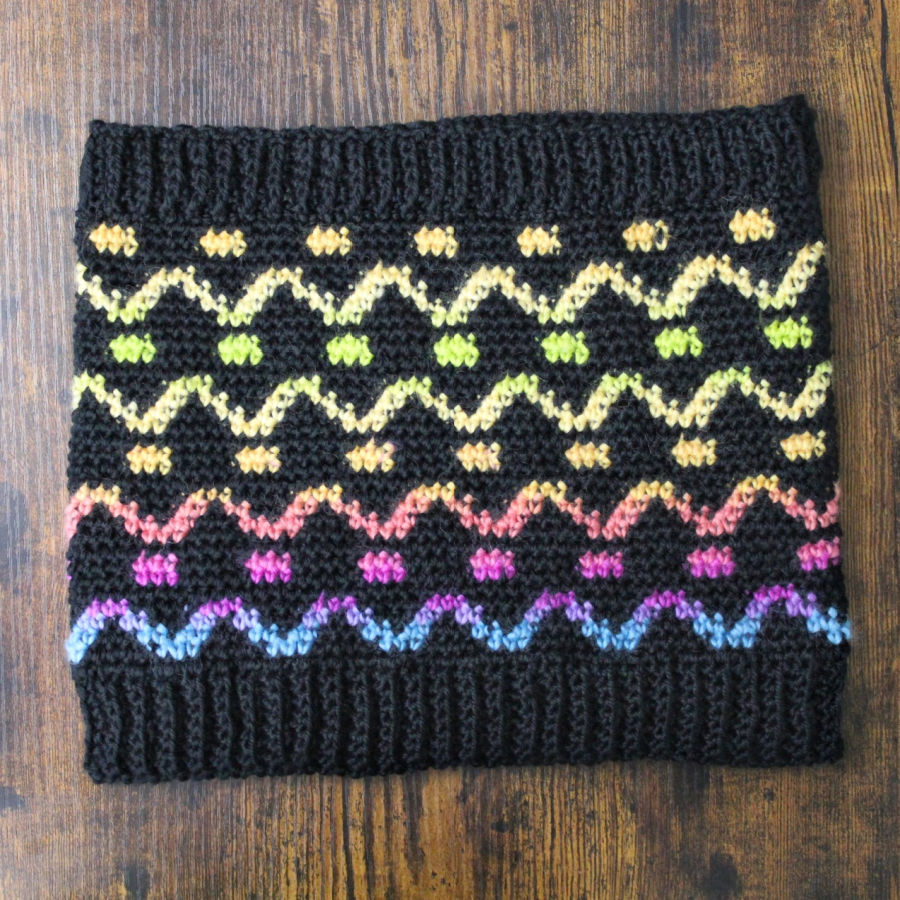
More Fair Isle Crochet Patterns
Love this pattern? You may also like some of these other Fair Isle crochet patterns that also use this fun technique!


Ways to Access the Pattern
- Free on the blog as a blog subscriber: Blog Subscribers can access the full pattern for free here on the blog by logging in or signing up for a Grow Account.
- Upgrade to the ad-free, printable pdf pattern on Ravelry or Etsy. This pdf can be downloaded and/or printed for your convenience.
Gatlinburg Hat
Get the PDF Pattern!
Upgrade to the ad-free, printable PDF download on Ravelry or Etsy!
Just want the free version? Scroll down below!
Want to try before you buy? Check out my ever growing list of Free Crochet Patterns!
Gatlinburg Hat
Copyright © 2026 Michelle Ferguson – Two Brothers Blankets
All rights reserved. No part of this pattern may be reproduced, sold, or tampered with, in any form or by any means, without permission from the publisher.
Items produced from these patterns may be sold, but the patterns themselves may not be sold, shared, or altered in any way.
Yarn:
100% Premium Acrylic
100g/218yds
Hook:
I/9 (5.5mm) crochet hook
Other Materials:
Pom maker or faux fur pom (optional)
Gauge:
16 sc x 16 rows = 4”
Pattern Difficulty:
Easy
Stitches Needed & Abbreviations
st – stitch(es)
ch – chain
sl st – slip stitch
sc – single crochet
blo – back loop only
sc2tog – single crochet 2 together
MC – main color
CC – contrasting color
**- repeat what is inside these symbols
Sizing:
| Size | Bust Circumference | Finished Circumference | Finished Length | Yardage |
| Toddler | 18-20” | 16.5” | 7.5” | 102/85 |
| Child | 20-21″ | 19.5″ | 8.5″ | 120/100 |
| Adult | 22-23″ | 22.5″ | 10” | 139/115 |
Pattern Notes:
Pattern is in US terms.
Hat is worked from the bottom up. Starting chain 1 does not count as first stitch.
Hat is made in fair isle crochet style. Unused yarn is floated behind the stitches until it is used again. If more than 7 stitches are used before a color change, catch your float halfway through.
Entire pattern is worked in blo sc, unless stated otherwise within the pattern. Join your round in both loops.
Pattern is written in toddler size with larger sizes in parentheses as follows: Toddler (Child, Adult).
Crochet graph of the pattern is provided below, if you prefer to follow that. Photo tutorial for color changes and catching your floats is also provided.
Pattern is written as number of stitches to work with what color to use as follows: 2 (MC), 2 (CC).
Video guide on Fair Isle Crochet: https://youtu.be/7sJYa948S0U?si=Y4VhvwQcen_0bQ6X
Access The Pattern
To access exclusive content, click the button to access the Grow.me app and sign in or create an account. You can create an account via your Google or Facebook accounts, or use an email and create a password.
Once you’ve created an account and signed in you will have access to all of the exclusive content on my blog. You’ll just need to sign in. If you forgot your password, simply click the “Forgot My Password” button to retrieve it. I cannot get access to your grow account to retrieve it for you.
Thank you so much for being a blog subscriber and I hope you enjoy the exclusive content!
Gatlinburg Hat Crochet Pattern:
Brim of Hat
With CC, Ch 9.
Row 1: Sc in 2nd ch from hook and across. (8)
Row 2: Ch 1, turn, sc in blo of each st across. (8)
Rows 3-64 (76, 88): Repeat row 2.
Sew both ends of the brim together by slip stitching through both stitches across. Turn brim to the other side and continue to Body of Hat.
Body of Hat
Join MC now.
Round 1: Ch 1, (in both loops) work 66 (78, 90) sc evenly around the side of the brim, join to 1st st. (66, 78, 90)
You will now be working in blo of each stitch in every round throughout the pattern.
Round 2: Ch 1, 2(MC), 2 (CC), *10 (MC), 2 (CC)*, repeat from * to last 2 st, 2 (MC), join to 1st st. (66, 78, 90)
Round 3: Ch 1, 1 (MC), 4 (CC), *8 (MC), 4 (CC)*, repeat from * to last st, 1 (MC), join to 1st st. (66, 78, 90)
Round 4: (change color at join- see video tutorial) Ch 1, 6 (CC), *2 (MC), 2 (CC), 2 (MC), 6
(CC)*, repeat from * around, join to 1st st. (66, 78, 90)
Round 5: (change color at join- see video tutorial) Ch 1, 1 (MC),4 (CC), *3 (MC), 2 (CC), 3 (MC), 4 (CC)*, repeat from * to last st, 1 (MC), join to 1st st. (66, 78, 90)
Round 6: Ch 1, 2 (MC), 2 (CC), *10 (MC), 2 (CC)*, repeat from * to last 2 st, 2 (MC), join to 1st st. (66, 78, 90)
Round 7: Ch 1, 8 (MC), 2 (CC), *10 (MC), 2 (CC)*, repeat from * to last 8 st, 8 (MC), join to 1st st.
(66, 78, 90)
Round 8: Ch 1, 7 (MC), 4 (CC), * 8 (MC), 4 (CC)*, repeat from * to last 7 st, 7 (MC), join to 1st st. (66, 78, 90)
Round 9: Ch 1, 2 (MC), 2 (CC), 2 (MC), *6 (CC), 2 (MC), 2 (CC), 2 (MC)*, repeat from * around,
join to 1st st. (66, 78, 90)
Round 10: Ch 1, 2 (MC), 2 (CC), *3 (MC), 4 (CC), 33 (MC), 2 (CC)*, repeat from * to last 2 st, 2 (MC), join to 1st st. (66, 78, 90)
Round 11: Ch 1, 8 (MC), 2 (CC), *10 (MC), 2 (CC)*, repeat from * to last 8 st, 8 (MC), join to 1st st. (66, 78, 90)
Repeat rounds 2-6 one more time for toddler size.
Repeat rounds 2-11 one more time for child size.
Repeat rounds 2-11 one more time and then 2-6 one more time for adult size.
Fasten off CC. You will only use MC from now until the end, still in blo.
Round 12: Ch 1, *sc2tog*, repeat from * around, join to 1st st. (33, 39,45)
Round 13: Ch 1, sc in 1st st, sc2tog, *sc in next st, sc2tog*, repeat from * around, join to 1st st. (22, 26, 30)
Round 14: Ch 1, *sc2tog*, repeat from * around, join to 1st st. (11, 13, 15)
Fasten off hat leaving a long tail to weave closed. With a tapestry needle, weave the tail in
and out of the stitches in round 14. Pull tight to close. Fasten off. Weave in ends. Add Pompom to top of hat.
Fair Isle Crochet Chart for the Camden Hat
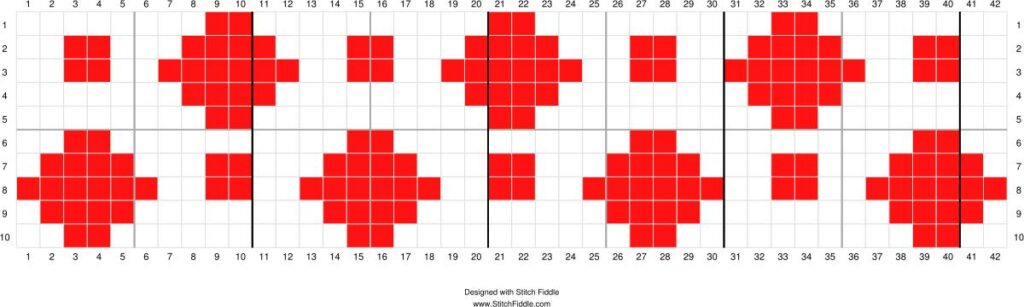
To follow chart, start with row 10 and work your way across each column , left to right. Then work your way up each row until you reach row 1. Row 10 = Round 2 in written pattern. Row 1= Round 11 in written pattern.
Photo Tutorial for Color Changes and Floats
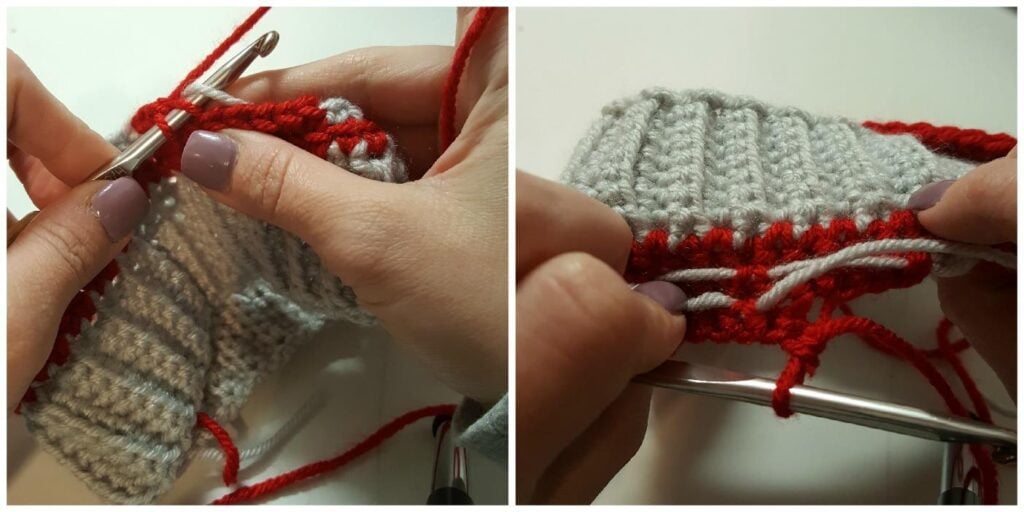
To change colors, instead of finishing out the last stitch before you go to the next color, pull the next color through the 2 loops for the last step of your stitch. This will finish out your last stitch and start you off with the new color for your next stitch.
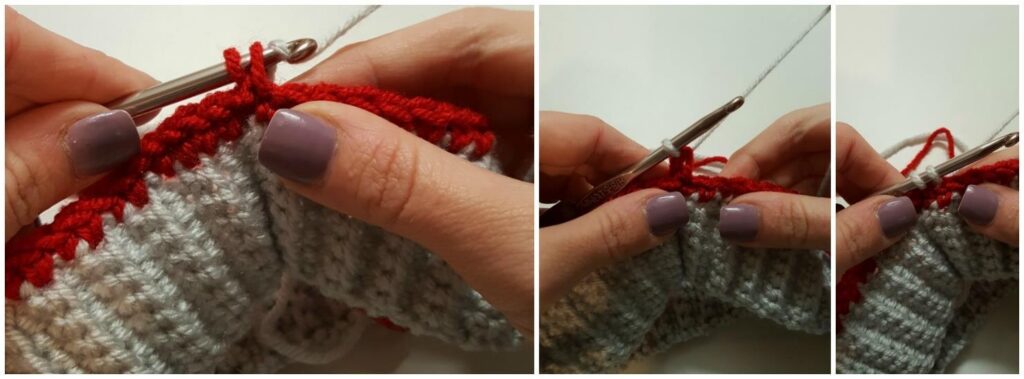
To catch your float when working 7 stitches or more in the same color, simply grab your non-working yarn when working a middle stitch and then drop it again until your next color change.
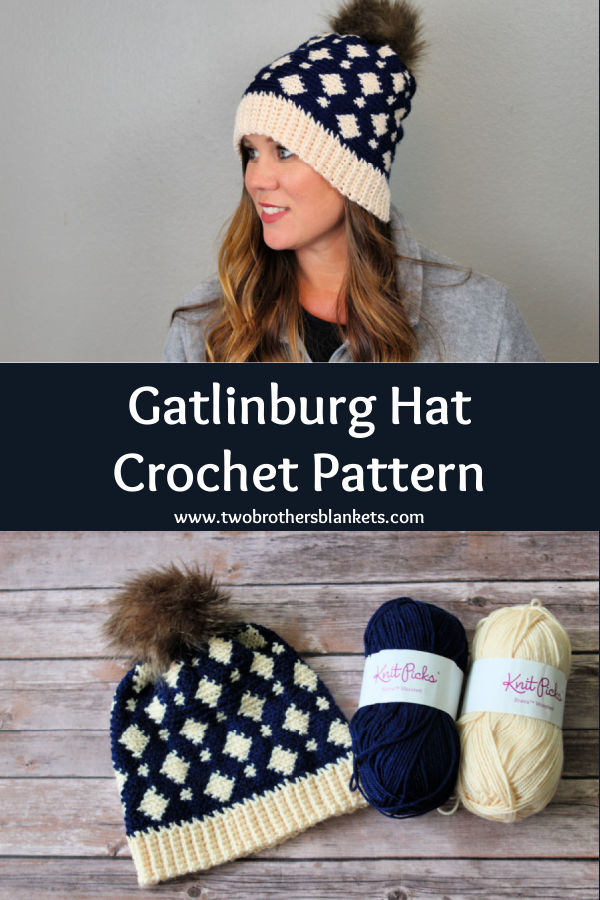
Pin It!
Free Blanket Pattern + More!
Sign up for our newsletter and receive a Dude Blanket crochet pattern pdf FREE straight to your inbox.

Free Blanket Pattern + More!
Sign up for our newsletter and receive a Dude Blanket crochet pattern pdf FREE straight to your inbox.



Bless you for your contribution!