Do you love summer tops? This Button up pattern is such a fun one!
I am so happy to have Roeska from Handmade by Roeska on the blog today sharing this awesome crochet top pattern!
About the Designer
Roeska is a Tunisian Crochet designer that is based in the Netherlands. She has been designing since the summer of 2020. She believes in creating beginner friendly, size inclusive patterns to introduce makers into Tunisian garments. She utilizes basic stitches with a unique usage of color that looks complicated, but are deceptively easy, and truly addicting.
When Roeska is not coming up with new designs, she splits her time between testing patterns for other designers and enjoying the company of her husband and three little ones. Her daughter has enjoyed challenging and inspiring Mommy’s new designs.
Roeska’s “day shift” profession is a lecturer of biomedical sciences at a local University, which she enjoys very much. Recently Roeska has started a blog about diversity and inclusion in the yarn/fiber community.
You can check out more of Roeska patterns on Ravelry!

If you love crocheting as much as I do, or want to learn more, or just want to show off your work, please join our Crochet Garments community over on Facebook! I hope you’ll share your finished crochet project with us!
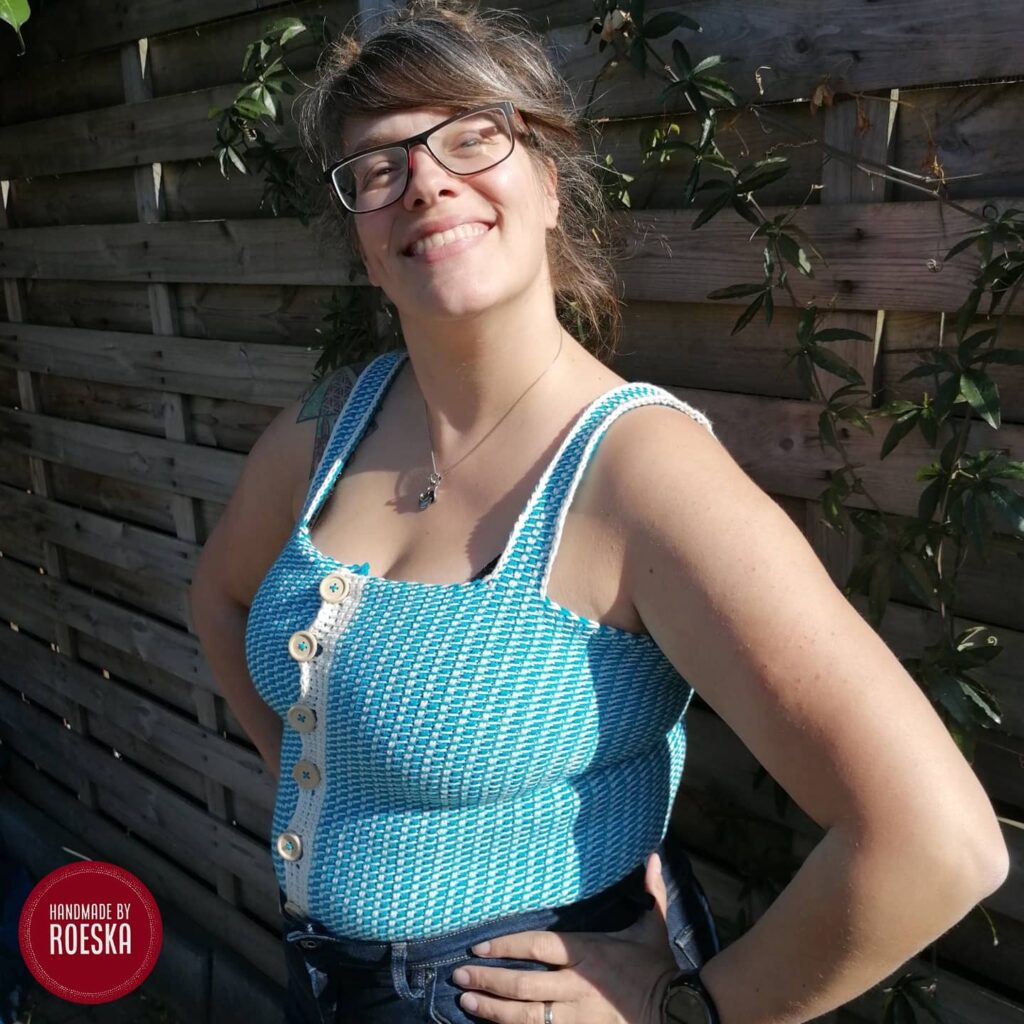
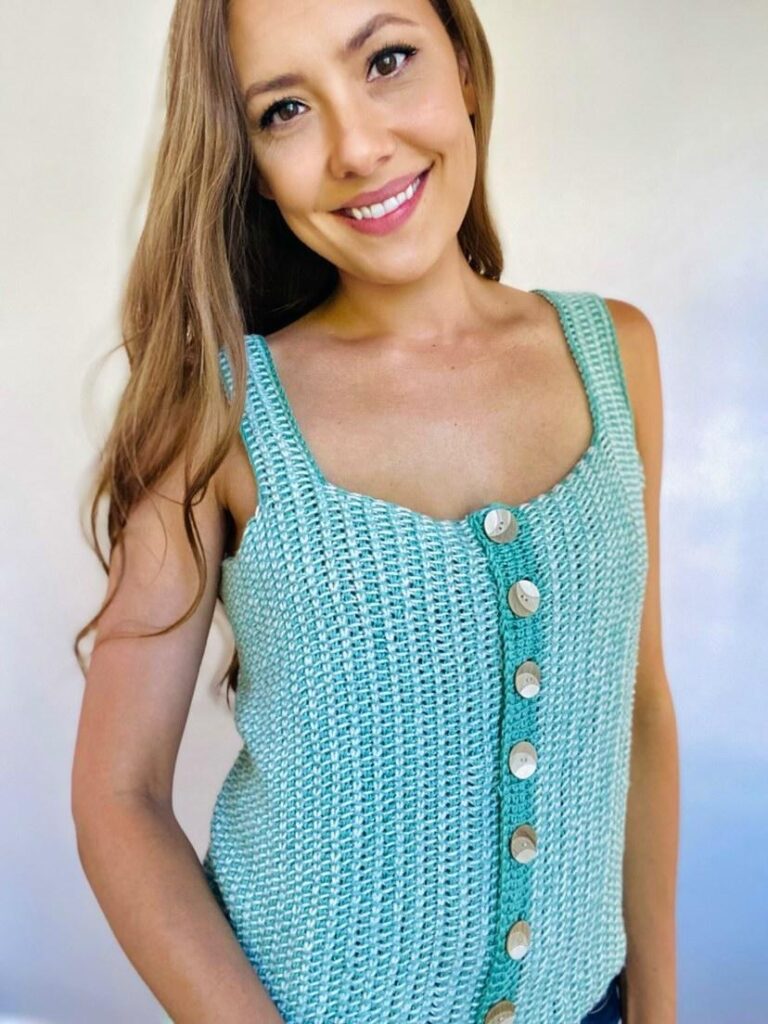
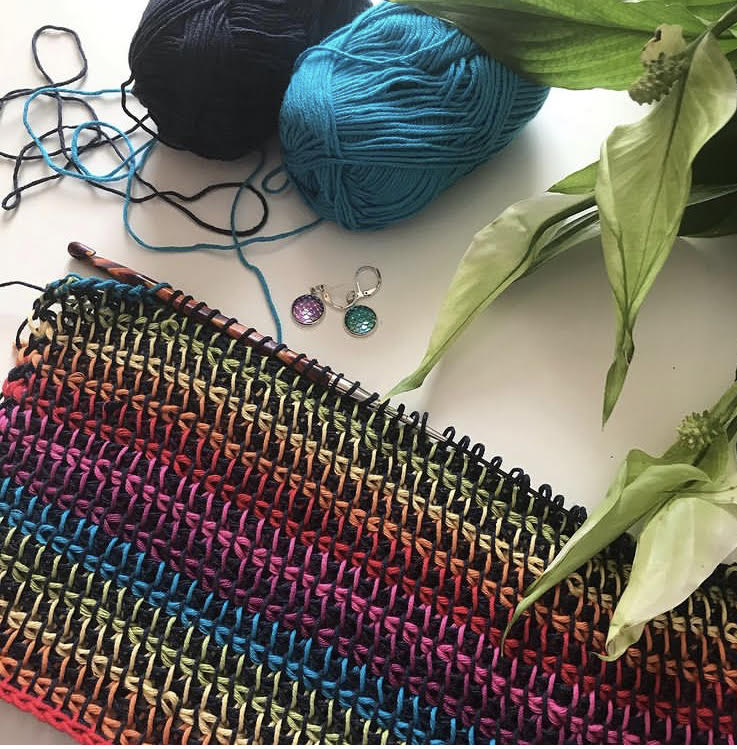
Button Up Summer Top Tunisian Crochet Pattern
Items needed:
Garnstudio Drops Cotton Merino, Merino Superwash Wool (52%), Cotton (48%), 50 g = approx 110 m, 8 ply / DK / worsted (or any other yarn with which you meet gauge)
In 01 Naturel (MC) and 24 Türkis (CC)
Yardage:
MC: 300, 350, 380, 400, 430, 480, 550, 620 yards
CC: 280, 270, 330, 360, 400, 440, 500, 540 yards
6.5mm (US K/10.5) Tunisian hook with a 20” cord.
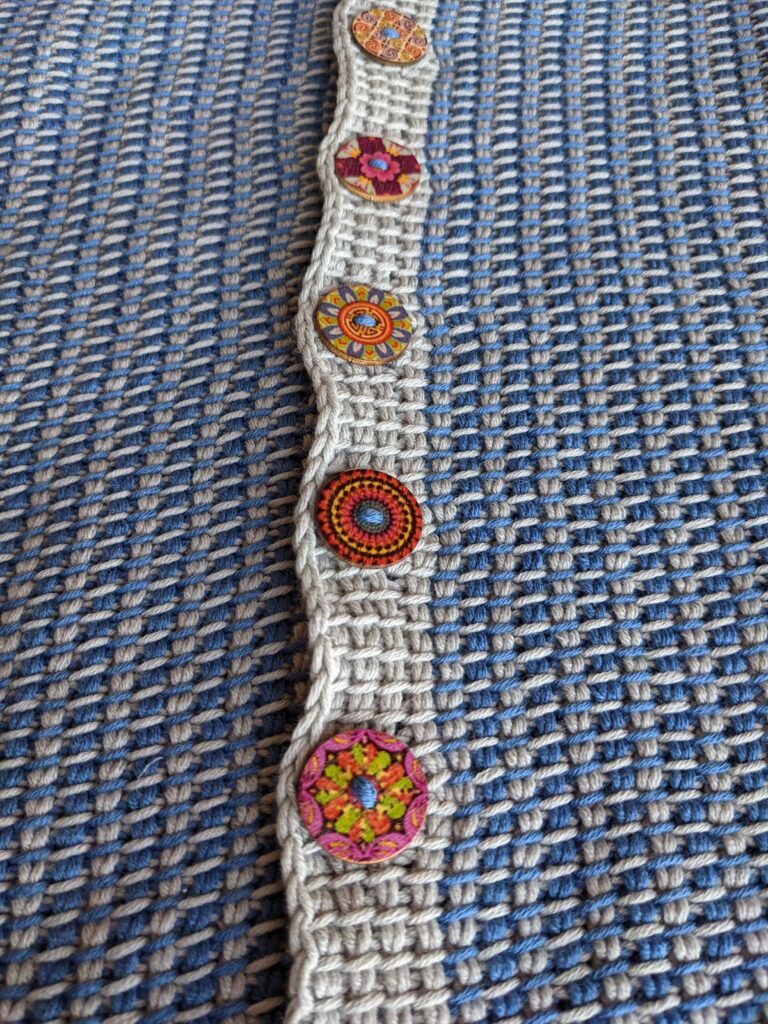
1″ buttons (8x)
Darning needle
Scissors
Removable stitch markers (8x)
Yarn substitutions:
Schachenmayr Catania
King Cole Cottonsoft
Alize Baby Best
Cascade Ultra Pima Cotton
Cascade Yarns, Anchor Bay
Cascade Yarns Ultra Pima
Loops and Threads Joy DK
Abbreviations:
Ch – chain
St(s) – stitch(es)
FwdP – Forward Pass
RetP – Return Pass
MC – Main Colour
CC – Contrast Colour
Tss – Tunisian simple stitch
PM – Place Marker
Tbo – Tunisian bind off
Slst – slip stitch
RS – Right side
WS – Wrong side
Notes:
This top is constructed side to side, the only seaming is at the ends of the straps to the back. The top has 0 to +2″ of ease, depending on your bust size. The pattern is made completely in Tunisian Simple Stitch. The loop on your hook at the beginning of the FwdP counts as a stitch and the edge stitch counts as a stitch. It can help to mark the first stitch (not the loop on hook) and the edge stitch of the row; these are the places the st(s) can easily be overlooked, resulting in a loss of stitches.
The pattern is written as follows, 1, 2, 3, 4, 5, 6, 7, 8. All st counts will be in the corresponding colour.
Pattern is written in US terms and Imperial measurements.
Gauge:
To meet gauge is essential for the correct fit of the piece. After blocking the gauge should be:
16 st x 14 rows = 4” x 4” (10 cm x 10 cm) square in Tunisian Simple Stitch, using the 6.5mm (US K/10.5) Tunisian hook for the FwdP or any other hook size to meet gauge.
Sizing:
31 – 34”, 35 – 38”, 39 – 42”, 43 – 46”, 47 – 50”, 51 – 54”, 55 – 58”, 59 – 62”
Special techniques:
Tunisian simple stitch: In this garment we use the Tunisian simple stitch (Tss). To make this stitch, insert the hook under the front vertical bar of the stitch, pull up a loop and leave this on your hook.
Edge stitch: At the end of the FwdP, the last stitch is called the Edge Stitch. There are several methods to make an Edge stitch, I prefer an Edge stitch where a loop is picked up after inserting the hook under the two vertical bars on the side of the work. This creates a more stable edge.
https://www.instagram.com/reel/COvFVIEJEVO/
My friend Deepsha from @yarnsandcoffee made this reel to illustrate a clean colour change edge in this pattern.
Tension/side consistency: to maintain tension is (in my opinion) a matter of practice. On the FwdP I like to keep the loops that I pick up on my hook, tightly on my hook. I think this ensures consistency between them. On the RetP I like to hold the fabric where my hook is.
To keep the left (bottom) and right (top) side of the top consistent, make sure the first and last loop are similar in size.
This video shows how to maintain tension (from 4:40)
This video shows how to keep both sides consistent (from 13:52).
Button holes: To make button holes in the FwdP, we will (1) pull up a loop in the next st (2) pull through the first loop on the hook (3) repeat from (1) once. Now you have a hole, that consists of 2 stitches. Continue with the FwdP in Tss.
On the RetP, when you reach the button holes, ch 2. Continue with the RetP as usual.
This video shows you how to make a 4 stitch button hole in Tss. However, in this garment, we only make a 2 stitch button hole! Tunisian bind off: Here you make a Tss. Instead of adding a loop on your hook, you slst it through the loop already on your hook (1 loop will remain on your hook).
(first described bind off):
Pattern:
Body Front (1)
Using the 6.5mm Tunisian hook with cable.
Row 1: with CC, ch 64, 64, 72, 72, 72, 76, 76, 76, skip the first ch, Tss in the back bump of the remaining ch.
Change to MC, RetP (64, 64, 72, 72, 72, 76, 76, 76 st).
Row 2: in MC, Tss 62 (62, 70, 70, 70, 74, 74, 74), edge stitch.
Change to CC, RetP (64, 64, 72, 72, 72, 76, 76, 76 st).
Row 3: in CC, Tss 62 (62, 70, 70, 70, 74, 74, 74), edge stitch.
Change to MC, RetP (64, 64, 72, 72, 72, 76, 76, 76 st).
Row 4 – 15 (15, 17, 17, 17, 17, 19, 19): repeat Rows 2 and 3.
Strap (1)
Row 16 (16, 18, 18, 18, 20, 20, 20): in MC, ch 48 (48, 60, 60, 60, 72, 72, 72), skip the first ch, Tss in the back bump of the ch, then in the Tss of the previous row 110 (110, 130, 130, 130, 146, 146, 146), edge stitch.
Change to CC, RetP (112, 112, 132, 132, 132, 148, 148, 148 st).
Rows 17 – 21 (17 – 21, 19 – 23, 19 – 23, 19 – 23, 21 – 27, 21 – 27, 21 – 27): Alternate Rows A/B, end with a Row A.
Row A: in CC, Tss 110 (110, 130, 130, 130, 146, 146, 146), edge stitch.
Change to MC, RetP (112, 112, 132, 132, 132, 148, 148, 148 st)
Row B: in MC, Tss 110 (110, 130, 130, 130, 146, 146, 146), edge stitch.
Change to CC, RetP (112, 112, 132, 132, 132, 148, 148, 148 st).
Row 22 (22, 24, 24, 24, 28, 28, 28): in MC, Tbo 48 (48, 60, 60, 60, 72, 72, 72), Tss in remaining 62 (62, 70, 70, 70, 74, 74, 74) st, edge stitch.
Change to CC, RetP (64, 64, 72, 72, 72, 76, 76, 76 st).
Body Back
Rows 23-105 (23 – 115, 25 – 123, 25 – 137, 25 – 149, 29 – 159, 29 – 167, 29 – 187): Alternate Rows C/D, end with a Row C.
Row C: in CC, Tss 62 (62, 70, 70, 70, 74, 74, 74), edge stitch.
Change to MC, RetP (64, 64, 72, 72, 72, 76, 76, 76 st).
Row D: in MC, Tss 62 (62, 70, 70, 70, 74, 74, 74), edge stitch.
Change to CC, RetP (64, 64, 72, 72, 72, 76, 76, 76 st).
PM in the first st of rows:
Size 1: 42, 48, 76, 82;
Size 2: 48, 54, 82, 88;
Size 3: 50, 56, 88, 94;
Size 4: 58, 64, 94, 100;
Size 5: 64, 70, 102, 108;
Size 6: 68, 76, 108, 114;
Size 7: 72, 78, 148, 154;
Size 8: 82, 88, 122, 128.
These marked rows are where we will attach the straps on the back.
Strap (2)
Row 106 (116, 124, 138, 150, 160, 168, 188): in MC, ch 48 (48, 60, 60, 60, 72, 72, 72), skip the first ch, Tss 110 (110, 130, 130, 130, 146, 146, 146), edge stitch.
Change to CC, RetP (112, 112, 132, 132, 132, 148, 148, 148 st)
Rows 107 – 111 (117 – 121, 125 – 129, 139 – 143, 151 – 155, 161 – 167, 169 – 175, 189 – 195): Alternate Rows A/B, end with a Row A.
Row A: in CC, Tss 110 (110, 130, 130, 130, 146, 146, 146), edge stitch.
Change to MC, RetP (112, 112, 132, 132, 132, 148, 148, 148 st).
Row B: in MC, Tss 110 (110, 130, 130, 130, 146, 146, 146), edge stitch.
Change to CC, RetP (112, 112, 132, 132, 132, 148, 148, 148 st).
Row 112 (122, 130, 144, 156, 168, 176, 196): in MC, Tbo 48 (48, 60, 60, 60, 72, 72, 72). Tss in remaining 62 (62, 70, 70, 70, 74, 74, 74) st, edge stitch.
Change to CC, RetP (64, 64, 72, 72, 72, 76, 76, 76 st).
Body Front (2)
Rows 113 – 119 (123 – 133, 131 – 141, 145 – 155, 157 – 169, 169 – 181, 177 – 189, 197 – 209): Alternate Rows C/D, end with a Row C.
Row C: in CC, Tss 62 (62, 70, 70, 70, 74, 74, 74), edge stitch.
Change to MC, RetP (64, 64, 72, 72, 72, 76, 76, 76 st).
Row D: in MC, Tss 62 (62, 70, 70, 70, 74, 74, 74), edge stitch.
Change to CC, RetP (64, 64, 72, 72, 72, 76, 76, 76 st).
End with a Row C.
Lapel
The lapel uses only MC and therefore we can fasten off CC.
Row(s) 120 (134, 142, 156, 170, 182 – 183, 190 – 191, 210 – 211):
in MC, Tss 64 (64, 72, 72, 72, 76, 76, 76), edge stitch.
RetP (64, 64, 72, 72, 72, 76, 76, 76 st).
Buttonhole Row 121 (135, 143, 157, 171, 184, 192, 212): Tss 2 (2, 3, 3, 3, 5, 5, 5), [button hole], *Tss 6 (6, 7, 7, 7, 7, 7, 7), [button hole]* repeat from * 6 more times, Tss in remaining st(s), edge stitch.
RetP: chain 2 for each button hole (64, 64, 72, 72, 72, 76, 76, 76 st).
Rows: 122 – 123 (136 – 137, 144 – 145, 158 – 159, 172 – 173, 185 – 187, 193 – 195, 213 – 215):
in MC, Tss (in the back loop of the chain where the button holes were made) 64 (64, 72, 72, 72, 76, 76, 76), edge stitch.
RetP (64, 64, 72, 72, 72, 76, 76, 76 st).
End with the Tbo. Fasten off MC.
Buttons
Laying the garment on a flat surface, fold the top closed, allowing the lapel to overlap the front section. Mark between rows 2 and 3 of the front section where the button holes are (I used stitch markers for this bit). Sew on buttons between row 2 and 3. I used the CC to sew on the buttons.
Finishing
With the back of the garment facing you, line up the ends of the straps to the stitch markers on the back of your top. Ensuring there are no twists in the strap, sew the straps to the WS of the tops. Sew along the bottom edge and the sides for additional support. You can adjust the height of the top by sewing in the straps lower on the top.
Weave in all ends. Block according to fibre.
You are finished!! I hope you enjoyed crocheting this top! Share your work with Roeska!
Instagram: @handmadebyroeska
If you enjoyed this pattern, check out my ever growing list of Free Crochet Patterns!
Pin it!