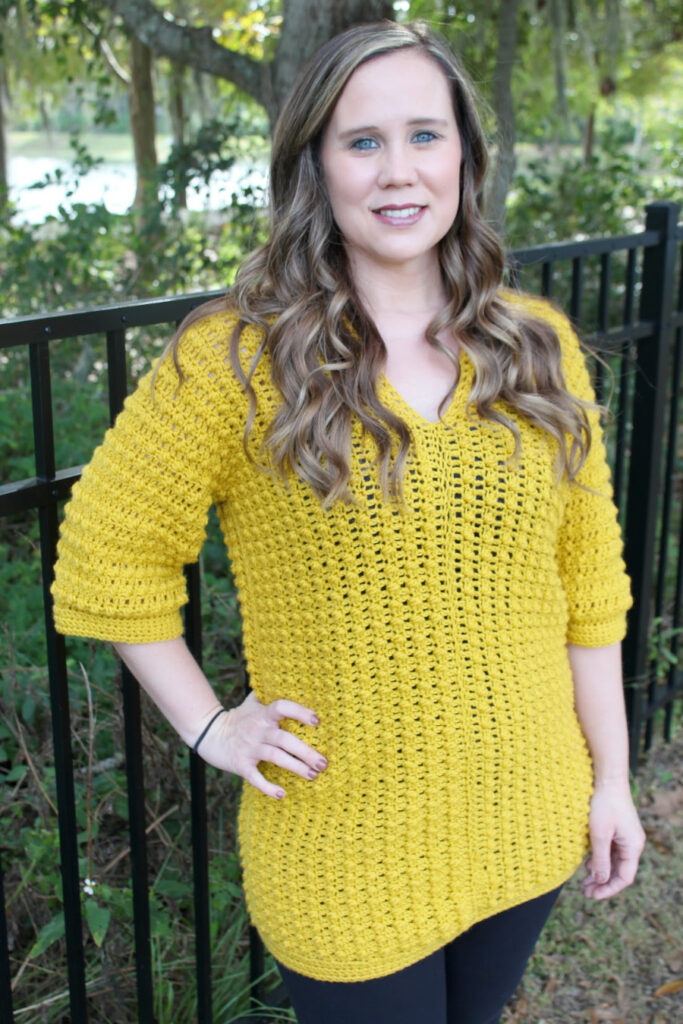
Imagine this. You’ve chosen a crochet garment pattern that you can’t wait to make. You’ve taken all of the necessary measurements and you’re ready to choose a size. But when you look at the size chart, your measurements fall into more than one size. Don’t be discouraged! This is fixable and I’m going to tell you how.

In the real world, human bodies come in all shapes and sizes, and often do not fit neatly into the size chart. That’s why I want to share some easy ways to adjust your crochet garment pattern size. We’ll look at five areas that commonly need adjusting: width, length, neckline, armholes, and sleeves. For each area, I’ll share the easiest way to adjust for each workup style. So let’s get started.
Adjusting Crochet Pattern Width
I always recommend trying on your garment as you’re crocheting it to check for fit. So let’s say you’re making a top, but when you try it on, you realize that a certain part of the top is a little tight. Maybe you could use a little extra room in the bust, waist, or hips. You can fix this issue by adjusting the width of the garment.
Top Down or Bottom Up
The best way to slightly adjust your width is to go up or down a hook size. If you’re truly in between sizes, I would recommend you make the larger size. So if your bust measures as small and your hips measure as medium, make the medium. Then, you can adjust each part of the garment as necessary.
If the garment is too small in one area, increase your hook size when you’re working that part. This will loosen up your stitches and give you more room. On the other hand, if the garment is too big, decrease your hook size to tighten your tension and give you a better fit.
Side by Side
Usually, for a side by side garment, you’ll be making two panels, working in long rows. An easy way to adjust the width of a side by side garment is to add more rows to the panel to make it wider.
Rectangular
For a garment made in the rectangular workup style, you’ll need to add more stitches to make it wider. That’s where it could get a little tricky. For the stitch pattern to come out right, you will need to pay attention to the stitch multiple. So if it’s a multiple of four, make sure the number of stitches you add is a multiple of four—for example, four, eight, or 12 stitches.
For a rectangular or side by side garment, you could also try to go up a hook size and see if that adds the width that you need. However, this may also add more length. Sometimes, you just have to play with it and see what works.
How to Adjust the Length of a Crochet Garment Pattern
Length is super easy to adjust. For most (but not all) top down, bottom up, or rectangular crochet garments, you just add or take away rounds or rows. If you need more length, add rounds or rows. If you need less length, subtract rounds or rows.
For side by side, you can adjust the length by adding or subtracting stitches to make a longer or shorter panel.
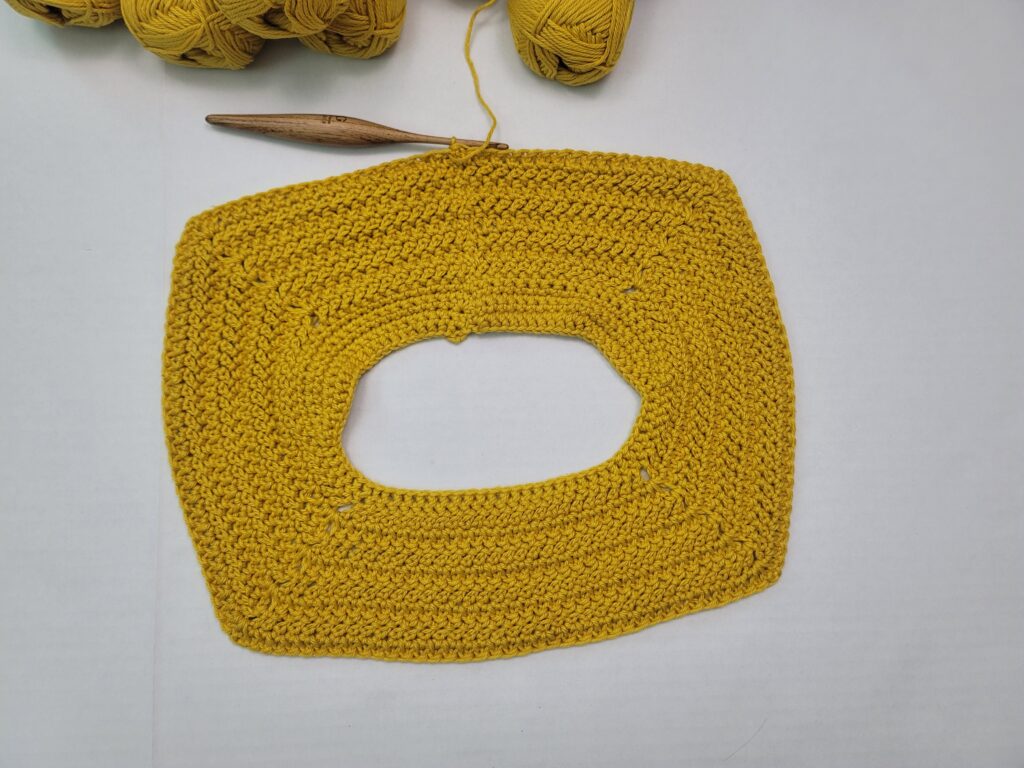
How to Change the Size of Your Neckline
Have you ever started a crochet sweater, only to find that it won’t fit over your head? Or maybe the neckline is too loose and bunches up. There are several ways to adjust your neckline for a better fit.
Top Down
If your garment pattern says to chain a certain amount and join, you could try to use a chainless foundation single crochet stitch instead (or any of the other chainless foundation stitches). Chainless foundation stitches tend to be pretty stretchy, so they may give you enough extra stretch to get the garment over your head.
Alternatively, you could also adjust your tension or hook size for your chain or chainless foundation . Just pay attention to your tension and make sure the neckline turns out the right size.
Bottom Up
For a bottom up garment, you’re usually working in the round until you get to the armholes, where you split into rows to create a front and back panel. Then, you seam the shoulders to create the neckline. So when you’re sewing the panels together, just sew or stitch less or more, depending how much room you want.
If you sew them together and you find you need more room, just take out a few stitches. Or if the neckline is too big, just add a few more stitches on each side.
Rectangular
This works the same way as with a bottom up garment. When you’re seaming together the rectangles at the shoulders, just sew more or less stitches to make the neckline the desired size.

Side by Side
Most of the time, a side by side garment will create a V neck. So if that “V” is coming down too low, you just need to sew more stitches. For example, I really don’t love the big V back. That’s just my personal opinion. So when working a side by side pattern, like the Tuscan Sun Tunic, I usually stitch up as as far up as I can to close up the V in the back. It’s that simple! Just sew as few or as many stitches as you need to achieve the neckline you want.
Armholes
Do you ever find the armholes of your crochet garment cutting into your armpits? Or are they too baggy? There are few different ways you can adjust.
Top Down
Some of my top down garment use a raglan or circular yoke, while with others you’ll chain a certain number of stitches to create armholes. Here are some ways you can adjust the armholes for each style.
Raglan or Circular Yoke
With a raglan or circular yoke, you’ll increase for several rounds, then skip a certain number of stitches and reconnect your yarn on the other side. This basically folds the garment in half and the skipped stitches become your armholes.
If you’re doing a raglan or a circular yoke, and find that the armholes are too tight, add more rounds to the yoke to give it more length before you connect the sides together. To do this, once you’ve completed the last increase round, do some more rounds with that same stitch count. Keep making more rounds until you have enough room in the armholes.
Chaining
If the pattern asks you to chain a certain number, you can chain more loosely or go up hook size for your chain if you need more room. Or if you need less room, go down hook size or chain tighter.
If you’re trying to change the stitch count, you’ve got to make sure you know multiples, how many stitches are in the front and how many are in the back. There’s a little math involved to try to do that. So first I would try to just chain looser or go up a hook size.
You can also do the same thing that you did with the circular yoke or raglan—add more rounds of that same stitch count first, and then try chaining. If you can add more length and bring the armholes down just a tad, it’ll give you more room in the arms.
Bottom Up
If you’re a crocheting a garment from the bottom up, you will work in the round up to the armholes and then work the front and back panels in rows. That makes it easy to adjust your arm holes. If you need more room, just add more rows to your front and back panels before you seam the shoulders. To make the armholes smaller, make fewer rows.
Rectangular
Similar to the neckline, all you need to do to adjust the armhole size is to adjust your seams. Sew however many stitches you need to get the armhole size you want. If you find you need more room, work less stitches or undo some stitches. If you need less room, work more stitches.
Side by Side
Like with rectangular garments, for a side by side garment, it’s just a matter of how many stitches you sew. If you need more room, let out a few stitches and vice versa.
Sleeves
Sleeves work the same way as the body of your garment. If your sleeves are a little too tight, go up a hook size to make need more room. To make them tighter, you can go down a hook size or two. Sometimes you need to go down two hook sizes to really tighten up those stitches. Sometimes one hook size just doesn’t make enough of a difference. So play around with that and figure out what works for you.
Also, if there are decreases in your sleeves and you find they are becoming too tight at the wrist, you can just skip the decreases.
If your sleeves are way too baggy, you can work some decreases. An easy way to do decreases without having to do a bunch of math is to decrease by two every round. So if it’s single crochet, do a two single crochet together (sc2tog) at the start of the round and at the end of the round. That will give you two decreases in each round.
As with any adjustment, you’ll have to do a little experimentation. It may look different, depending on if you’re joining or if you’re working in a continuous round, etc. But it’s another easy adjustment you can try.
So those are my tips for adjusting crochet pattern size. If you have any questions, please leave them in the comments.
Tag me on social media @twobrothersblankets, especially if you’ve tried some of these tips to adjust the size of one of my crochet patterns. Let me know how it worked out!
Pin it for Later!