Gauge is probably the most important part, or at least one of the most important parts, of crocheting a garment. Checking your gauge is key to getting a great fit and knowing several things when it comes to crocheting clothing. And yet, it’s a topic I get asked questions about all the time. It seems to be something that is simple yet kind of hard to understand. So today I’m going to take you along with me as I check gauge from start to finish.

What is Crochet Gauge?
First, let’s talk about what crochet gauge is. Gauge is when you work up a swatch, usually just a rectangle or a square, and you measure the number of stitches within a given measurement. If you’re looking at the “gauge” section of a pattern, it will usually tell you the number of stitches within four inches and the number of rows within four inches. Sometimes, you’ll see other measurements like five inches or two inches.
Ultimately, those stitch counts will tell you how many stitches per inch you have, which will determine the number of stitches and the size of the garment.
If you have too many stitches or too few stitches within that measurement, it’s not going to match with the designer. The sizing is not going to match with the pattern and the number of stitches that it tells you to use. So that is why you want gauge to match.
How you do that is by using the hook size that gives you the correct number of stitches in four inches. You can learn everything you need to know about how to adjust your crochet gauge in this post.
What You Need to Crochet a Gauge Swatch (And Measure It)
- Written crochet pattern
- The yarn you will use to crochet the garment
- The hook size indicated in the pattern, and hooks a size or two larger or smaller if adjustments are needed
- Measuring tape
- Bowl of water at the temperature listed in the care instructions -or- your washing machine
- Blocking mat
- Blocking pins
- Towel
How to Crochet and Measure Your Gauge Swatch
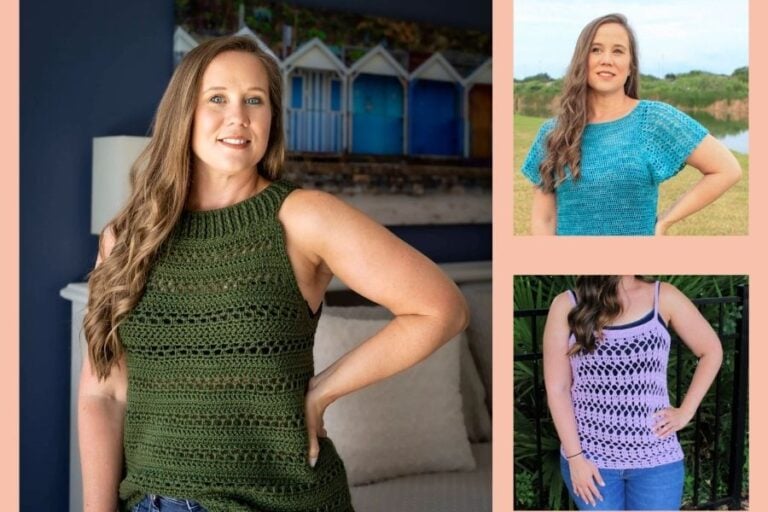
Now I’m going to walk you through the process of crocheting a gauge swatch from start to finish. If you want to watch the process in action, be sure to watch the video tutorial! For this demonstration, I’ll be making a gauge swatch for the Vinnie Sweater. But this process will be the same for pretty much any crochet pattern.
Step 1: Check The Pattern

Before we even get to the “gauge” section, let’s look at “materials.” This section will indicate which yarn and hook the designer used to meet gauge. When you crochet your gauge swatch, start with the hook size listed in the pattern and the yarn you will use.
Then, under “gauge,” note the number of stitches and rows used to measure for gauge. Even though the pattern lists 14 stitches and 14 rows for gauge, I made my swatch 20 stitches by 20 rows.
Adding a few stitches and rows to the number listed in the gauge gives you a large enough swatch to measure different spots, check your tension, etc. If the stitch count in the gauge is less than 20 stitches, I do 20 stitches by 20 rows. If it’s more than 20 stitches, I add 10 stitches.
Step 2: Crochet Your Gauge Swatch

Working in the stitch listed in the “gauge” section, crochet your swatch using the stitch count you determined above (gauge measurement +). As you’re crocheting, count your stitches to make sure you have the right amount.
Step 3: Measure your Swatch


To measure your stitches, start a stitch or two from the edge (the stitches in the center are more even). Lay your measuring tape horizontally, along the row. Count the number of stitches within four inches (or your given measurement).
To measure rows, hold the measuring tape vertically, parallel with the left or right side of the swatch. Ideally, start a row or two from the edge and count the number of rows within your given measurement.
In the sample swatch shown here, I got 16 stitches and 12 rows in four inches, compared to the 14 stitches and 14 rows indicated in the pattern. So I got too many stitches and not enough rows. When you’re trying to make gauge, you should consider width before height. I cover that in more detail in my gauge FAQs post. But essentially, that means I will need to go up a hook size to try to get 14 stitches in four inches.
Step 4: Wash and Dry Your Crochet Gauge Swatch

Look at your yarn label and find the washing instructions. For example, the yarn shown here, Knit Picks Swish, can be machine washed cold and tumble dried on low. Follow these instructions to wash and dry your crochet swatch, just as you would the completed garment.
Washing your gauge swatch may seem odd. But let’s say I wash the swatch and its size changes. After washing, it may end up being 14 stitches or 14 rows like called for in the pattern. In that case, I wouldn’t need to adjust my gauge. You can learn all about why you need to wash your gauge swatch in this post.
You’ll want to wash the swatch, block and measure it for blocked gauge, and then dry it and measure again. This will help you understand how the crochet fabric will behave when you wash the garment.


To wet block your gauge swatch, fill a bowl with water at the temperature listed in the care instructions on your yarn label. Since this yarn is supposed to be washed cold, I used cool water. I allowed the swatch to soak for a few minutes. If you plan to machine wash your garment, I recommend throwing your swatch into the washing machine.
Once your swatch has been through a wash cycle (or is fully saturated with water), remove it from the washing machine (or the bowl) and gently squeeze out any excess water. Do not wring it out. Then, lay the swatch flat on a towel and roll up the towel tightly and squeeze firmly to remove as much water as possible.

Arrange the swatch so that it is as even as possible, with straight edges and square corners. Add a few blocking pins around the edges to hold the swatch in place. Then measure the stitches and rows again as you did in step three.
When I wet blocked the swatch I made in the demo, it went from 16 stitches and 12 rows in four inches to 13 stitches and 13 rows. So you can see that blocking can make a big difference in your stitch and row counts! That’s why it’s important to take this step and get your blocked gauge.
When wet, the swatch is now slightly too big. So I could try a smaller hook size. But wait! I’m planning to machine dry the actual garment. So let’s what it does in the dryer. Again, dry the swatch according to the yarn care instructions (or how you will care for your finished garment). I threw mine in the dryer on low.
Once your swatch is dry, measure it one more time. When I dried my sample swatch, it shrunk back to its original size of 16 stitches and 14 rows in four inches. Again, since the stitch count is more important, I need to go up a hook size in order to make bigger stitches and achieve the correct gauge. Then, I can simply add or subtract rows as I’m working on the garment.
Now it’s time to make a new swatch and start all over again. This time, with a larger hook, my swatch measures exactly the 14 stitches by 14 rows that I need to make gauge! The good news is, since I know the swatch will shrink back to its original size when washed and dried, I don’t need to wash the new one.
Step 5: Bonus Tip
Once you have successfully met gauge, take a picture of the hook size and yarn you are using for the project. This way you will remember when you pick up the project again.
Time to crochet your gauge swatch!
I know this seems like a long and complicated process. But crocheting a gauge swatch is so important if you want to make a one-of-a-kind garment that’s a perfect fit! Bookmark this page for future reference and watch the video below to see how to crochet a gauge swatch, step by step.
Once you’ve achieved gauge and you’re ready to start making your first crochet garment, check out these 5 Tips for Beginners to Crochet Clothes With Confidence. Also, if you want your garment to fit correctly, learn how to measure for crochet garments, here.
If you have any questions that I didn’t answer here, you can always reach out to me, either in the comments or by email. I’d be happy to help you!
Tag me on social media @twobrothersblankets, especially if you make one of my garments or if you use these tips when working a garment pattern!
Pin it for Later!

Free Blanket Pattern + More!
Sign up for our newsletter and receive a Dude Blanket crochet pattern pdf FREE straight to your inbox.