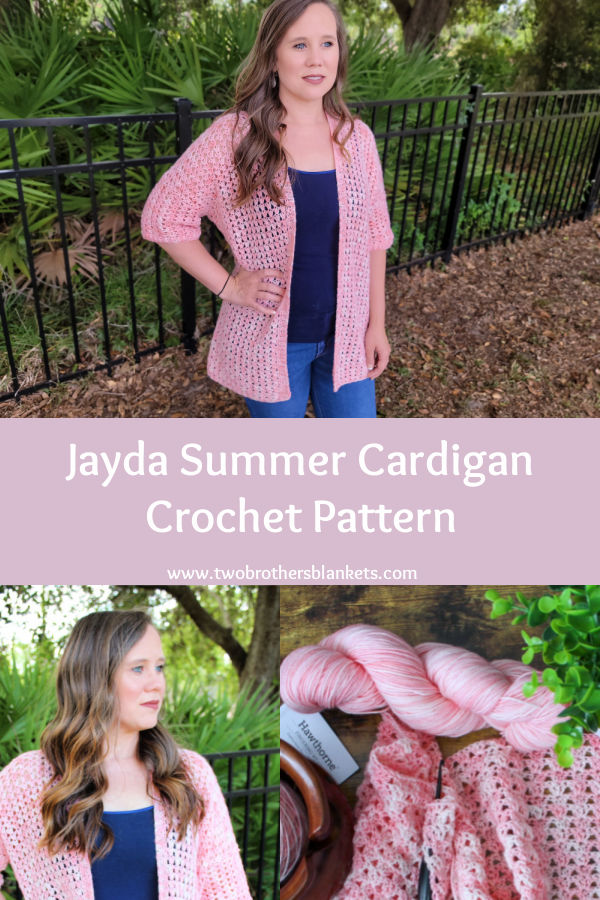
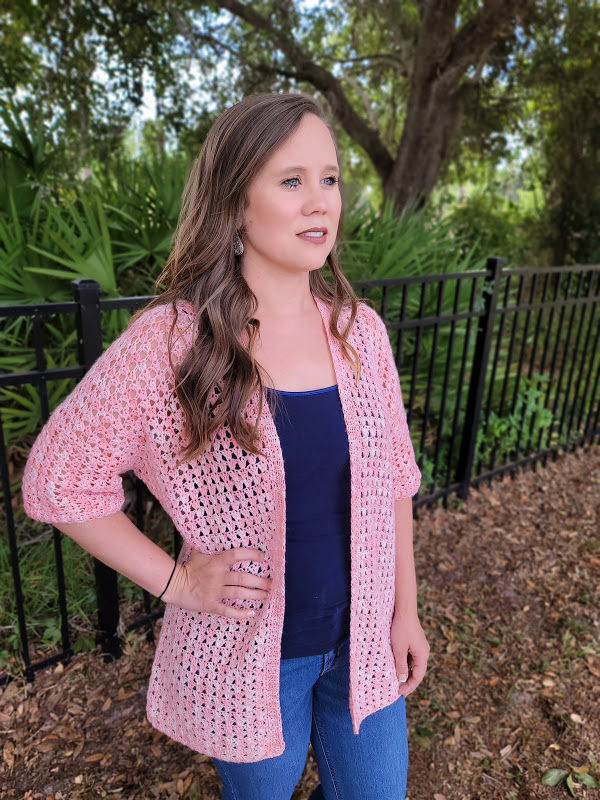
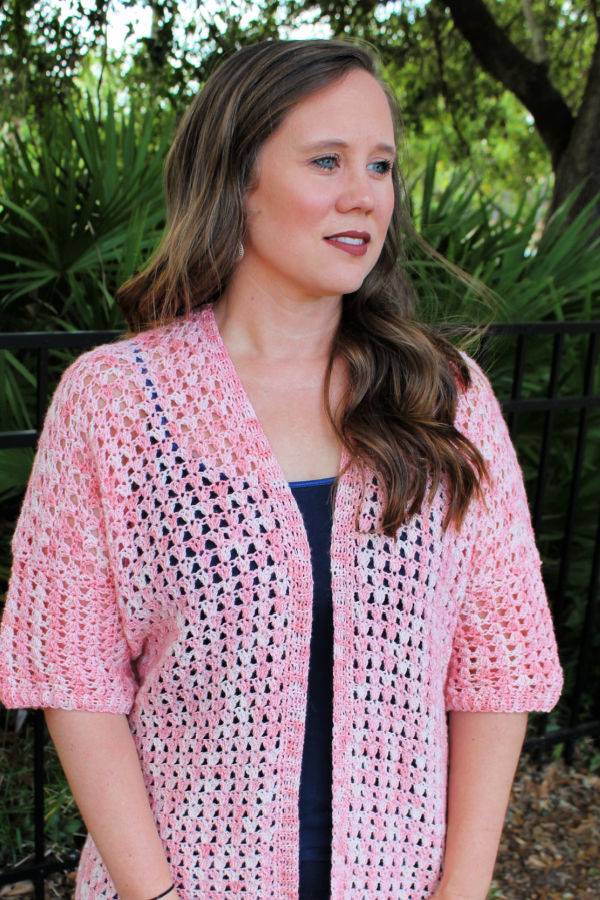
If you’ve been looking for a crochet cardigan that actually looks like something you’d buy in a store, this is it.
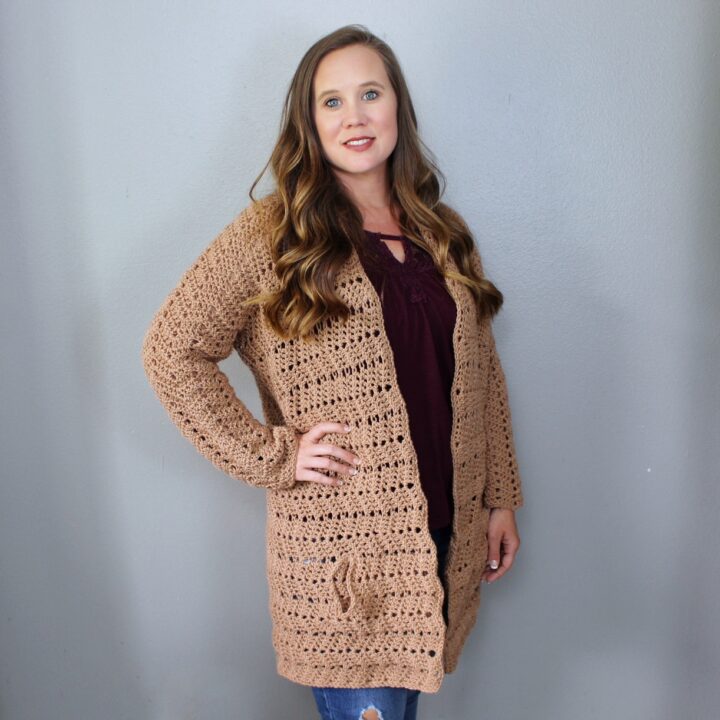
The Jayda Cardigan is lightweight, slightly oversized, and designed to be worn all spring and summer long! If you can double crochet and single crochet, you can absolutely make this.
Special thanks to WeCrochet for providing the yarn for this pattern!
Pattern Inspiration
This is one of those patterns where the yarn came first, which doesn’t happen often. I originally wanted to use this yarn to make a summer top, but then decided to pivot and go for a summer cardigan. It had been a while since I designed a summer crochet cardigan so I decided to go for it!
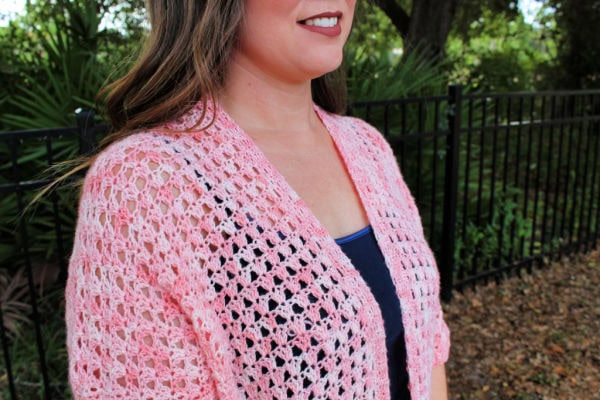
I went with a really simple stitch and let the yarn and the style do the heavy lifting for this design. A summer crochet cardigan looks and fits best when it’s slightly oversized and has a really nice drape!
I created this cardigan with 4″ of positive ease to make it slightly oversized and then blocked it to create even more give and flow! I love how it looks and feels, and it goes with nearly any outfit!
Pattern Details
Your cardigan will be constructed from the bottom up in one big panel to start and then split into 3 panels to create the armholes. You will then seam at the shoulders and work your sleeves and trim.
This project is super customizable and the pattern includes the multiples used to work the width. You can also adjust the length of both the entire cardigan and the sleeves.
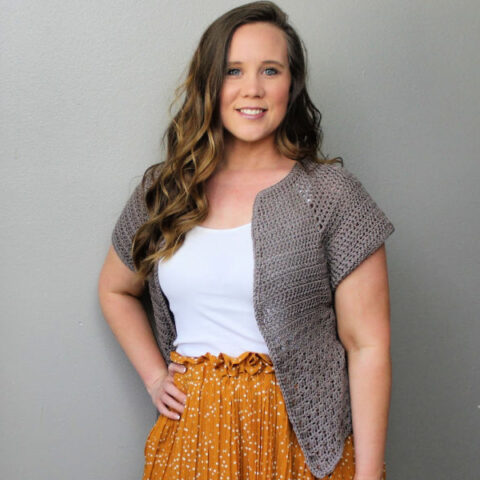
I am 5’3″ with 38″ hips and 36″ bust and I am modeling a size medium in the photos.
The pattern is rated intermediate in pattern difficulty. The stitches used are very simple, just double crochet and single crochet. But the construction is why I labeled this as intermediate. You need to be somewhat familiar with measuring for a garment, ease, and constructing a garment.
I highly recommend my Ultimate Guide to Crocheting Garments email sequence if you want to learn more about crocheting garments!

If you love crocheting as much as I do, or want to learn more, or just want to show off your work, please join our Crochet Garments community over on Facebook! I hope you’ll share your finished crochet cardigan with us!
Frequently Asked Questions
Q? Is this crochet cardigan beginner-friendly?
A. This pattern uses simple stitches like single crochet and double crochet, but the construction makes it best for confident beginners or intermediate crocheters.
Q? What yarn is best for a lightweight crochet cardigan?
A. A fingering weight yarn works best for this pattern because it creates a soft, breathable fabric with great drape.
Q? Can I make this cardigan longer or shorter?
A. Yes! You can easily adjust the length by adding or removing rows in the main body and sleeves.
The yarn
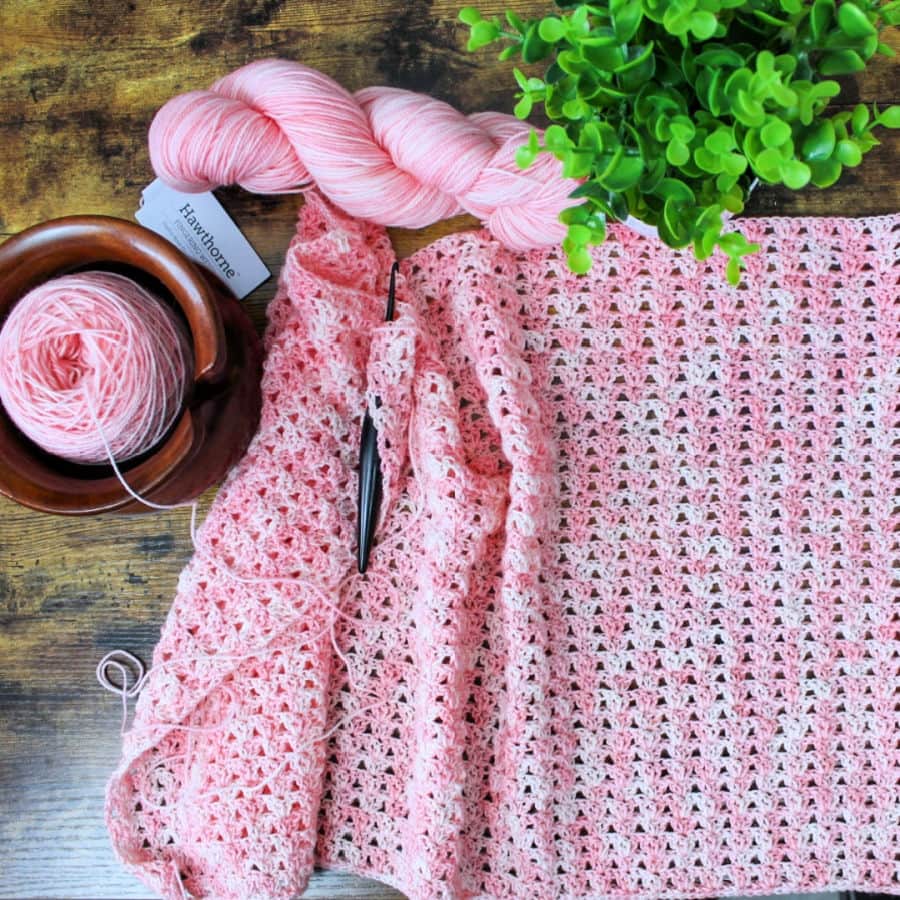
I used WeCrochet’s Hawthorne Fingering Kettle Dye yarn in the colorway Daphne. This beautiful fingering (#1) weight yarn is made of 80% Fine Superwash Highland Wool and 20% Polyamide. It is hand dyed and simply gorgeous!
This yarn comes in a skein of 357 yards and is able to be washed in the machine on the gentle cycle and tumble dried on low heat.
It comes in 21 beautiful colors that would all look great as a Jayda Cardigan!
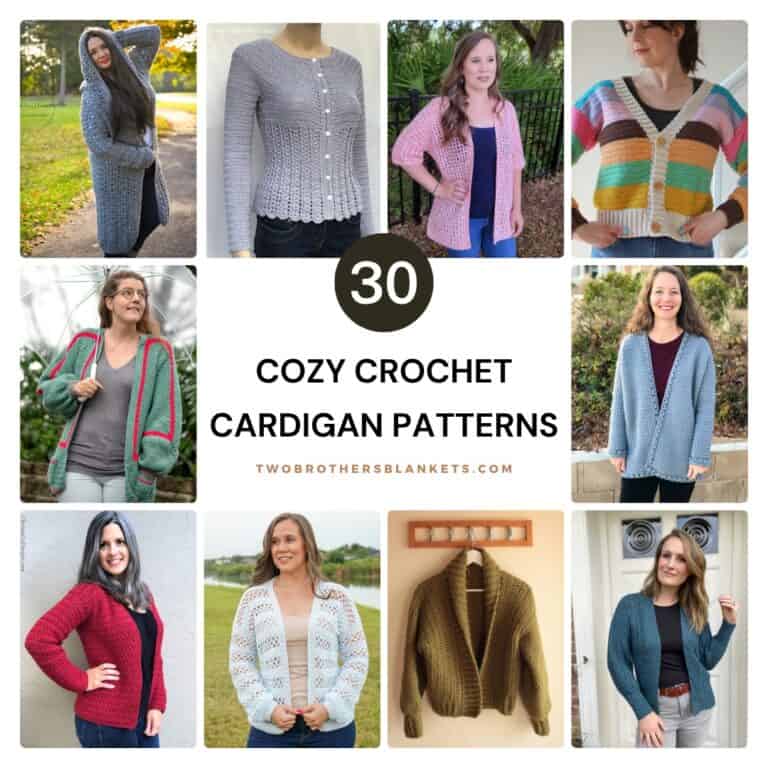
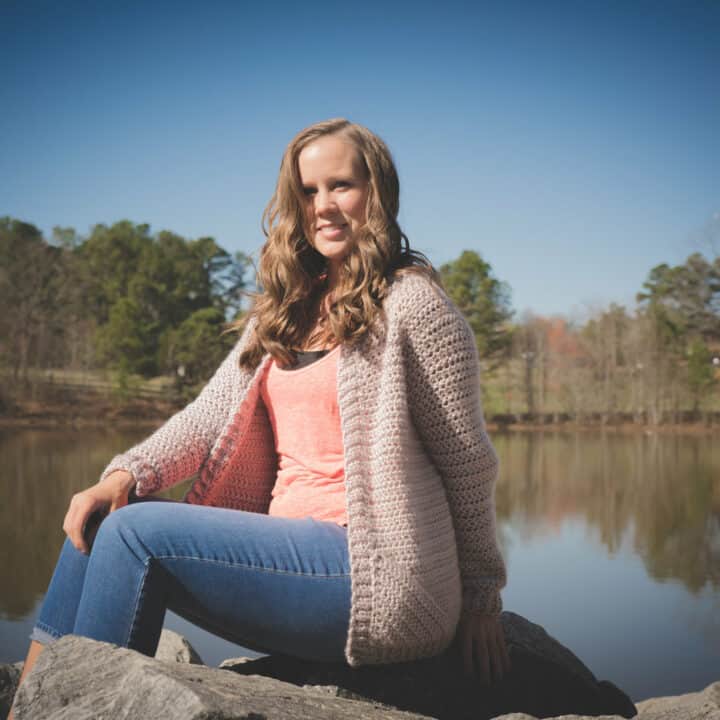
More Cardigan Patterns

Ways to Access the Pattern
- Free on the blog as a blog subscriber: Blog Subscribers can access the full pattern for free here on the blog by logging in or signing up for a Grow Account.
- Upgrade to the ad-free, printable pdf pattern on Ravelry or Etsy. This pdf can be downloaded and/or printed for your convenience.

Jayda Cardigan
Get the PDF Pattern!
Upgrade to the ad-free, printable PDF download on Ravelry or Etsy!
Just want the free version? Scroll down below!
Jayda Cardigan Crochet Pattern
Copyright © 2026 Michelle Ferguson – Two Brothers Blankets
All rights reserved. No part of this pattern may be reproduced, sold, or tampered with, in any form or by any means, without permission from the publisher.
Items produced from these patterns may be sold, but the patterns themselves may not be sold, shared, or altered in any way.
Yarn:
Hawthorne Fingering Kettle Dye (#1)
Colorway: Daphne
80% Fine Superwash Highland Wool, 20% Polyamide (Nylon)
100g/357yards
Hook:
G (4.0mm) crochet hook
Other Materials:
Gauge:
18 sts x 9 rows = 4” – see page 4 for gauge swatch instructions
Pattern Difficulty:
Intermediate
Stitches Needed & Abbreviations:
blo: back loop only
ch(s): chain(s)
dc: double crochet
FSC: chainless foundation single crochet
RS: right side
sc: single crochet
st(s): stitch(es)
*: repeat from
Sizing:
| Size | Bust Circumference | Hip Circumference | Finished Circumference | Yardage |
| XS | 28-30” | 34” | 38” | 1155 |
| S | 32-34” | 36” | 40” | 1250 |
| M | 36-38” | 40” | 44” | 1400 |
| L | 40-42” | 44” | 48” | 1550 |
| XL | 44-46” | 48” | 52” | 1675 |
| 2X | 48-50” | 53” | 57” | 1850 |
| 3X | 52-54” | 55” | 59” | 2000 |
| 4X | 56-58” | 57” | 61” | 2150 |
| 5X | 60-62” | 62” | 66” | 2200 |
Pattern Notes:
Pattern is in US terms.
Starting chain DOES count as first stitch unless stated otherwise within the pattern.
Starting stitch count is worked in a multiple of 3+1. Sleeve counts are a multiple of 3.
Length can be adjusted by adding more rows/rounds to each section of the cardigan.
Pattern is worked in the smallest size with additional sizes in parentheses as follows: XS (S, M, L, XL) and 2X (3X, 4X, 5X). Final stitch count for all sizes is in parentheses at the end of each round/ row.
Scroll past sizes XS-XL instructions for sizes 2X-5X.
Pattern has 4” of positive ease from the hip measurements above. I also recommend blocking the cardigan to give it an even more oversized and flowy look. If you do not want the oversized look do not block the garment.
Access The Pattern
To access exclusive content, click the button to access the Grow.me app and sign in or create an account. You can create an account via your Google or Facebook accounts, or use an email and create a password.
Once you’ve created an account and signed in you will have access to all of the exclusive content on my blog. You’ll just need to sign in. If you forgot your password, simply click the “Forgot My Password” button to retrieve it. I cannot get access to your grow account to retrieve it for you.
Thank you so much for being a blog subscriber and I hope you enjoy the exclusive content!
Pattern:
Gauge Swatch
FSC 22
Row 1: ch 3, turn, skip 2 sts, *3 dc in next st, skip 2 sts*, repeat from * across, 1 dc in last. (20 dc)
Row 2: ch 3, turn, skip 1 dc, *3 dc in next st, skip 2 sts*, repeat from * across to last 5 dc, skip 2 dc, 3 dc in next st, skip 1 dc, 1 dc in last st. (20 dc)
Rows 3-9: Repeat row 2.
The 6 3dc sets within swatch should measure 4” across. All 9 rows should measure 4” high.
XS-XL:
Bottom Panel
FSC 172 (181, 199, 217, 235)
Row 1: ch 3, turn, skip 2 sts, *3 dc in next st, skip 2 sts*, repeat from * across, 1 dc in last st. (170, 179, 197, 215, 233 dc)
Row 2: (RS) ch 3, turn, skip 1 dc, *3 dc in next st, skip 2 dc*, repeat from * across to last 5 dc, skip 2 dc, 3 dc in next st, skip 1 dc, 1 dc in last st. (170, 179, 197, 215, 233 dc)
Row 3-40: repeat round 2. Panel should be approximately 16-17” long, or desired length from armhole down.
Do not fasten off.
Panel 1 (Left panel if right-handed, Right panel if left-handed)
Row 1: ch 3, turn, skip 1 dc, *3 dc in next st, skip 2 dc*, repeat across 12 (13, 14, 16, 17) more times. (40, 43, 46, 52, 55 dc)
Row 2: ch 3 (does not count), turn, skip 1 dc, *3 dc in next, skip 2 dc*, repeat from * across to last, 1 dc in last. (40, 43, 46, 52, 55 dc)
Row 3-14 (16, 16, 18, 18): Repeat rows 1-2.
Fasten off, leaving a long tail for seaming the shoulders.
Panel 2 (Center Panel)
Turn garment and join to 2nd dc in first unworked 3 dc set. (You will be facing the wrong side of your work)
Row 1: ch 3, do NOT turn, 2 dc in same st, *skip 2 dc, 3 dc in next*, repeat across 28 (29, 33, 35, 39) more times. (90, 93, 105, 111, 123 dc)
Row 2: ch 3 (does not count), turn, skip 1, *3 dc in next st, skip 2 dc*, repeat from * across. (90, 93, 105, 111, 123 dc)
Row 3-14 (16, 16, 18, 18): Repeat row 2.
Fasten off.
Panel 3 (Right panel if right-handed, Left panel if left-handed)
Turn garment and join to 2nd dc in first unworked 3 dc set. (You will be facing the wrong side of your work)
Row 1: ch 3, do Not turn, 2 dc in same st, *skip 2 dc, 3 dc in next*, repeat from * across to last st, 1 dc in last st. (40, 43, 46, 52, 55 dc)
Row 2: ch 3, turn, skip 1 dc, *3dc in next st, skip 2 dc*, repeat from * across. (40, 43, 46, 52, 55 dc)
Row 3: ch 3 (does not count), turn, *3 dc in next st, skip 2 dc*, repeat from * across to last st, 1 dc in last st. (40, 43, 46, 52, 55 dc)
Row 3-14 (16, 16, 18, 18): Repeat rows 2-3. (You will end on a repeat of row 2.)
Fasten off, leaving a long tail for seaming the shoulders.
Seaming at the Shoulders
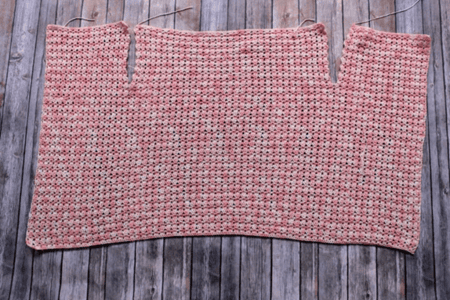
Now using your long tail and a yarn needle, fold over panel 1 and panel 3 and sew the top to panel 2, using the stitches to guide you. You will sew together each stitch of the left and right panels to the back panel. (See photo below.)

Sleeves
Facing RS, join yarn to armpit area of the armhole.
Round 1: ch 1, work 57 (60, 63, 66, 69) sc evenly around the entire armhole, do not join. (57, 60, 63, 66, 69 sc)
Round 2: (Put your stitch marker into the first stitch) 3 dc in 1st sc, skip 2, *3dc in next, skip 2*, repeat around. (57, 60, 63, 66, 69 dc)
Round 3: skip 1 dc, 3 dc in next, *skip 2 dc, 3 dc in next*, repeat from * around, skip last dc. (57, 60, 63, 66, 69 dc)
Rounds 4-10: (or to desired length) repeat round 2.
Do not fasten off. Move on to Sleeve Trim.
Sleeve Trim
Ch 5
1.Sc in 2nd ch from hook and across. (4)
2. Sl st in next 2 sts.
3. Ch 1, turn, sc in blo of each sc. (4)
4. Ch 1, turn, sc in blo of each st across. (4)
Repeat steps 2-4 all the way around the sleeve. Join ends by working a slip stitch into each starting ch and the last row of stitches. Fasten off.
Front Trim
Join yarn to bottom corner of yarn facing RS. You will be working up, around, and down the front edge of the cardigan.
Row 1: ch 1, evenly sc up, around, and down the front edge of the cardigan. Number of stitches does not matter.
Ch 5
1.Sc in 2nd ch from hook and across. (4)
2. Sl st in next 2 chs of neckline.
3. Ch 1, turn, sc in blo of each sc. (4)
4. Ch 1, turn, sc in blo of each st across. (4)
Repeat steps 2-4 all the way around the front of the cardigan. Fasten off.
Weave in all ends.
Now you will block your cardigan. For more information on how to block crochet garments visit my blog post HERE.
2X-5X
Bottom Panel
FSC 262 (271, 280, 298)
Row 1: ch 3, turn, skip 2 sts, *3 dc in next st, skip 2 sts*, repeat from * across, 1 dc in last st. (260, 269, 271, 280, 298 dc)
Row 2: (RS) ch 3, turn, skip 1 dc, *3 dc in next st, skip 2 dc*, repeat from * across to last 5 dc, skip 2 dc, 3 dc in next st, skip 1 dc, 1 dc in last st. (260, 269, 271, 280, 298 dc)
Row 3-40: repeat round 2. Panel should be approximately 17-18” long or desired length from armhole down.
Do not fasten off.
Panel 1 (Left panel if right-handed, Right panel if left-handed)
Row 1: ch 3, turn, skip 1 dc, *3 dc in next st, skip 2 dc*, repeat across 18 (19, 20, 21) more times. (58, 61, 64, 67 dc)
Row 2: ch 3 (does not count), turn, skip 1 dc, *3 dc in next, skip 2 dc*, repeat from * across to last, 1 dc in last. (58, 61, 64, 67 dc)
Row 3-20 (20, 22, 22): Repeat rows 1-2.
Fasten off, leaving a long tail for seaming the shoulders.
Panel 2 (Center Panel)
Turn garment and join to 2nd dc in first unworked 3 dc set. (You will be facing the wrong side of your work)
Row 1: ch 3, do NOT turn, 2 dc in same st, *skip 2 dc, 3 dc in next*, repeat across 47 (48, 49, 53) more times. (144, 147, 150, 162 dc)
Row 2: ch 3 (does not count), turn, skip 1, *3 dc in next st, skip 2 dc*, repeat from * across. (144, 147, 150, 162 dc)
Row 3-20 (20, 22, 22): Repeat row 2.
Fasten off.
Panel 3 (Right panel if right-handed, Left panel if left-handed)
Turn garment and join to 2nd dc in first unworked 3 dc set. (You will be facing the wrong side of your work)
Row 1: ch 3, do Not turn, 2 dc in same st, *skip 2 dc, 3 dc in next*, repeat from * across to last st, 1 dc in last st. (58, 61, 64, 67 dc)
Row 2: ch 3, turn, skip 1 dc, *3dc in next st, skip 2 dc*, repeat from * across. (58, 61, 64, 67 dc)
Row 3: ch 3 (does not count), turn, *3 dc in next st, skip 2 dc*, repeat from * across to last st, 1 dc in last st. (58, 61, 64, 67 dc)
Row 3-20 (20, 22, 22): Repeat rows 2-3. (You will end on a repeat of row 2.)
Fasten off, leaving a long tail for seaming the shoulders.
Seaming at the Shoulders

Now using your long tail and a yarn needle, fold over panel 1 and panel 3 and sew the top to panel 2, using the stitches to guide you. You will sew together each stitch of the left and right panels to the back panel. (See photo below.)

Sleeves
Facing RS, join yarn to armpit area of the armhole.
Round 1: ch 1, work 72 (75, 78, 81) sc evenly around the entire armhole, do not join. (72, 75, 78, 81 sc)
Round 2: (Put your stitch marker into the first stitch) 3 dc in 1st sc, skip 2, *3dc in next, skip 2*, repeat around. (72, 75, 78, 81 dc)
Round 3: skip 1 dc, 3 dc in next, *skip 2 dc, 3 dc in next*, repeat from * around, skip last dc. (72, 75, 78, 81 dc)
Rounds 4-10: (or to desired length) repeat round 2.
Do not fasten off. Move on to Sleeve Trim.
Sleeve Trim
Ch 5
1.Sc in 2nd ch from hook and across. (4)
2. Sl st in next 2 sts.
3. Ch 1, turn, sc in blo of each sc. (4)
4. Ch 1, turn, sc in blo of each st across. (4)
Repeat steps 2-4 all the way around the sleeve. Join ends by working a slip stitch into each starting ch. Fasten off.
Front Trim
Join yarn to bottom corner of yarn facing RS. You will be working up, around, and down the front edge of the cardigan.
Row 1: ch 1, evenly sc up, around, and down the front edge of the cardigan. Number of stitches does not matter.
Ch 5
1.Sc in 2nd ch from hook and across. (4)
2. Sl st in next 2 sts.
3. Ch 1, turn, sc in blo of each sc. (4)
4. Ch 1, turn, sc in blo of each st across. (4)
Repeat steps 2-4 all the way around the front of the cardigan. Join ends by working a slip stitch into each starting ch. Fasten off. See end of sizes XS-XL for blocking information.
Pin It!